
Technical data


9-14 Fabric OS Administrator’s Guide
Publication Number: 53-0000518-09
Viewing and Saving Diagnostic Information
9
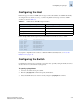
You can specify up to six host IP addresses for storing syslog messages, as shown in this example:
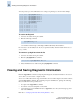
To set the facility level
1. Connect to the switch and log in as admin.
2. Enter the following command:
n is a number from 0 through 7, indicating a UNIX local7 facility. The default is 7.
It is necessary to set the facility level only if you specified a facility other than local7 in the host /etc/
syslog.conf file.
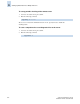
To remove a syslogd host from the list
1. Connect to the switch and log in as admin.
2. Enter the syslogDipRemove command:
3. Verify the IP address was deleted using the syslogDipShow command.
Viewing and Saving Diagnostic Information
Enter the supportShow command to dump important diagnostic and status information to the session
screen, where you can review it or capture its data.
To save a set of files that customer support technicians can use to further diagnose the switch condition,
enter the supportSave command. The command prompts for an FTP server, packages the following
files, and sends them to the specified server:
• the output of the supportShow command
• the contents of any trace dump files on the switch
• system message logs (for SilkWorm directors, supportSave saves the system message logs from
both of the CP blades)
Refer also to “Setting Up Automatic Trace Dump Transfers,” next.
switch:admin> syslogdipadd 10.1.2.1
switch:admin> syslogdipadd 10.1.2.2
switch:admin> syslogdipadd 10.1.2.3
switch:admin> syslogdipadd 10.1.2.4
switch:admin> syslogdipadd 10.1.2.5
switch:admin> syslogdipadd 10.1.2.6
switch:admin> syslogdipshow
syslog.IP.address.1 10.1.2.1
syslog.IP.address.2 10.1.2.2
syslog.IP.address.3 10.1.2.3
syslog.IP.address.4 10.1.2.4
syslog.IP.address.5 10.1.2.5
syslog.IP.address.6 10.1.2.6
syslogdfacility -l n
switch:admin> syslogdipremove 10.1.2.1