
Technical data
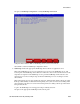


12. Application Console: Verify that the server has been added to the
/usr/openv/netbackup/bp.conf file
cat /usr/openv/netbackup/bp.conf
CLIENT_NAME = 10.240.34.10
SERVER = NB71server
13. Application server iLO: Exit platform configuration utility (platcfg)
14.
Return to calling procedure if applicable.
3.11.10 Create LV and Filesystem for Netbackup Client Software
This procedure will carve out storage for the Netbackup Client to reside on. This is necessary so that
the Netbackup Client does not lead to disk shortage in the /usr/ filesystem.
Prerequisites:
• The volume group that the netbackup logical volume will reside in has been previously determined.
You can determine what space is available in each volume group by running the 'vgs' command
and looking at the 'VFree' column. Ultimately applications should decide what volume group that
the netbackup LV should reside in.
1. Server: Login as root user.
2. Server: Create a storageMgr configuration file that defines the LV to be created.
# echo "lv --mountpoint=/usr/openv --size=2G --name=netbackup_lv --vg=$VG" >
/tmp/nb.lvm
The above example uses the $VG as the volume group. Please replace $VG with the desired volume
group as specified by the application group.
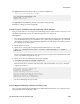
3. Server: Create the LV and filesystem by using storageMgr.
# /usr/TKLC/plat/sbin/storageMgr /tmp/nb.lvm
This will create the LV, format it with a filesystem, and mount it under /usr/openv/. Example
output is shown below:
Called with options: /tmp/nb.lvm
VG vgguests already exists.
Creating lv netbackup_lv.
Volume netbackup_lv will be created.
Success: Volume netbackup_lv was created.
Creating filesystem, this may take a while.
Updating fstab for lv netbackup_lv.
Configuring existing lv netbackup_lv.
The LV for netbackup has been created!
3.11.11 Migrate Netbackup Client to New Filesystem
This procedure will migrate the installed files for Netbackup Client from the /usr/ filesystem into a
filesystem dedicated to Netbackup Client.
295
909-2209-001 Revision G, February 2014
3 Procedures