
Installation Guide Owner's manual
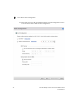
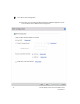


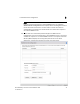
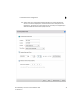
Table Of Contents
- Introduction
- Hardware Installation
- Installation instructions
- Precautions
- Access Point placement
- Integrated antenna model wall mount instructions
- Integrated antenna model suspended ceiling t-bar mount
- External antenna model wall mount instructions
- External antenna model suspended ceiling t-bar mount
- External antenna suspended ceiling tile (Plenum) mount
- Mobility 1220 Access Point external antenna model antenna options
- LED indicators
- Initial Access Point Configuration
- Specifications
- Regulatory Information
- Country Approvals
- Health and Safety Recommendations
- Health and Safety Recommendations
- RF Exposure Guidelines
- Wireless Devices - Countries
- Radio Frequency Interference Requirements—FCC
- Radio Frequency Interference Requirements – Canada
- CE Marking and European Economic Area (EEA)
- Statement of Compliance
- Waste Electrical and Electronic Equipment (WEEE)
- TURKISH WEEE Statement of Compliance
- Mobility 1220 China ROHS Compliance
Initial Access Point Configuration
3
Brocade Mobility 1220 Access Point Installation Guide 39
53-1002916-01
17. Set the following DHCP and Static IP Address/Subnet information for the WAN
interface:
•
Use DHCP - Select the checkbox to enable an automatic network address
configuration using the Access Point’s DHCP server.
•
Static IP Address/Subnet - Enter an IP Address/Subnet and gateway for the
Access Point's WAN interface. These are required fields
•
The port connected to the WAN - Select the port used as the physical
Access Point connection to the external network. The ports available differ
depending on the Access Point model deployed. Access Point models with
a single port have this option fixed.
•
Enable NAT on the WAN Interface - Select the checkbox to allow traffic to
pass between the Access Point's WAN and LAN interfaces.
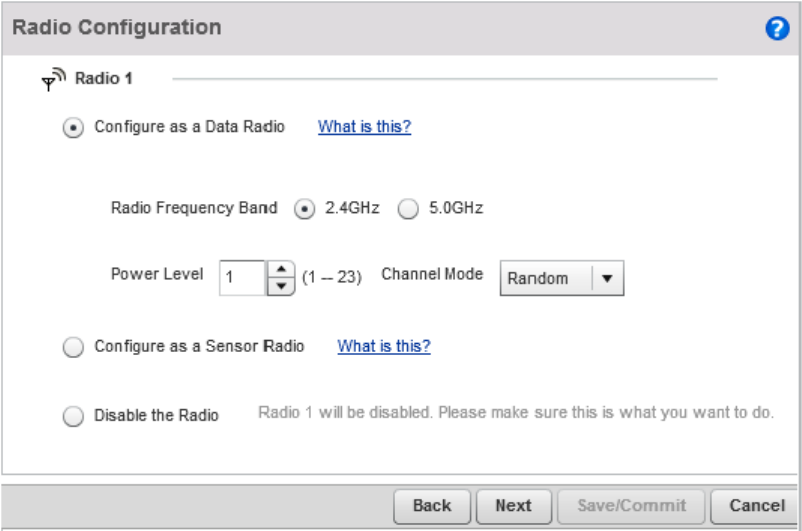
18. Select Next. The Initial AP Setup Wizard displays the Radio Configuration
screen to define support for the 2.4GHz radio band, 5GHz radio band or to set
the radio's functionality as a dedicated sensor.