
User Manual v12.3.0 Owner manual

Brocade Network Advisor SAN + IP User Manual 903
53-1003155-01
Layer 3 access control list policy
22
a. Select the rule you want to edit in the ACL Entries list and click the left arrow button.
The rule displays in the ACL Entry area.
b. Complete step 5 through step 12 in “Creating an extended L3 ACL configuration” on
page 899.
The updated ACL rule displays in the ACL Entries list. To edit additional rules for the same
ACL, repeat step 4.
5. To add a new rule, complete step 5 through step 12 in “Creating an extended L3 ACL
configuration” on page 899.
The updated ACL rule displays in the ACL Entries list. To update additional rules for the same
ACL, repeat step 5.
6. To delete an existing rule, select the rule you want to delete in the ACL Entries list and click the
left arrow button.
7. Use the Up and Down arrow buttons to rearrange the ACLs in the ACL Entries list.
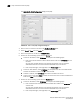
8. View the advanced settings for an ACL by selected the ACL in the ACL Entries list and clicking
View.
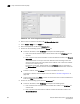
The L3 ACL Advanced Settings dialog box displays.
9. Click Close on the L3 ACL Advanced Settings dialog box to close.
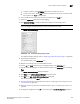
10. Click OK on the Duplicate - L3 ACL Configuration dialog box.
The new ACL displays in the ACLs list.
11. To set the configuration type and operations, refer to “Configuring the ACL configuration type
and operations” on page 911.
12. (Ethernet routers only) To set the hit statistics duration, refer to “Configuring hit statistics” on
page 911.
13. To deploy the configuration, click OK on the Device_Name - L3 ACL Configuration dialog box.
The Deploy to Products - L3 ACL dialog box displays. To deploy the configuration, refer to
“Security configuration deployment” on page 943.
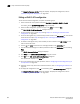
Creating an IPv6 L3 ACL configuration
To create an IPv6 L3 ACL configuration, complete the following steps.
1. Select an Ethernet router product and select Configure > Security > L3 ACL > Product.
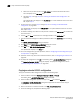
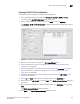
The Device_Name - L3 ACL Configuration dialog box displays.
2. Select New IPv6 from the Add list.