
User Manual v12.3.0 User Manual


Brocade Network Advisor SAN User Manual 659
53-1003154-01
Layer 2 access control list management
17
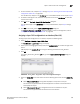
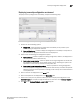
5. To add a new ACL rule, complete step 4 through step 12 in “Creating an extended Layer 2 ACL
configuration (Fabric OS)” on page 656.
The new ACL entry displays in the ACL Entries list. To add additional ACL entries, repeat step 5.
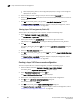
6. To delete an existing ACL rule, select the rule you want to edit in the ACL Entries list and click
the left arrow button.
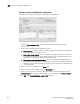
7. Cl ick OK on the Duplicate - Layer 2 ACL Configuration dialog box.
The new ACL displays in the ACL Entries list. To copy additional ACLs, repeat step 2 through
step 7.
8. Click OK on the Device_Name - Layer 2 ACL Configuration dialog box.
The Deploy to Products - Layer 2 ACL dialog box displays. To save the configuration, refer to
“Saving a security configuration deployment” on page 664
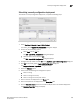
Assigning a Layer 2 ACL configuration to an interface (Fabric OS)
To assign Layer 2 ACL configuration to a interface, complete the following steps.
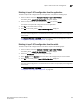
1. Select Configure > Security > Layer 2 ACL > Port.
The Port Selection - Layer 2 ACL dialog box displays.
2. Select a port or Link Aggregation Group (LAG) in the Available Ports list and click the right arrow
button.
LAGs display in the Available Ports list using the following convention: Po LAG_Number.
3. Click OK.
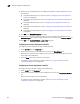
The Device_Name - Port_Number/LAG LAG_Number- Layer 2 ACL Configuration dialog box
displays.
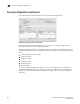
FIGURE 255
Device_Name
-
Port_Number
- Layer 2 ACL Configuration dialog box
4. Select the Assign ACL option and choose one of the following options from the first Assign ACL
list:
• Select ACLs on this Product to assign ACLs deployed on the product to the port.
The second list is populated with the ACLs deployed on the switch or associated with a
save deployment object.
• Select ACLs bound to this port to assign ACLs bound to the interface to the port.
The second list is populated with the ACLs bound to the interface.