
(Supporting ADX v03.1.00) Owner's manual
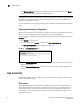
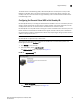

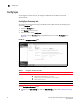
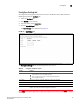
Table Of Contents
- Contents
- Preface
- Introduction to the Brocade Virtual ADX Web Interface
- Navigating the Web Interface
- Navigating the Dashboard
- Configuration Overview
- System Settings
- Network Settings
- Traffic Settings
- GSLB Settings
- Security Settings
- Monitoring Overview
- Viewing System Information
- Viewing Network Status
- Viewing Traffic Statistics
- Viewing Security Statistics
- Maintenance Overview
- Managing Software Images
- Restarting the System
- License Management
- Packet Capture
- Accessing the CLI
- Retrieving System Information for Technical Support
- Troubleshooting
- Config Template XML Schema
- Managing Config Templates through the CLI
22 Brocade Virtual ADX Graphical User Interface Guide
53-1003242-01
High Availability
5
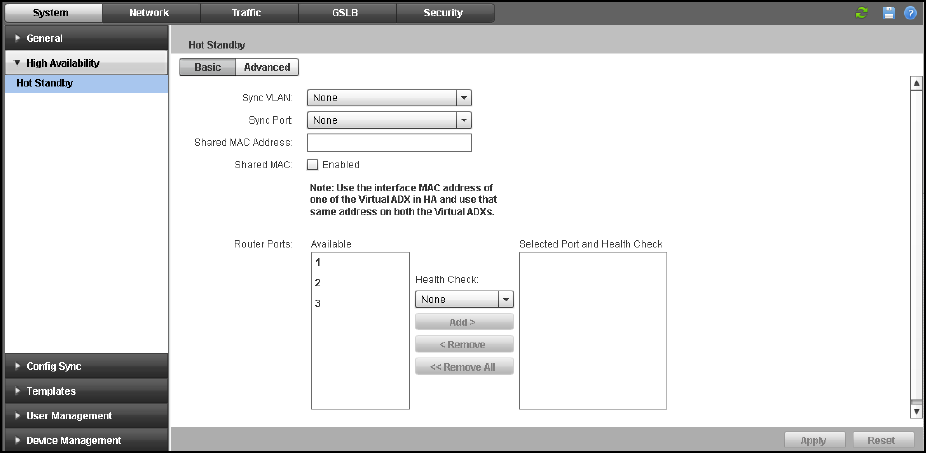
FIGURE 13 Configuring hot standby
4. Under the Basic tab, provide the following information:
• Sync VLAN: Select a port-specific VLAN from the list.
• Sync Port: Select the hot standby port from the list. Placing the hot standby port in its own
VLAN prevents unnecessary traffic from going over the directly connected backup link.
• Shared MAC Address: Specify the MAC address of one of the Brocade Virtual ADXs. You
must use a MAC address of the Brocade Virtual ADXs, not the MAC address of the backup
ports.
• Shared MAC: Select the Enabled check box to enable the shared MAC address. When you
enable shared MAC addresses, make sure that the Brocade Virtual ADX is in promiscuous
mode.
• Router Ports: Select the number of router ports from the Available list and click Add to
specify the ports for the active device. Click Remove to remove an added router port. Both
the Brocade Virtual ADXs in the hot standby must use the same router-ports numbers.
• Health Check: Select the configured health check for the ports.
5. To configure the advanced parameters for the hot standby configuration, click the Advance tab.
The Advance tab is displayed. See Figure 14.