
(Supporting ADX v03.1.00) Owner's manual
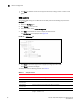
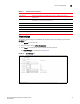
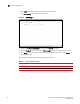
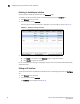
Table Of Contents
- Contents
- Preface
- Introduction to the Brocade Virtual ADX Web Interface
- Navigating the Web Interface
- Navigating the Dashboard
- Configuration Overview
- System Settings
- Network Settings
- Traffic Settings
- GSLB Settings
- Security Settings
- Monitoring Overview
- Viewing System Information
- Viewing Network Status
- Viewing Traffic Statistics
- Viewing Security Statistics
- Maintenance Overview
- Managing Software Images
- Restarting the System
- License Management
- Packet Capture
- Accessing the CLI
- Retrieving System Information for Technical Support
- Troubleshooting
- Config Template XML Schema
- Managing Config Templates through the CLI
Brocade Virtual ADX Graphical User Interface Guide 57
53-1003242-01
Configuring network interfaces and IP addresses
6
3. Select an interface from the Summary tab and click Edit.
The IP Interface tab is displayed. See Figure 44.
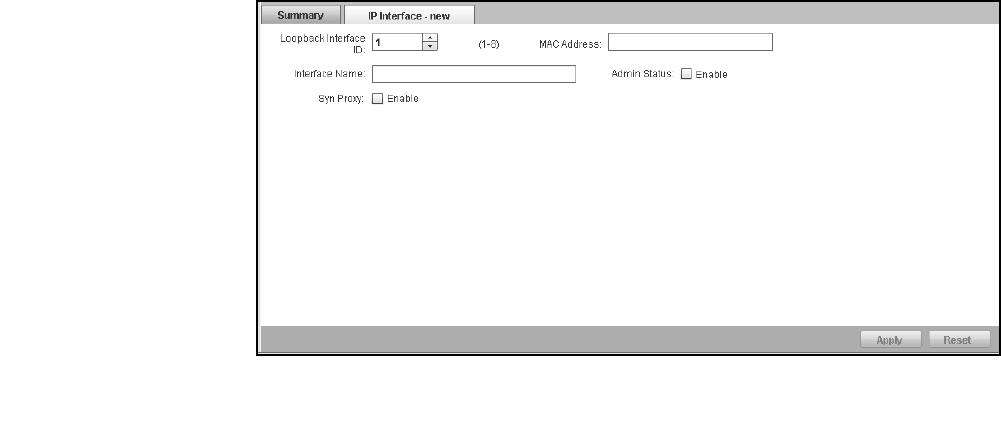
FIGURE 44 IP Interface tab
4. Provide the following information:
• Loopback Interface ID: Displays the ID assigned to the interface.
• MAC Address: Displays the MAC address of the interface.
• Interface name: Enter a unique name for the interface. The interface name is represented
by the physical and logical parts.
• Admin Status: Deselect the Enable check box to disable the interface. By default, the
interface is enabled.
• SYN-Proxy: Click the Enable check box to activate the SYN-Proxy control.
5. Click Apply to save your entries.
Click Reset to revert the configuration to the previous configured values.
For more information on the network interfaces, refer to the Brocade Virtual ADX Switch and Router
Guide.
Adding a loopback interface
Loopback interfaces are always up, regardless of the states of physical interfaces. They can add
stability to the network because they are not subject to route flap problems that can occur due to
unstable links between a Layer 3 Switch and other devices. You can configure up to eight loopback
interfaces on a Brocade Virtual ADX. You can add up to 24 IP addresses to each loopback interface.
To configure a loopback interface on the Brocade Virtual ADX, perform the following steps within
the Configure tab.
1. Click Network on the menu bar.
2. From the sidebar, select Interface.
The Summary tab is displayed. See Figure 42.