
(Supporting ADX v03.1.00) Owner's manual
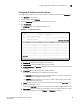
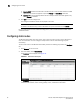
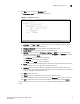

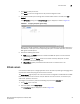
Table Of Contents
- Contents
- Preface
- Introduction to the Brocade Virtual ADX Web Interface
- Navigating the Web Interface
- Navigating the Dashboard
- Configuration Overview
- System Settings
- Network Settings
- Traffic Settings
- GSLB Settings
- Security Settings
- Monitoring Overview
- Viewing System Information
- Viewing Network Status
- Viewing Traffic Statistics
- Viewing Security Statistics
- Maintenance Overview
- Managing Software Images
- Restarting the System
- License Management
- Packet Capture
- Accessing the CLI
- Retrieving System Information for Technical Support
- Troubleshooting
- Config Template XML Schema
- Managing Config Templates through the CLI
Brocade Virtual ADX Graphical User Interface Guide 67
53-1003242-01
Virtual servers
7
4. Click Apply to save your entries.
Click Reset to revert the configuration to the previous configured values.
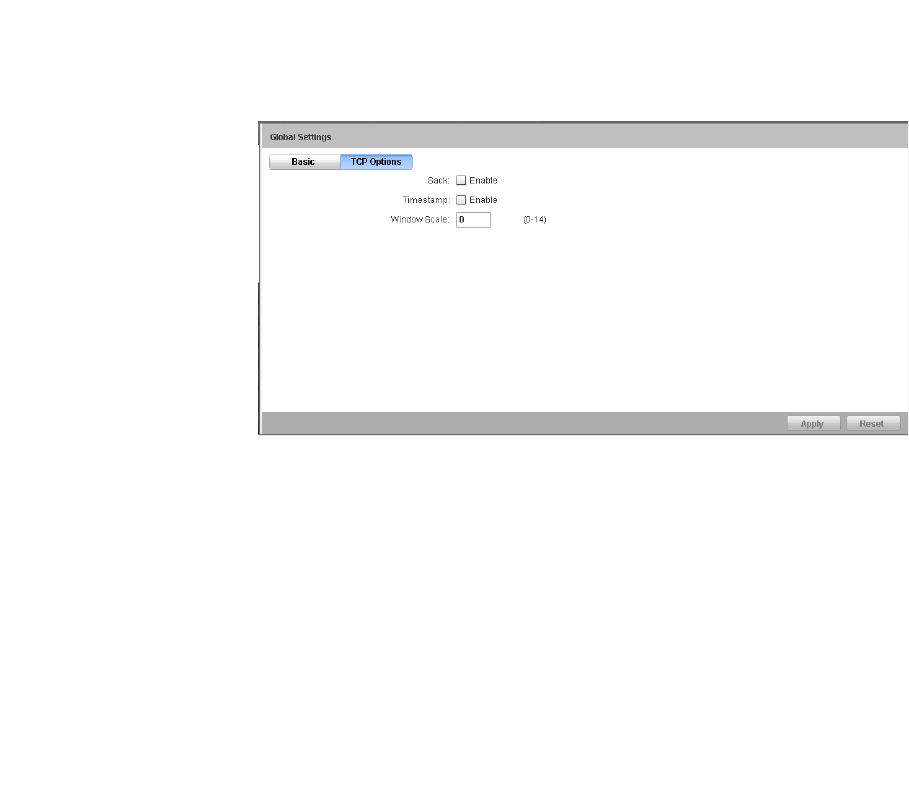
5. To configure the TCP options settings when the SYN cookie feature is enabled, click TCP
Options.
The TCP Options settings in the Global Settings page is displayed, as shown in Figure 53.
FIGURE 53 Configuring TCP Options global settings
When a client sends a SYN with a TCP option to the Virtual ADX, the Virtual ADX replies with a
SYN-ACK with a TCP option if the corresponding TCP option is enabled. Otherwise, the Virtual
ADX ignores the TCP options.
6. Provide the following information:
• Sack: Select the Enable check box to enable the SACK TCP option to send a selective
acknowledgment.
• Timestamp: Select the Enable check box to enable timestamp TCP option to send a
timestamp in the acknowledgement.
• Window Scale: Specify the window scale factor. Enter a number from 0 to 14.
Virtual servers
A virtual server allows you to manage application server resources by handling the changing traffic
requirements without disrupting the service to the end-users.
The Virtual Server page displays a list of the virtual servers configured on the Brocade Virtual ADX.
Each entry includes the virtual server name, IP address of the virtual server, virtual server port,
admin state, predictor, and status.
To configure a virtual server, perform the following steps within the Configure tab.
1. Click Traffic on the menu bar.
2. From the sidebar, select Virtual Server.
The Virtual Server page is displayed, as shown in Figure 54.