
Installation and Deployment Guide (Supporting ADX v03.1.00) Instruction Manual

• 2 virtual CPUs
• 20GB disk space
• 4 virtual ethernet ports
NOTE
The minimum memory requirement is dependent on the Brocade Virtual ADX licenses. For more
information on minimum memory requirements for the licenses, refer to the Brocade Virtual ADX
Licensing Guide.
Refer to Brocade Virtual ADX Interfaces for further information on virtual port requirements.
Software
• Citrix XenServer hypervisor version 6.2.0 or higher
• Citrix XenCenter client version 6.2.
Configuration requirements
Enable e1000 vNICs on the XenServer system
You must complete the following, once-off procedure to enable e1000 vNICs on the XenServer
machine before deploying Brocade Virtual ADX.
1. Use the following command to rename /usr/lib/xen/bin/qemu-dm to /usr/lib/xen/bin/qemu-dm.orig .
[root@xenserver ~]# mv /usr/lib/xen/bin/qemu-dm /usr/lib/xen/bin/qemu-dm.orig
2. Create a new /usr/lib/xen/bin/qemu-dm file with the following contents:
#!/bin/bash
oldstring=$@
newstring=${oldstring//rtl8139/e1000}
exec /usr/lib/xen/bin/qemu-dm.orig $newstring
3. Execute the following command:
[root@xenserver ~]# chmod 755 /usr/lib/xen/bin/qemu-dm
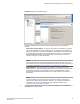
Brocade Virtual ADX download
Use the following steps to download a copy of the Brocade Virtual ADX software.
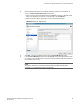
1. Go to http://my.brocade.com and login.
2. Click on My Account in the upper right hand corner of the page.
NOTE
Skip steps 3 and 4 if you have already requested and been granted access.
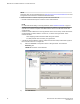
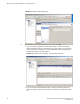
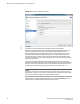
3. Click on Request Special Site Access in the My Site Access section of the page.
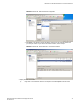
4. Enter the access code provided with your certificate of entitlement in the input box next to the
Submit button on the screen, and click on Submit . The system will show a message that the
Software
42 Brocade Virtual ADX Installation and Deployment Guide
53-1003241-01