
Installation and Deployment Guide (Supporting ADX v03.1.00) Instruction Manual

NOTE
XenCenter client can be downloaded free from http://www.citrix.com/xenserver/download. You must
be registered on the Citrix site to download the XenCenter client.
3. Create the XenServer "networks" required by the Brocade Virtual ADX VM.
• Brocade Virtual ADX VM requires a minimum of four virtual interfaces.
NOTE
For information about adding or removing interfaces, refer to Additional interfaces on page 21.
• XenServer does not support the concept of port groups. A "network" on the XenCenter GUI is
equivalent to a vSwitch on vSphere from VMware and is used to bind a Brocade Virtual ADX
virtual interface.
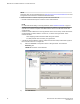
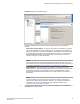
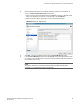
• XenServer creates a "Network" for each physical NIC on the host on bootup. These networks are
named Network 0 for NIC0, Network 1 for NIC1 etc., as shown in the figure below. These
networks are used:
‐ When deploying the Brocade Virtual ADX VM mgmt1 interface
‐ For data ports that need connectivity to a physical NIC
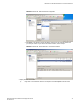
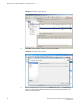
• A XenServer "External Network" must be created and used for a data port that needs a physical
NIC connection and to be on a single vlan.
a) Select the xenserver on left panel as shown in the figure below. Then select the
Networking tab.
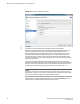
FIGURE 12 XenCenter: Server Networks
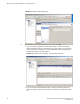
b) Click Add Network .
Brocade Virtual ADX Installation on Citrix XenServer
44 Brocade Virtual ADX Installation and Deployment Guide
53-1003241-01