
BR-Receipts User's Guide (Macintosh)


22
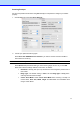
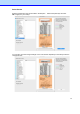
New Template
Create templates to apply to your receipts. Create a different template for each vendor to help
organize your receipts.
1.
Click New template.
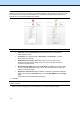
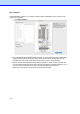
2.
The receipt image will be displayed with a red bar. Click and drag the red bar to separate the
top and bottom areas of the receipt. Drag to select an area of the receipt, right-click the
selected area, and choose a field type from the pop-up menu to verify this area.
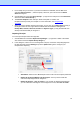
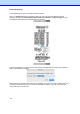
3.
Set the expense data attributes this way.Drag a rectangle to select an area, right-click the
area and choose a field type. Each data unit must be mapped to a separate field type. If you
choose a data unit that is being used, the previous field type will be removed..
Make sure your selections are accurate for the best OCR results.