
Network User's Guide


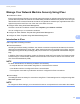
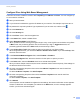

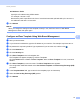
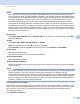
Table Of Contents
- Network User’s Guide
- Table of Contents
- 1 Introduction
- 2 Changing Your Network Settings
- 3 Configuring Your Machine for a Wireless Network (ADS-2800W / ADS-3600W)
- Overview
- Confirm Your Network Environment
- Configuration
- Configuration in Ad-hoc Mode
- Configure Your Machine for a Wireless Network Using the Machine’s Control Panel Setup Wizard
- Use Wi-Fi Direct®
- Scan from Your Mobile Device Using Wi-Fi Direct®
- Configure Your Wi-Fi Direct® Network
- Wi-Fi Direct® Network Configuration Overview
- Configure Your Wi-Fi Direct® Network Using the One-Push Method
- Configure Your Wi-Fi Direct® Network Using the One-Push Method of Wi-Fi Protected Setup™ (WPS)
- Configure Your Wi-Fi Direct® Network Using the PIN Method
- Configure Your Wi-Fi Direct® Network Using the PIN Method of Wi-Fi Protected Setup™ (WPS)
- Configure Your Wi-Fi Direct® Network Manually
- 4 Web Based Management
- Overview
- Configure Your Machine Settings
- Set a Login Password
- Use LDAP Authentication
- Restrict Users
- Synchronize with the SNTP Server
- Change the Scan to FTP Configuration
- Change the Scan to SFTP Configuration
- Change the Scan to Network Configuration (Windows®)
- Change the Scan to SharePoint Configuration (Windows®)
- Configure TCP/IP Advanced Settings
- Address Book Import/Export (ADS-2800W / ADS-3600W)
- 5 Scan to E-mail Server (ADS-2800W / ADS-3600W)
- 6 Security Features
- 7 Troubleshooting
- 8 Additional Network Settings (Windows®)
- A Appendix
- B Index

Security Features
69
6
Manage Multiple Certificates 6
The Multiple Certificate feature feature allows you to use Web Based Management to manage each
certificate installed on your machine. In Web Based Management, navigate to the CA Certificate screen to
view certificate content, delete, or export your certificates.
You can store up to three CA certificates to use SSL.
We recommend storing one certificate fewer than allowed, reserving an empty spot in case of certificate
expiration. When a certificate expires, import a new certificate into the reserved spot, and then delete the
expired certificate. This ensures that you avoid configuration failure.
NOTE
When you use SSL for SMTP communications, you do not have to select a certificate. The necessary
certificate is selected automatically.
Importing a CA Certificate 6
1 Start your web browser.
2 In your browser’s address bar, type the IP address of your machine. For example: http://192.168.1.2.
NOTE
• If you are using a Domain Name System or enable a NetBIOS name, you can type another name, such
as “SharedScanner” instead of the IP address.
• For example:
http://SharedScanner/
If you enable a NetBIOS name, you can also use the node name.
• For example:
http://brwxxxxxxxxxxxx/
You can find the NetBIOS name on your machine’s control panel under Node Name.
3 No password is required by default. Type a password if you have set one, and then click .
4 Click the Network tab, and then click Security.
5 Click CA Certificate.
6 Click Import CA Certificate and select the certificate.
7 Click Submit.