
Network User's Guide


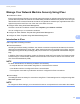
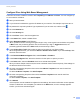

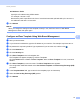
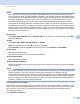
Table Of Contents
- Network User’s Guide
- Table of Contents
- 1 Introduction
- 2 Changing Your Network Settings
- 3 Configuring Your Machine for a Wireless Network (ADS-2800W / ADS-3600W)
- Overview
- Confirm Your Network Environment
- Configuration
- Configuration in Ad-hoc Mode
- Configure Your Machine for a Wireless Network Using the Machine’s Control Panel Setup Wizard
- Use Wi-Fi Direct®
- Scan from Your Mobile Device Using Wi-Fi Direct®
- Configure Your Wi-Fi Direct® Network
- Wi-Fi Direct® Network Configuration Overview
- Configure Your Wi-Fi Direct® Network Using the One-Push Method
- Configure Your Wi-Fi Direct® Network Using the One-Push Method of Wi-Fi Protected Setup™ (WPS)
- Configure Your Wi-Fi Direct® Network Using the PIN Method
- Configure Your Wi-Fi Direct® Network Using the PIN Method of Wi-Fi Protected Setup™ (WPS)
- Configure Your Wi-Fi Direct® Network Manually
- 4 Web Based Management
- Overview
- Configure Your Machine Settings
- Set a Login Password
- Use LDAP Authentication
- Restrict Users
- Synchronize with the SNTP Server
- Change the Scan to FTP Configuration
- Change the Scan to SFTP Configuration
- Change the Scan to Network Configuration (Windows®)
- Change the Scan to SharePoint Configuration (Windows®)
- Configure TCP/IP Advanced Settings
- Address Book Import/Export (ADS-2800W / ADS-3600W)
- 5 Scan to E-mail Server (ADS-2800W / ADS-3600W)
- 6 Security Features
- 7 Troubleshooting
- 8 Additional Network Settings (Windows®)
- A Appendix
- B Index

Security Features
72
6
Configure IPsec Using Web Based Management 6
The IPsec connection conditions consist of two Template types: Address and IPsec. You can configure up
to 10 connection conditions.
1 Start your web browser.
2 In your browser’s address bar, type the IP address of your machine. For example: http://192.168.1.2.
3 No password is required by default. Type a password if you have set one, and then click .
4 Click the Network tab.
5 Click the Security tab.
6 Click the IPsec menu in the left navigation bar.
7 In the Status field, enable or disable IPsec.
8 Select Negotiation Mode for IKE Phase 1.
IKE is a protocol used to exchange encryption keys to carry out encrypted communication using IPsec.
In Main mode, the processing speed is slow, but the security is high. In Aggressive mode, the
processing speed is faster than in Main mode, but the security is lower.
9 In the All Non-IPsec Traffic field, select the action to be taken for non-IPsec packets.
When using Web Services, you must select Allow for All Non- IPsec Traffic. If you selected Drop, Web
Services cannot be used.
0 In the Broadcast/Multicast Bypass field, select Enabled or Disabled.
A In the Protocol Bypass field, select the check box for the option or options you want.
B In the Rules table, select the Enabled check box to activate the template.
When you select multiple check boxes, the lower-numbered check boxes have priority if the settings for
the selected check boxes conflict.
C Click the corresponding drop-down list to select the Address Template that is used for the IPsec
connection conditions.
To add an Address Template, click Add Template.
D Click the corresponding drop-down list to select the IPsec Template that is used for the IPsec
connection conditions.
To add an IPsec Template, click Add Template.
E Click Submit.
If the computer must be restarted to register the new settings, the restart confirmation screen appears.
If there is a blank item in the template you enabled in the Rules table, an error message appears.
Confirm your choices and submit again.