
User Manual
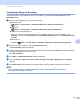

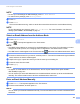


Table Of Contents
- User’s Guide ADS-2400N / ADS-2800W / ADS-3000N / ADS-3600W
- Brother Numbers
- User’s Guides and Where Do I Find Them?
- Getting Started
- You Can Use the Following Features
- Table of Contents
- 1 General Information
- Using the Guide
- About This Machine
- Control Panel Overview (ADS-2400N / ADS-3000N)
- Control Panel Overview (ADS-2800W / ADS-3600W)
- Shortcut Settings (ADS-2800W / ADS-3600W)
- Accessing Brother Utilities (Windows®)
- General Setup (ADS-2400N / ADS-3000N)
- General Setup (ADS-2800W / ADS-3600W)
- Setting Lock (ADS-2800W / ADS-3600W)
- Secure Function Lock 3.0 (ADS-2800W / ADS-3600W)
- Active Directory Authentication (ADS-2800W / ADS-3600W)
- LDAP Authentication (ADS-2800W / ADS-3600W)
- 2 Document Specifications
- 3 Scan Preparation
- 4 Prepare Your Network for Scanning with Your Computer
- 5 Before scanning
- 6 Scan Using Your Computer
- Change the ControlCenter4 User Interface (Windows®)
- Scan Using ControlCenter4 in Home Mode (Windows®)
- Scan Using ControlCenter4 in Advanced Mode (Windows®)
- Create a Custom Tab (ControlCenter4 Advanced Mode) (Windows®)
- Change Scan Settings (ControlCenter4) (Windows®)
- Scan Using Brother iPrint&Scan (Mac)
- Scan Using Nuance™ PaperPort™ 14SE or Other Windows® Applications
- Use ABBYY FineReader
- Scan Using TWAIN Applications (Macintosh)
- Scan Using Apple Image Capture (ICA Driver)
- 7 Scan Using the Control Panel
- Save Scanned Documents on Your Computer in Home Mode
- Save Scanned Documents on Your Computer in Advanced Mode
- Save Scanned Documents on a USB Flash Drive
- Scan Documents to an FTP Server
- Scan Documents to an SFTP Server
- Scan Documents to a Shared Folder / Network Location (Windows®)
- Scan Documents to SharePoint
- Scan Using Web Services (Windows Vista®, Windows® 7, Windows® 8, Windows® 8.1 and Windows® 10)
- Send Scanned Documents Directly to an Email Address (ADS-2800W / ADS-3600W)
- Set Up the Address Book (ADS-2800W / ADS-3600W)
- Upload Scanned Documents to the Web (ADS-2800W / ADS-3600W)
- Change Scan to PC Settings (Windows®)
- Scan Options Using the Touchscreen (ADS-2800W / ADS-3600W)
- 8 Managing the Machine from Your Computer
- 9 Routine Maintenance
- 10 Troubleshooting
- A Specifications
- B Appendix
- C Index

Scan Using the Control Panel
177
7
Scan Using Web Services (Windows Vista
®
, Windows
®
7,
Windows
®
8, Windows
®
8.1 and Windows
®
10) 7
If you have installed the driver for scanning via Web Services, the menu that allows you to use Web Services
for scanning appears in Destination field when you click Scan to Network Device in the left navigation bar
(ADS-2400N / ADS-3000N) or on the Touchscreen of the machine (ADS-2800W / ADS-3600W).
For information about installing Web Services, see Install Drivers Used for Scanning via Web Services
(Windows Vista
®
, Windows
®
7, Windows
®
8, Windows
®
8.1, Windows
®
10) in the Network User’s Guide.
NOTE
• If the Touchscreen or LED indications show “Out of Memory”, decrease the Paper size setting or the
Resolution setting. For more information, see Configuring Settings for Scanning on page 178.
• Certain characters in the messages displayed on the Touchscreen may be replaced with spaces if the
language settings of your OS and your Brother machine are different.
(ADS-2400N / ADS-3000N)
If using ADS-2400N or ADS-3000N, you need to assign WS Scan to one of the three Network Device Keys.
For more information, see Assign the Scan Feature to the Network Device Key 1-3 on page 29.
1 Load your document.
2 Press the , or button to which you have assigned the Web Service Scan feature.
The machine starts scanning.
(ADS-2800W / ADS-3600W)
1 Load your document.
2 Swipe left or right.
3 Press WS Scan.
4 Press the type of scan you want to perform.
5 Press a or b to display the destination computer where you want to send the scan.
Press the destination computer.
6 Press Start.
The machine starts scanning.