Innov-ís 4000D/4000 PREMIUM PACKAGE Version 3.0 Upgrade Kit Operation Manual Before using this upgrade kit, be sure to read this Operation Manual for information on its correct use.
CONTENTS Before You Start........................................................................................................................ 2 New Features............................................................................................................................ 2 Screens Operations Performed Using a USB Mouse.................................................................. 3 Clicking a key ...............................................................................................
Before You Start It is important to remember to perform the upgrade according to the Installation Guide. The machine can then be used as described in the Operation Manual. New machine features and benefits are described in this Operation Manual. New Features The following features will be added with the upgrade to version 3.0. • Screens operations can be performed using a USB mouse. • A USB hub can be used. • A pivot function has been added for easily changing the sewing direction.
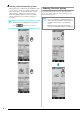
Screens Operations Performed Using a USB Mouse If a USB mouse (sold separately by computer retailers) is connected to the sewing machine, the mouse can be used to perform operations in the screens. In addition, a USB hub can be connected so that USB media and a USB mouse can be used at the same time. ■ Clicking a key When the mouse is connected, the pointer appears in the screen. Move the mouse to position the pointer over the desired key, and then click the left mouse button.
■ Changing pages Rotate the mouse wheel to switch through the tabs of the pattern selection screens. Memo • If for additional pages is displayed, rotate the mouse wheel to display the next page. In the or with the pointer on the next part of a page.
■ Moving embroidery patterns In the Embroidery and Embroidery Edit screens, patterns can be moved by dragging them to the desired position. a Select a pattern. b Press c Move the mouse to position the pointer over the desired pattern, and then drag the pattern to the desired position. In addition, patterns can be dragged to their desired positions by directly touching the screen with your finger or touch pen. or to display the editing screen.
■ Selecting combined embroidery patterns When patterns are combined in the Embroidery Edit screen, patterns can be selected by clicking them. Move the mouse to position the pointer over the desired pattern, and then click the left mouse button. In addition, patterns can be selected by directly touching the screen with your finger or touch pen. Memo • If a pattern that is overlapping cannot be selected, touch 6 in the screen to select it.
Color Sorting Repeated Patterns The sewing order of combined border embroidery patterns in the Embroidery Edit screen can be automatically changed so that the same color can be continuously sewn in each pattern that is repeated. This allows you to continue sewing without repeatedly changing the upper thread or changing the sewing order manually.
Note Pivoting • The “NEEDLE POSITION” (P. 2 of the settings screen) must be set in the down position for the If the pivot setting is selected, the machine stops with the needle lowered (in the fabric) and the presser foot is automatically raised to an appropriate height when the “Start/Stop” button is pressed. When the “Start/Stop” button is pressed again, the presser foot is automatically lowered and sewing continues. This function is useful for stopping the machine to rotate the fabric.
c Place the fabric under the presser foot with the needle at the starting point of the stitching, and then press the “Start/Stop” button. The machine will begin sewing. Automatic Fabric Sensor System (Automatic Presser Foot Pressure) The thickness of the fabric is automatically detected and the presser foot pressure is automatically adjusted with an internal sensor while sewing, so your fabric is fed smoothly. The fabric sensor system works continuously while sewing.
a Free-motion Quilting For free-motion quilting, use free-motion quilting foot “C” or free-motion open toe quilting foot “O” depending on the stitch that is selected, and set the machine to free-motion sewing mode. In this mode, the presser foot is raised to the necessary height for freemotion sewing. We recommend attaching the foot controller and sewing at a consistent speed. You can adjust the sewing speed with the speed control slide on the machine.
c h Select any of the following stitches. Use both hands to stretch the fabric taut, and then move the fabric at a consistent pace in order to sew uniform stitches roughly 2.0-2.5 mm (approx. 1/16 - 3/32 inch) in length. → Free-motion quilting foot “C” is indicated in the upper-left corner of the screen. d Remove the presser foot holder. e Attach free-motion quilting foot “C” at the front with the presser foot holder screw aligned with the notch in the quilting foot. a Stitch i Press mode.
a Press to set the machine to free-motion sewing mode. e Hold the quilting foot in place with your right hand, and tighten the presser foot holder screw using the screwdriver with your left hand. a Presser foot holder screw CAUTION • Be sure to securely tighten the screws with the screwdriver. Otherwise, the needle may touch the quilting foot, causing it to bend or break.
Free-motion echo quilting foot “E” measurement a Press to set the machine to free-motion sewing mode. a 6.4 mm (approx. 1/4 inch) b 9.5 mm (approx. 3/8 inch) CAUTION • With free-motion quilting, control the feeding speed of the fabric to match the sewing speed. If the fabric is moved faster than the sewing speed, the needle may break or other damage may result.
g Using the measurement on the quilting foot as a guide, sew around the motif. Returning to the Beginning of the Pattern When sewing character/decorative stitches, you can return to the beginning of the pattern after trial sewing or when the stitching is sewn incorrectly. a Press the “Start/Stop” button to stop the machine, and then press . a 6.4 mm (approx. 1/4 inch) Finished project → Sewing returns to the beginning of the selected pattern (“W”) from the point where sewing was stopped.
Measurements on the Bobbin Cover The measurements on the bobbin cover are references for patterns with a middle (center) needle position. The measurements on the needle plate and the needle plate cover are references for stitches with a left needle position.
English 111-001