
Operation Manual


24
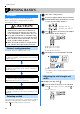
SEWING BASICS
2 SEWING BASICS
Basic sewing operations are described below.
Before operating the sewing machine, read the
following precautions.
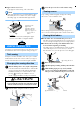
Follow the basic procedures below to sew.
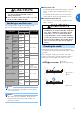
Using the stitch selection keys, select the desired stitch.
When the sewing machine is turned on, the straight
stitch ( left needle position) is selected.
a
Turn on the sewing machine.
b
(For models equipped with the character stitch key)
Confirm that the utility stitch indicator is lit. If it
is not lit, press the utility stitch key.
c
Press (stitch selection keys). The number
of the selected stitch is displayed.
a Designate the tens digit.
b Designate the ones digit.
The stitch is selected.
d
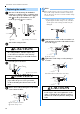
Attach the presser foot indicated in the LCD.
a Presser foot type
• For details, refer to
“Replacing the presser foot”
(page 22)
.
■ [Example] Selecting stitch .
a
Press the stitch selection keys to select stitch 04.
With on the right, select “4”, and with on
the left, select “0”.
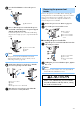
SEWING
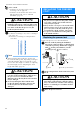
CAUTION
●
While the machine is in operation, pay special
attention to the needle location. In addition, keep
your hands away from all moving parts such as the
needle and handwheel, otherwise injuries may occur.
●
Do not pull or push the fabric too hard while sewing,
otherwise injuries may occur or the needle may break.
● Never use bent needles. Bent needles can easily
break, possibly resulting in injuries.
●
Make sure that the needle does not strike basting
pins, otherwise the needle may break or bend.
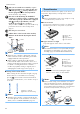
General sewing procedure
1 Turn on the machine.
Turn on the sewing machine.
For details on turning on the machine, refer to “Power
supply” (page 8).
2 Select the stitch.
Select the stitch appropriate for the area to be sewn.
For details on selecting a stitch, refer to “Selecting a
stitch” (page 24).
3 Attach the presser foot.
Attach the presser foot appropriate for the stitch.
For details on replacing the presser foot, refer to
“Replacing the presser foot” (page 22).
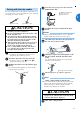
4 Start sewing.
Position the fabric, and then start sewing. When sew-
ing is finished, cut the threads.
For details on starting to sew, refer to “Starting to sew”
(page 25).
Selecting a stitch
Adjusting the stitch length and
width
a Utility stitch key
b Utility stitch indicator