ADVANCED USER’S GUIDE DCP-7055 DCP-7060D DCP-7065DN Not all models are available in all countries.
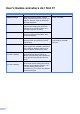
User's Guides and where do I find it? Which manual? What's in it? Where is it? Safety and Legal Read this Guide first. Please read the Safety Instructions before you set up your machine. See this Guide for trademarks and legal limitations. Printed / In the Box Quick Setup Guide Follow the instructions for setting up your machine and installing the drivers and software for the operating system and connection type you are using.
Table of Contents 1 General Setup 1 Memory Storage .................................................................................................... 1 Ecology features .................................................................................................... 1 Toner Save ...................................................................................................... 1 Sleep Mode .....................................................................................................
iii
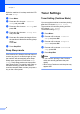
1 General Setup Memory Storage Your menu settings are stored permanently, and in the event of a power failure will not be lost. Temporary settings (for example, Contrast) will be lost. 1 1 1 Ecology features 1 Toner Save 1 You can save toner using this feature. When you set Toner Save to On, prints appear lighter. The default setting is Off. a b Press Menu. Press a or b to choose 1.General Setup and press OK. c Press a or b to choose 2.Ecology and press OK. d Press a or b to choose 1.
Chapter 1 While the machine is in sleep mode the LCD will show Sleep. Toner Settings a b Press Menu. Toner Setting (Continue Mode) c Press a or b to choose 2.Ecology and press OK. d Press a or b to choose 2.Sleep Time and press OK. e Press a or b to select the length of time the machine is idle before entering sleep mode. Press OK. f Press a or b to choose 1.General Setup and press OK. a b Press Stop/Exit.
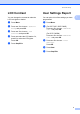
General Setup LCD Contrast 1 User Settings Report You can change the contrast to make the LCD look lighter or darker. You can print a list of the settings you have programmed. a b a b c d e Press Menu. Press a or b to choose 1.General Setup and press OK. Press a or b to choose 3.LCD Contrast and press OK. Press a to make the LCD darker. Or, press b to make the LCD lighter. Press OK. 1 1 Press Menu. (For DCP-7055 / DCP-7060D) Press a or b to choose 3.Machine Info. and press OK.
Chapter 1 Network Configuration Report (For DCP-7065DN) You can print a report showing the current network configuration, including the internal print server settings. Note Node name: Node name appears in the Network Configuration List. The default node name is “BRNXXXXXXXXXXXX”. a b Press Menu. c Press a or b to choose 4.Network Config. Press OK. d Press Start. 4 Press a or b to choose 4.Machine Info.. Press OK.
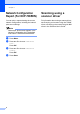
2 Making copies Copy settings 2 2 2 When you want to quickly change the copy settings temporarily for the next copy, use the temporary COPY keys. You can use different combinations. DCP-7055 DCP-7060D / DCP-7065DN 2 2 The machine returns to its default settings one minute after copying. Stop copying 2 To stop copying, press Stop/Exit.
Chapter 2 Using the Options key 2 Make sure you are in Copy mode. Use the Options key to quickly set the following copy settings temporarily for the next copy.
Making copies Press Menu selections Options Enlarge/Reduce 100%* Page 8 97% LTRiA4 2 94% A4iLTR 91% Full Page 85% LTRiEXE 83% LGLiA4 (for Asia) 78% LGLiLTR (for Asia) 70% A4iA5 50% Custom(25-400%) Auto 1 200% 141% A5iA4 104% EXEiLTR Page Layout Off(1 in 1)* 2 in 1 (P) 10 2 2 in 1 (L) 2 2 in 1 (ID) 4 in 1 (P) 2 4 in 1 (L) 2 1 When using the ADF 2 (P) means Portrait and (L) means Landscape. The factory settings are shown in Bold with an asterisk.
Chapter 2 Improving copy quality 2 You can choose from a range of quality settings. The default setting is Auto. Auto Auto is the recommended mode for ordinary printouts. Suitable for documents that contain both text and photographs. Sorting copies using the ADF (For DCP-7065DN) You can sort multiple copies. Pages will be stacked in the order 1 2 3, 1 2 3, 1 2 3, and so on. a b Load your document in the ADF. c Press Options. Press a or b to choose Stack/Sort. Press OK.
Making copies (For DCP-7065DN) Auto sets the machine to calculate the reduction ratio that best fits the size of paper. Auto is only available when using the ADF. Custom(25-400%) allows you to enter a ratio from 25% to 400% in 1% increments. f c Press a or b to choose 3.Contrast. Press OK. d Press a or b to increase or decrease the contrast. Press OK. e Brightness Note Adjust the copy brightness to make copies darker or lighter.
Chapter 2 Making N in 1 copies (page layout) g Put the next page on the scanner glass. Press OK. Repeat steps f and g for each page of the layout. h After all the pages have been scanned, press b in step f to finish. 2 You can reduce the amount of paper used when copying by using the N in 1 copy feature. This allows you to copy two or four pages onto one page. If you want to copy both sides of an ID card onto one page, see 2 in 1 ID Copy on page 11.
Making copies 2 in 1 (L) 4 in 1 (P) b Press Options. Press a or b to choose Page Layout. Press OK. c Press a or b to choose 2 in 1 (ID). Press OK. d Turn over the ID Then Press Start 4 in 1 (L) 2 in 1 ID Copy You can copy both sides of your identification card onto one page, keeping the original card size. Note You can copy an identification card to the extent permitted under applicable laws. See Legal limitations for copying in the Safety and Legal booklet. a Press Start.
Chapter 2 Duplex Copying (1-sided to 2-sided) (For DCP-7060D / DCP-7065DN) Duplex Copy (long edge flip) 1 sided i 2 sided L Portrait 1 1 2 2 Landscape 11 1 2 2 a b Load your document. c Press Duplex and a or b to select 1sidedi2sided L. Press OK. d Press Start to copy the page. (For DCP-7065DN) If you placed the document in the ADF, the machine scans the pages and starts printing. If you are using the scanner glass, go to step e.
Making copies Advanced Duplex Copy (short edge flip) 2 1 sided i 2 sided S 2 Portrait 1 1 2 2 Landscape 11 1 2 a b 2 Load your document. Press a or b to enter the number of copies you want. c Press Duplex and a or b to select 1sidedi2sided S. Press OK. d Press Start to copy the page. (For DCP-7065DN) If you placed the document in the ADF, the machine scans the pages and starts printing. If you are using the scanner glass, go to step e.
A Routine maintenance Cleaning the machine Clean the outside and inside of the machine regularly with a dry, lint-free soft cloth. When you replace the toner cartridge or the drum unit, make sure that you clean the inside of the machine. For details about cleaning the machine, see the Basic User's Guide. WARNING DO NOT use cleaning materials that contain ammonia, alcohol, any type of spray, or any type of flammable substance to clean the outside or inside of the machine.
Routine maintenance Checking the remaining life of the drum unit A Packing and shipping the machine You can see the machine’s parts life on the LCD. a b Press Menu. Press a or b to choose one of the following: 3.Machine Info. (DCP-7055 / DCP-7060D) 4.Machine Info. (DCP-7065DN) Press OK. c Press a or b to choose one of the following: 4.
d Put the protective material (1) in the machine with the “REMOVE” text to the left, as shown in the illustration. i Pack the AC cord and printed materials in the original carton as shown below: FRONT (1) e Put the drum unit and toner cartridge assembly back into the machine. f Put the elastic band over the handle of the drum unit, as shown in the illustration. j g h 16 Close the front cover. Put the machine into the bag it originally came in. Close the carton and tape it shut.
B Glossary B This is a comprehensive list of features and terms that appear in Brother manuals. Availability of these features depends on the model you purchased. ADF (automatic document feeder (For DCP-7065DN)) The document can be placed in the ADF and scanned one page at a time automatically. Cancel Job Cancels a programmed print job and clears the machine’s memory. Temporary settings You can choose certain options for each copy without changing the default settings.
C Index C P Copy 2 in 1 ID Copy .......................................11 brightness ...............................................9 Contrast ..................................................9 Enlarge/Reduce ......................................8 keys .........................................................5 N in 1 (page layout) ...............................10 Options key .............................................6 quality ......................................................
These machines are approved for use in the country of purchase only. Local Brother companies or their dealers will only support machines purchased in their own countries.