
User Manual
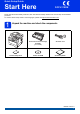
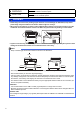
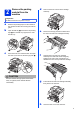
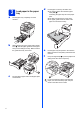
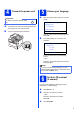
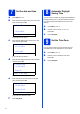
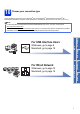
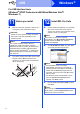

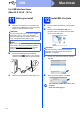
Table Of Contents
- Quick Setup Guide DCP-8110DN
- Start Here
- 1 Unpack the machine and check the components
- 2 Remove the packing material from the machine
- 3 Load paper in the paper tray
- 4 Connect the power cord
- 5 Choose your language
- 6 Set the LCD contrast (if needed)
- 7 Set the date and time
- 8 Automatic Daylight Saving Time
- 9 Set the Time Zone
- 10 Choose your connection type
- For USB Interface Users (Windows® XP/XP Professional x64 Edition/Windows Vista®/ Windows® 7)
- For USB Interface Users (Mac OS X 10.5.8 - 10.7.x)
- For Wired Network Interface Users (Windows® XP/XP Professional x64 Edition/Windows Vista®/ Windows® 7)
- For Wired Network Interface Users (Mac OS X 10.5.8 - 10.7.x)
- For Network Users
- Other Information
- Options and Consumables
- Start Here

6
7
Set the date and time
a Press Menu, 6, 1, 1.
b Enter the last two digits of the year on the dial
pad, and then press OK.
61.Date&Time
Year:2012
Enter & OK Key
(e.g. Enter 1, 2 for 2012.)
c Enter the two digits for the month on the dial
pad, and then press OK.
61.Date&Time
XX/XX/2012
Month:03
Enter & OK Key
(e.g. Enter 0, 3 for March.)
d Enter the two digits for the day on the dial pad,
and then press OK.
61.Date&Time
XX/03/2012
Day:25
Enter & OK Key
(e.g. Enter 2, 5 for 25th.)
e Enter the time in 24-hour format on the dial
pad, and then press OK.
61.Date&Time
25/03/2012
Time:15:25
Enter & OK Key
(e.g. Enter 1, 5, 2, 5 for 15:25.)
f Press Stop/Exit.
8
Automatic Daylight
Saving Time
You can set the machine to change automatically for
Daylight Saving Time. It will reset itself forward one
hour in the Spring and backward one hour in the
Autumn.
a Press Menu, 6, 1, 2.
b Press a or b to choose On (or Off).
Press OK.
c Press Stop/Exit.
9
Set the Time Zone
You can set the time zone (not summer time but
standard time) on the machine for your location.
a Press Menu, 6, 1, 3.
b Press a or b to choose the time zone.
Press OK.
c Press Stop/Exit.