Advanced User’s Guide DCP-8110DN Version 0 UK/IRE
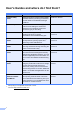
User's Guides and where do I find them? Which Guide? What's in it? Product Safety Guide Read this Guide first. Please read the Safety Instructions before you set up your machine. See this Guide for trademarks and legal limitations. Printed / In the box Quick Setup Guide Follow the instructions for setting up your machine and installing the drivers and software for the operating system and connection type you are using.
Table of Contents 1 General Setup 1 Memory storage..................................................................................................... 1 Automatic Daylight Saving Time............................................................................ 1 Ecology features.................................................................................................... 2 Toner Save ......................................................................................................
A Routine maintenance 22 Cleaning and checking the machine....................................................................22 Checking the Page Counters.........................................................................23 Checking the remaining life of parts ..............................................................23 Replacing periodic maintenance parts.................................................................23 Packing and shipping the machine .......................................
1 General Setup Memory storage Your menu settings are stored permanently and in the event of a power failure will not be lost. Temporary settings (for example, Contrast) will be lost. During a power failure the machine will retain the date and time for up to 60 hours. 1 1 Automatic Daylight Saving Time 1 1 You can set the machine to change automatically for Daylight Saving Time. It will set itself forward one hour in the Spring, and back one hour in the Autumn. a b Press Menu, 6, 1, 2.
Chapter 1 Ecology features Toner Save You can save toner using this feature. When you set Toner Save to On, prints appear lighter. The default setting is Off. a b c Press Menu, 1, 3, 1. Press a or b to choose On or Off. Press OK. Press Stop/Exit. Note We do not recommend Toner Save for printing Photo or Greyscale images. 1 1 Sleep Time The Sleep mode setting can reduce power consumption. When the machine is in Sleep mode (Power Save mode) it acts as though it is turned off.
General Setup Power Down mode If the machine is in Deep Sleep mode for 4 hours, it will then go into Power Down mode automatically and the LCD will show Power Down. Power Down mode is the lowest power consumption mode, which achieves a power consumption of approximately 0.26 W. To start printing, press any key on the control panel and then send the print data. You can enable or disable the Power Down mode feature by following these steps: a b Press Menu, 1, 3, 3. c Press Stop/Exit.
Chapter 1 LCD Contrast You can change the contrast to make the LCD look lighter or darker. a b c 4 1 Glass ScanSize Press Menu, 1, 6. When scanning Letter size documents, you will need to set the scan glass size to Letter; otherwise, a portion of your scanned documents will be missing. Press c to make the LCD darker. Or, press d to make the LCD lighter. Press OK. a b Press Menu, 1, 8, 1. c Press Stop/Exit. Press Stop/Exit. Press a or b to choose Letter. Press OK.
General Setup User Settings List 1 You can print a list of the machine's settings. a b c Press Menu, 6, 4. Press Start. Press Stop/Exit. Network Configuration Report 1 The Network Configuration Report is a report listing the current network configuration including the network print server settings. a b c Press Menu, 6, 5. Press Start. Press Stop/Exit.
2 Security features Secure Function Lock 2.0 Secure Function Lock lets you restrict Public access to the following machine functions: Copy Scan 1 USB Direct Print 2 Page Limit 3 1 Scan includes scan jobs sent via Brother iPrint&Scan. 2 Print includes print jobs via Google Cloud Print and Brother iPrint&Scan. 3 Page Limit is configured using Web Based Management.
Security features Setting the password for the administrator The password you set in these steps is for the administrator. This password is used to set up users and to turn the Secure Function Lock on or off. (See Setting up restricted users uu page 8 and Turning Secure Function Lock on/off uu page 9.) a b Press Menu, 1, 7, 1. c Re-enter the password when the LCD shows Verify:. Press OK. d Press Stop/Exit. Enter a four-digit number for the password using numbers 0-9. Press OK.
Chapter 2 Setting up the Public user mode Public user mode restricts the functions that are available for Public users. Public users do not need to enter a password to access the features made available through this setting. You can set up one Public user. a b Press Menu, 1, 7, 1. Press a or b to choose Setup ID. Press OK. Setting up restricted users 2 2 You can set up users with a password and restrict the functions that are available to them.
Security features Turning Secure Function Lock on/off If you enter the wrong password, the LCD will show Wrong Password. Re-enter the correct password. Turning Secure Function Lock on a b c Press Menu, 1, 7, 1. Press a or b to choose Lock OffiOn. Press OK. Enter your four-digit administrator password. Press OK. Turning Secure Function Lock off a b Press Menu, 1, 7, 1. c Enter your four-digit administrator password. Press OK. Press a or b to choose Lock OniOff. Press OK.
Chapter 2 Changing to the Public mode After a restricted user has finished using the machine, it will return to the Public setting within one minute. You can exit from the restricted user mode by pressing the following keys: Clear when you are in the copy mode. (SCAN) when you are in the scan mode. Then LCD will ask you Go to Public?. Press 1 to choose 1.Yes.
Security features Setting up the password a b 2 Changing your Setting Lock password 2 Press Menu, 1, 7, 2. Enter a four-digit number for the password using numbers 0-9. Press OK. c Re-enter your password when the LCD shows Verify:. Press OK. d Press Stop/Exit. a b Press Menu, 1, 7, 2. c Enter your current four-digit password. Press OK. d Enter a four-digit number for the new password. Press OK. e Re-enter your new password when the LCD shows Verify:. Press OK. f Press Stop/Exit.
Chapter 2 Turning Setting Lock on/off If you enter the wrong password when following the instructions below, the LCD will show Wrong Password. Re-enter the correct password. Turning Setting Lock on a b Press Menu, 1, 7, 2. c Enter your four-digit password. Press OK. d Press Stop/Exit. Press a or b to choose On. Press OK. Turning Setting Lock off a b Press Menu, 1, 7, 2. c Press Stop/Exit. 12 Enter your four-digit password. Press OK twice.
3 Making copies Copy settings 3 When you want to quickly change the copy settings for the next copy, use the temporary COPY keys. You can change multiple settings. 3 Enlarging or reducing the image copied 3 You can choose the following enlargement or reduction ratios: Press 100%* 97% LTRiA4 94% A4iLTR 91% Full Page The machine returns to its default settings one minute after copying.
Chapter 3 d Do one of the following: Press a or b to choose the enlargement or reduction ratio you want. Press OK. Press a or b to choose Custom(25-400%). Press OK. Use the numeric keys to enter an enlargement or reduction ratio from 25% to 400%. (For example, press 5 and 3 to enter 53%.) Press OK. e Press Start. Note Page Layout Options 2 in 1 (P), 2 in 1 (L), 2 in 1 (ID), 4 in 1 (P) and 4 in 1 (L) are not available with Enlarge/Reduce.
Making copies Using the Options key 3 Use the Options key to quickly set the following copy settings temporarily for the next copy.
Chapter 3 Sorting copies 3 You can sort multiple copies. Pages will be stacked in the order 1 2 3, 1 2 3, 1 2 3, and so on. a b c d e f Load your document. Use the numeric keys to enter the number of copies (up to 99). Press Options. Press a or b to choose Stack/Sort. Press OK. Press a or b to choose Sort. Press OK. Press Start to scan the page. If you placed the document in the ADF, the machine scans the pages and starts printing. h 16 Auto Auto is the recommended mode for ordinary printouts.
Making copies Adjusting Brightness and Contrast Brightness Contrast 3 3 Adjust the copy brightness to make copies darker or lighter. To temporarily change the copy brightness setting, follow the steps below: a b Load your document. c Press Options. Press a or b to choose Brightness. Press OK. d Press c to make a lighter copy or press d to make a darker copy. Press OK. e Press Start. Adjust the contrast to help an image look sharper and more vivid.
Chapter 3 Making N in 1 copies (page layout) You can reduce the amount of paper used when copying by using the N in 1 copy feature. This allows you to copy two or four pages onto one page. If you want to copy both sides of an ID card onto one page, see 2 in 1 ID Copy uu page 19. Important • Please make sure the paper size is set to A4, Letter, Legal or Folio. g Put the next page on the scanner glass. Press OK. Repeat steps f and g for each page of the document.
Making copies If you are copying from the scanner glass: Place your document face down in the direction shown below: 2 in 1 (P) 2 in 1 ID Copy 3 3 You can copy both sides of your identification card onto one page, keeping the original card size. Note 2 in 1 (L) 4 in 1 (P) 4 in 1 (L) You can copy an identification card to the extent permitted under applicable laws.
Chapter 3 g Turn over your identification card and place it at the left side of the scanner glass. Duplex (2-sided) copying Press Start. The machine scans the other side of the card and prints the page. If you want to use the automatic duplex copy feature, load your document in the ADF. If you get an Out of Memory message while you are making duplex copies, try installing extra memory. (See Installing extra memory uu page 28.
Making copies Advanced Duplex Copy (short edge flip) 3 1 sided i 2 Sided S Portrait 1 3 2 2 1 Landscape 1 1 2 2 a b Load your document. c Press Duplex and a or b to select 1sidedi2sided S. Press OK. d Press Start to copy the document. Enter the number of copies (up to 99) using the numeric keys.
A Routine maintenance Cleaning and checking the machine Clean the outside and inside of the machine regularly with a dry, lint-free cloth. When you replace the toner cartridge or the drum unit, make sure that you clean the inside of the machine. If printed pages are stained with toner, clean the inside of the machine with a dry, lint-free cloth. WARNING • DO NOT put a toner cartridge or a toner cartridge and drum unit assembly into a fire. It could explode, resulting in injuries.
Routine maintenance Checking the Page Counters A You can see the machine’s Page Counters for copies, printed pages, reports and lists or a summary total. a b c Press a or b to see Total, List, Copy or Print. for PF Kit 1, PF Kit 2 2, Fuser and Laser. Please call Brother Customer Service when the following messages appear on the LCD. Press Stop/Exit. LCD message Description Replace Parts Replace the fuser unit. A You can see the machine’s parts life on the LCD.
Packing and shipping the machine WARNING This machine is heavy and weighs more than 15.6 kg. Be careful not to pinch your fingers when you put the machine down. If you use a Lower Tray, DO NOT carry the machine with the Lower Tray as you may be injured or cause damage to the machine because it is not attached to the Lower Tray. Note A If for any reason you must ship your machine, carefully repack the machine in the original packaging to avoid any damage during transit.
Routine maintenance d Wrap the machine in a plastic bag. Put the machine on the packing material (1). e Put the two packing material pieces (1) into the carton matching the right of the machine to the “RIGHT” mark on one of the packing material pieces, and the left of the machine to the “LEFT” mark on the other packing material pieces. Put the AC power cord and printed materials in the original carton as shown in the illustration. LEFT RIGHT A 1 1 FRONT 1 f Close the carton and tape it shut.
g 26 Repack the lower tray as shown in the illustration.
B Options Optional paper tray (LT-5400) An optional lower tray can be installed, and it can hold up to 500 sheets of 80 g/m2 paper. When an optional tray is installed, the machine can hold up to 800 sheets of plain paper. B Memory board B B DCP-8110DN has 64 MB of standard memory. The machine has one slot for optional memory expansion. You can increase the memory up to a maximum of 320 MB for DCP-8110DN.
Installing extra memory a b B e Turn off the machine’s power switch. Disconnect the interface cable from the machine, and then unplug the power cord from the electrical socket. Hold the SO-DIMM by the edges and align the notches in the SO-DIMM with the protrusions in the slot. Insert the SO-DIMM diagonally (1), then tilt it toward the interface board until it clicks into place (2). 1 2 Note Be sure to turn off the machine’s power switch before you install or remove the SO-DIMM.
Options g Plug the machine’s power cord back into the electrical socket first, and then connect the interface cable. h Turn on the machine’s power switch. Note To make sure that you have installed the SO-DIMM correctly, you can print the User Settings List that shows the current RAM SIZE. (See User Settings List uu page 5 .
C Glossary C This is a comprehensive list of features and terms that appear in Brother manuals. Availability of these features depends on the model you purchased. ADF (automatic document feeder) The document can be placed in the ADF and scanned one page at a time automatically. Scanning The process of sending an electronic image of a paper document into your computer. Beeper Volume Volume setting for the beep when you press a key or make an error.
D Index A M Apple Macintosh See Software User's Guide. Machine information checking remaining life of parts ............ 23 page counts .......................................... 23 Macintosh See Software User's Guide. Maintenance, routine ............................... 22 checking the remaining life of parts ...... 23 Memory adding DIMM (option) ........................... 27 installing ............................................ 28 storage ...................................................
R Reducing copies ....................................................13 Reports Network Configuration Report .................5 User Settings List ....................................5 Restricted users .........................................8 S Scanning See Software User's Guide. Security Secure function lock administrator password ........................7 Public user mode .................................8 restricted users ....................................8 Setting lock ............................
Visit us on the World Wide Web http://www.brother.com/ This machine is approved for use in the country of purchase only. Local Brother companies or their dealers will only support machines purchased in their own countries.