
User Manual
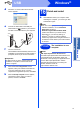
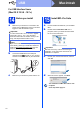
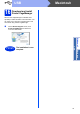
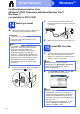
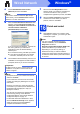
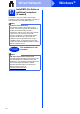
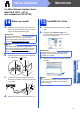
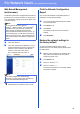
Table Of Contents
- Quick Setup Guide DCP-8110D/DCP-8110DN/DCP-8155DN
- Start Here
- 1 Unpack the machine and check the components
- 2 Remove the packing material from the machine
- 3 Load paper in the paper tray
- 4 Replace the control panel cover (if needed) (for Middle East and Turkey)
- 5 Connect the power cord
- 6 Set your country (for Middle East, Africa and Turkey)
- 7 Choose your language (if needed) (not available in some countries)
- 8 Set the LCD contrast (if needed)
- 9 Set the date and time
- 10 Set Daylight Saving Time (for Asia and Oceania)
- 11 Automatic Daylight Saving Time (for Middle East, Africa and Turkey)
- 12 Set the Time Zone (not available for DCP-8110D)
- 13 Choose your connection type
- For USB Interface Users (Windows® XP/XP Professional x64 Edition/Windows Vista®/Windows® 7)
- For USB Interface Users (Mac OS X 10.5.8 - 10.7.x)
- For Wired Network Interface Users (Windows® XP/XP Professional x64 Edition/Windows Vista®/Windows® 7) (not available for DCP-8110D)
- For Wired Network Interface Users (Mac OS X 10.5.8 - 10.7.x) (not available for DCP-8110D)
- For Network Users (not available for DCP-8110D)
- Other Information
- Options and Consumables
- Start Here

12
Macintosh
USB
For USB Interface Users
(Mac OS X 10.5.8 - 10.7.x)
14
Before you install
a Make sure your machine is connected to the
power and your Macintosh is ON. You must be
logged on with Administrator rights.
b Connect the USB cable to the USB port
marked with the symbol on your machine
and then connect the cable to your Macintosh.
c Make sure your machine's power switch is on.
15
Install MFL-Pro Suite
a Put the installer CD-ROM into your CD-ROM
drive.
b Double-click the Start Here OSX icon. If
prompted, select your model and then follow
the on-screen instructions.
c Choose your machine from the list, and then
click OK.
d When this screen appears, click Next.
Important
For users of Mac OS X 10.5.7 or lower, upgrade
to Mac OS X 10.5.8 - 10.7.x. (For the latest
drivers and information for the Mac OS X you are
using, visit http://solutions.brother.com/
.)
Note
If you want to add the PS driver (BR-Script3
printer driver), please go to the Brother Solutions
Center at http://solutions.brother.com/
and visit
FAQ's on your model page for instructions.
Important
DO NOT cancel any of the screens during the
installation. It may take a few minutes for the
installation to complete.
The installation of MFL-Pro Suite is now
complete.
Go to step 16 on page 13.