
User Manual
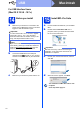
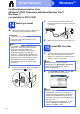
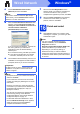
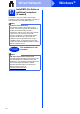
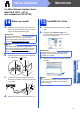
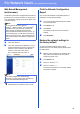

Table Of Contents
- Quick Setup Guide DCP-8110D/DCP-8110DN/DCP-8155DN
- Start Here
- 1 Unpack the machine and check the components
- 2 Remove the packing material from the machine
- 3 Load paper in the paper tray
- 4 Replace the control panel cover (if needed) (for Middle East and Turkey)
- 5 Connect the power cord
- 6 Set your country (for Middle East, Africa and Turkey)
- 7 Choose your language (if needed) (not available in some countries)
- 8 Set the LCD contrast (if needed)
- 9 Set the date and time
- 10 Set Daylight Saving Time (for Asia and Oceania)
- 11 Automatic Daylight Saving Time (for Middle East, Africa and Turkey)
- 12 Set the Time Zone (not available for DCP-8110D)
- 13 Choose your connection type
- For USB Interface Users (Windows® XP/XP Professional x64 Edition/Windows Vista®/Windows® 7)
- For USB Interface Users (Mac OS X 10.5.8 - 10.7.x)
- For Wired Network Interface Users (Windows® XP/XP Professional x64 Edition/Windows Vista®/Windows® 7) (not available for DCP-8110D)
- For Wired Network Interface Users (Mac OS X 10.5.8 - 10.7.x) (not available for DCP-8110D)
- For Network Users (not available for DCP-8110D)
- Other Information
- Options and Consumables
- Start Here

15
Windows
®
Wired Network
Windows
®
Macintosh
Wired Network
c Choose Wired Network Connection
(Ethernet) and then click Next.
d When the Firewall/AntiVirus detected screen
appears, choose Change the Firewall port
settings to enable network connection and
continue with the installation.
(Recommended) and click Next.
If you are not using the Windows
®
Firewall, see
the user’s guide for your software for
information on how to add the following
network ports.
For network scanning, add UDP port 54925.
If you still have trouble with your network
connection, add UDP port 161 and 137.
e The installation will automatically continue. The
installation screens appear one after another. If
prompted, follow any on-screen instructions.
f When the On-Line Registration screen
appears, make your selection and follow the
on-screen instructions. Once you have
completed the registration process, click Next.
g When the Setup Complete screen appears,
check the box of the action you want to
perform, and then click Next.
16
Finish and restart
a Click Finish to restart your computer. After
restarting the computer, you must log on with
Administrator rights.
Note
If you want to install the PS driver (BR-Script3
printer driver), choose Custom Install and then
follow the on-screen instructions.
Important
DO NOT cancel any of the screens during the
installation. It may take a few seconds for all
screens to appear.
Note
• If prompted, choose your machine from the list,
and then click Next.
• If your machine is not found over the network,
confirm your settings by following the on-screen
instructions.
• If there is more than one of the same model
connected on your network, the IP Address and
Node Name will be displayed to help you
identify the machine.
• You can find your machine’s IP address and the
node name by printing out the Network
Configuration Report. See Print the Network
Configuration Report on page 19.
• For Windows Vista
®
and Windows
®
7 users,
when the Windows Security screen appears,
select the check box and click Install to
complete the installation correctly.
Note
• If an error message appears during the
software installation, run the Installation
Diagnostics located in
Start/All Programs/Brother/DCP-XXXX LAN
(where DCP-XXXX is your model name).
• Depending on your security settings, a
Windows
®
Security or antivirus software
window may appear when using the machine or
its software. Please allow or permit the window
to continue.