
User Manual
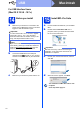
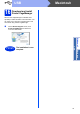
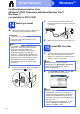
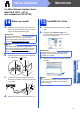
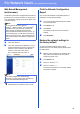

Table Of Contents
- Quick Setup Guide DCP-8110D/DCP-8110DN/DCP-8155DN
- Start Here
- 1 Unpack the machine and check the components
- 2 Remove the packing material from the machine
- 3 Load paper in the paper tray
- 4 Replace the control panel cover (if needed) (for Middle East and Turkey)
- 5 Connect the power cord
- 6 Set your country (for Middle East, Africa and Turkey)
- 7 Choose your language (if needed) (not available in some countries)
- 8 Set the LCD contrast (if needed)
- 9 Set the date and time
- 10 Set Daylight Saving Time (for Asia and Oceania)
- 11 Automatic Daylight Saving Time (for Middle East, Africa and Turkey)
- 12 Set the Time Zone (not available for DCP-8110D)
- 13 Choose your connection type
- For USB Interface Users (Windows® XP/XP Professional x64 Edition/Windows Vista®/Windows® 7)
- For USB Interface Users (Mac OS X 10.5.8 - 10.7.x)
- For Wired Network Interface Users (Windows® XP/XP Professional x64 Edition/Windows Vista®/Windows® 7) (not available for DCP-8110D)
- For Wired Network Interface Users (Mac OS X 10.5.8 - 10.7.x) (not available for DCP-8110D)
- For Network Users (not available for DCP-8110D)
- Other Information
- Options and Consumables
- Start Here

18
Macintosh
Wired Network
d When this screen appears, click Next.
16
Download and install
Presto! PageManager
When Presto! PageManager is installed OCR
capability is added to Brother ControlCenter2. You
can easily scan, share and organize photos and
documents using Presto! PageManager.
a On the Brother Support screen, click
Presto! PageManager and follow the
on-screen instructions.
17
Install MFL-Pro Suite on
additional computers
(if needed)
If you want to use your machine with multiple
computers on the network, install MFL-Pro Suite on
each computer. Go to step 15 on page 17.
Note
• You can find your machine’s MAC Address
(Ethernet Address) and IP Address by printing
out the Network Configuration Report. See Print
the Network Configuration Report on page 19.
• If this screen appears click OK.
1) Enter a name for your Macintosh in
Display Name (up to 15 characters long).
2) If you want to use the machine’s SCAN key
to scan over the network, you must check the
Register your computer with the "Scan
To" function on the machine box.
3) Click OK. Go to d.
• The name you enter will appear on the
machine’s LCD when you press (SCAN)
and choose a scan option. (For more
information, see Network Scanning (For
network models) in the Software User's Guide.)
The installation of MFL-Pro Suite is now
complete.
Go to step 16 on page 18.
Finish
The installation is now
complete.