
User Manual
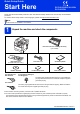

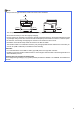
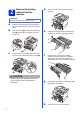
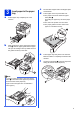
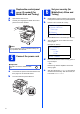

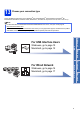
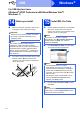
Table Of Contents
- Quick Setup Guide DCP-8110D/DCP-8110DN/DCP-8155DN
- Start Here
- 1 Unpack the machine and check the components
- 2 Remove the packing material from the machine
- 3 Load paper in the paper tray
- 4 Replace the control panel cover (if needed) (for Middle East and Turkey)
- 5 Connect the power cord
- 6 Set your country (for Middle East, Africa and Turkey)
- 7 Choose your language (if needed) (not available in some countries)
- 8 Set the LCD contrast (if needed)
- 9 Set the date and time
- 10 Set Daylight Saving Time (for Asia and Oceania)
- 11 Automatic Daylight Saving Time (for Middle East, Africa and Turkey)
- 12 Set the Time Zone (not available for DCP-8110D)
- 13 Choose your connection type
- For USB Interface Users (Windows® XP/XP Professional x64 Edition/Windows Vista®/Windows® 7)
- For USB Interface Users (Mac OS X 10.5.8 - 10.7.x)
- For Wired Network Interface Users (Windows® XP/XP Professional x64 Edition/Windows Vista®/Windows® 7) (not available for DCP-8110D)
- For Wired Network Interface Users (Mac OS X 10.5.8 - 10.7.x) (not available for DCP-8110D)
- For Network Users (not available for DCP-8110D)
- Other Information
- Options and Consumables
- Start Here

4
2
Remove the packing
material from the
machine
a Remove the packing tape from the outside of
the machine and the film covering the scanner
glass.
b Open the MP tray a, and remove the packing
tape b from the MP tray support, then close
the MP tray.
c Press the front cover release button and open
the front cover. Remove the silica gel pack a.
CAUTION
CAUTION
DO NOT eat the silica gel pack. Please throw
away. If ingested, seek medical attention
immediately.
d Take out the drum unit and toner cartridge
assembly.
e Remove the orange protective material from
the drum unit and toner cartridge assembly.
f Hold the drum unit and toner cartridge
assembly level with both hands and gently
shake it from side to side several times to
distribute the toner evenly inside the cartridge.
g Put the drum unit and toner cartridge assembly
firmly back in the machine.
h Close the front cover of the machine.
Important
DO NOT connect the AC power cord yet.