
User Manual
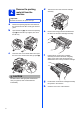
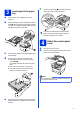
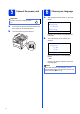

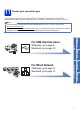
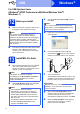
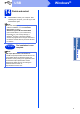
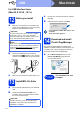
Table Of Contents
- Quick Setup Guide DCP-8110DN
- Start Here
- 1 Unpack the machine
- 2 Remove the packing material from the machine
- 3 Load paper in the paper tray
- 4 Attach the control panel cover
- 5 Connect the power cord
- 6 Choose your language
- 7 Set the LCD contrast (if needed)
- 8 Set the date and time
- 9 Automatic Daylight Saving Time
- 10 Set the Time Zone
- 11 Choose your connection type
- For USB Interface Users (Windows® XP/XP Professional x64 Edition/Windows Vista®/Windows® 7)
- For USB Interface Users (Mac OS X 10.5.8 - 10.7.x)
- For Wired Network Interface Users (Windows® XP/XP Professional x64 Edition/Windows Vista®/Windows® 7)
- For Wired Network Interface Users (Mac OS X 10.5.8 - 10.7.x)
- Options and Consumables
- Start Here

5
7
Set the LCD contrast
(if needed)
If you are having difficulty reading the LCD, try
changing the contrast setting.
a Press Menu, 1, 6.
b Press c to increase the contrast.
—OR—
Press d to decrease the contrast.
Press OK.
c Press Stop/Exit.
8
Set the date and time
a Press Menu, 6, 1, 1.
b Enter the last two digits of the year on the dial
pad, and then press OK.
(e.g. Enter 1, 2 for 2012.)
c Enter the two digits for the month on the dial
pad, and then press OK.
(e.g. Enter 0, 3 for March.)
d Enter the two digits for the day on the dial pad,
and then press OK.
(e.g. Enter 2, 5 for 25th.)
e Enter the time in 24-hour format on the dial
pad, and then press OK.
(e.g. Enter 1, 5, 2, 5 for 15:25.)
f Press Stop/Exit.