
User Manual


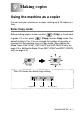
Table Of Contents
- USER'S GUIDE FAX-1840C/FAX-1940CN/MFC-3240C/MFC-3340CN
- APPROVAL INFORMATION
- Compilation and Publication Notice
- "EC" Declaration of Conformity
- Safety precautions
- Choosing a location
- Quick Reference Guide
- Table of Contents
- 1 Introduction
- 2 Getting started
- Initial Setup
- General Setup
- Setting the Mode Timer (MFC-3240C and MFC-3340CN only)
- Setting the Mode Timer (FAX-1835C, FAX-1840C and FAX-1940CN only)
- Setting the Paper Type
- Setting the Paper Size
- Setting the Ring Volume
- Setting the Beeper Volume
- Setting the Speaker Volume
- Turning on Automatic Daylight Savings Time
- Setting the LCD Contrast
- 3 Setup Send
- How to enter Fax mode
- How to dial
- How to Fax (B&W and Colour)
- Basic sending operations
- Advanced sending operations
- Broadcasting (Not available for colour faxes)
- Overseas Mode
- Delayed Fax (Not available for colour faxes)
- Delayed Batch Transmission (Not available for colour faxes)
- Setup for Polled Transmit (Standard) (Not available for colour faxes)
- Setup for Polled Transmit with Secure Code (Not available for colour faxes)
- TX Lock (FAX-1835C, FAX-1840C, MFC-3240C and MFC-3340CN only)
- Memory Security (FAX-1940CN only)
- 4 Setup Receive
- Basic receiving operations (FAX-1835C, FAX-1840C, MFC-3240C and MFC-3340CN only)
- Basic receiving operations (FAX-1940CN only)
- Choosing the Receive Mode
- Setting the Ring Delay
- Setting Toll Saver (TAD mode)
- Setting the F/T Ring Time (Fax/Tel mode only)
- Setting the Fax/Tel Announcement (FAX-1940CN only)
- Fax Detect (FAX-1835C, MFC-3240C and MFC-3340CN only)
- Fax Detect (FAX-1840C and FAX-1940CN only)
- Printing a reduced incoming fax (Auto Reduction)
- Receiving a fax at the end of a conversation
- Printing a fax from the memory
- Reception into memory (Not available for colour fax reception)
- Polling
- 5 Quick-Dial numbers and dialling options
- 6 Remote Fax Options (Not available for colour faxes)
- 7 TAD (Telephone Answering Device) (FAX-1940CN only)
- TAD mode
- Setting up the TAD
- Recording TAD Outgoing Message
- Activating TAD mode
- Message indicator
- Playing voice messages
- Printing a fax message
- Erasing incoming messages
- Setting Maximum Time for incoming messages
- Setting Toll Saver
- ICM Recording Monitor
- Recording a conversation
- Record Fax/Tel Outgoing Announcement (F/T OGM)
- TAD mode
- 8 Printing reports
- 9 Making copies
- 10 Walk-Up PhotoCapture Center™ (MFC-3340CN only)
- 11 Important information
- 12 Troubleshooting and routine maintenance
- Appendix A
- Appendix B
- Glossary
- Specifications
- Product description
- General
- Print media
- Copy
- PhotoCapture Center™ (MFC-3340CN only)
- Fax
- Scanner (MFC-3240C and MFC-3340CN only)
- Printer
- Interfaces
- Computer requirements
- Consumable items
- Network (LAN) (FAX-1940CN and MFC-3340CN only)
- Optional External Wireless Print/Scan Server (NC-2200w) (MFC-3240C and MFC-3340CN only)
- Index
- Remote Retrieval Access card (FAX-1940CN only)
- Remote Retrieval Access card (FAX-1835C, FAX-1840C, MFC-3240C and MFC-3340CN only)
- brother UK/IRE/SAF/PAN NORDIC

7 - 2 TAD (TELEPHONE ANSWERING DEVICE) (FAX-1940CN ONLY)
Recording TAD Outgoing Message
Recording the TAD Outgoing Message (
TAD Message
) is the first
step you need to follow before you can turn on the TAD. Make sure
your OGM is less than 20 seconds long.
1
Press
Menu/Set
,
2
,
7
,
1
.
The LCD prompts you to choose an
OGM.
2
Press
▲
or
▼
to select
TAD Message
(not
F/T Message
).
Press
Menu/Set
.
3
Press
▲
or
▼
to select
Record MSG
.
Press
Menu/Set
.
4
Pick up the handset to record a message.
For example: Hello. We are unable to take your call at this time.
Please leave a message after the signal.
5
Replace the handset.
The TAD will play your OGM.
6
Press
Stop/Exit
.
This is the only setting you can select if you want to turn on
the TAD.
1.OGM
TAD Message