
Quick Setup Guide
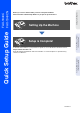


Table Of Contents
- Quick Setup Guide
- Getting Started
- Table of Contents
- Setting Up the Machine
- 1 Removing the Protective Parts
- 2 Installing the Handset
- 3 Loading Paper
- 4 Installing the Phone Line and Power Cord
- 5 Installing the Ink Cartridges
- 6 Print Quality Check
- 7 Setting the Date and Time
- 8 Setting Your Station ID
- 9 Selecting a Receive Mode (FAX-1840C only)
- 10 Selecting a Receive Mode (FAX-1940CN only)
- 11 Setting Up the Message Center (FAX-1940CN only)
- 12 Selecting Your Language (Canada only)
- 13 Sending in the Product Registration and Test Sheet (USA only)
- 14 Using the FAX as a Printer or for PC-FAX Send
- 15 Using the Network features of the FAX-1940CN
- Replacement Consumables

4
Setting Up the Machine
1
Remove the protective tape and paper.
1
Connect the curled handset cord to the MFC
and the other end to the handset.
1
Pull the paper tray completely out of the
machine and remove the output paper tray.
2
Press and slide the paper guide to fit the
paper width.
3
Pull out the paper support and unfold the
paper support flap.
4
Fan the stack of paper well to avoid paper
jams and mis-feeds.
5
Gently insert the paper into the paper tray
print side down and top edge first.
Check that the paper is flat in the tray and
below the maximum paper mark.
6
Put the output paper tray back on and push
the paper tray firmly back into the machine.
1
Removing the Protective
Parts
2
Installing the Handset
3
Loading Paper
You can load up to 100 sheets of 20 lb
paper.
For more details, see “About paper” in
Chapter 1 of the User’s Guide.
Use the paper support flap for Letter, Legal
and A4 size paper.
■
Make sure the paper side guides touch the
sides of the paper.
■
Be careful that you do not push the paper
in too far; it may lift at the back of the tray
and cause paper feed problems.
Paper Side Guide
Paper Support
Paper Support Flap