
User's Guide
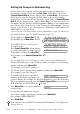
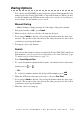

Table Of Contents
- YL4_US.pdf
- Brother Numbers
- Ordering Accessories and Supplies
- Notice – Disclaimer of Warranties (For USA and Canada)
- Compilation and Publication Notice
- BROTHER ONE YEAR LIMITED WARRANTY and EXCHANGE SERVICE (For USA Only)
- BROTHER ONE YEAR LIMITED WARRANTY and EXCHANGE SERVICE (For USA Only)
- BROTHER MULTIFUNCTION CENTER/FACSIMILE MACHINE LIMITED WARRANTY (For Canada Only)
- Quick Reference Guide
- Table of Contents
- 1 Introduction
- 2 Assembly and Connections
- Packing List
- Choosing a Location
- Assembly
- Installing the Drum Unit Assembly (with Toner Cartridge)
- Setting Up the FAX/MFC
- Loading Paper
- Acceptable Paper
- Paper Capacity of Feeder
- Connecting an External Telephone
- Connecting an External Telephone Answering Device (TAD)
- Special Line Considerations
- Multi-Line Connections (PBX)
- Custom Features on a Your Phone Line
- 3 On-Screen Programming
- 4 Initial Setup
- Getting Started
- Setting Paper Size
- Setting Date and Time
- Setting Station ID
- Setting the Ring Volume
- Setting the Beeper Volume
- Setting the Speaker Volume
- Setting the Handset Volume
- Choosing the Handset Volume (For Volume Amplify)
- Setting Volume Amplify
- Memory Storage
- Turning On Automatic Daylight Savings Time
- Toner Save
- Sleep Mode
- Setting Tone/Pulse Dialing Mode (For Canada Only)
- Getting Started
- 5 Setup Receive
- 6 Setup Send
- 7 Auto Dial Numbers and Dialing Options
- 8 Telephone Services
- 9 Remote Fax Options
- 10 Printing Reports
- 11 Making Copies
- 12 Using Brother Machine as a Printer
- 13 Printer Driver Settings (For Windows® Only)
- 14 Using the Windows®-Based Brother MFL-Pro Control Center (For Windows® Only)
- 15 Scanner and Using ScanSoft™ PaperPort® and TextBridge® OCR
- Using ScanSoft™ PaperPort® and TextBridge®
- Viewing Items
- Organizing Your Items in Folders
- Links to Many Other Applications
- Using ScanSoft™ TextBridge® OCR (Converting Image Text to Text You Can Edit)
- Importing Items from Other Applications
- Exporting Items in Other Formats
- Accessing the Scanner
- Scanning a Document into Your PC
- Settings in the Scanner Window
- PreScanning an Image
- Using ScanSoft™ PaperPort® and TextBridge®
- 16 Setting Up and Using PC FAX (For Windows® Only)
- Introduction
- MFC Remote Setup
- PC FAX Sending (For Windows® Only)
- Setting Up Speed Dial
- The Address Book
- Setting Up a Member in the Address Book
- Setting Up a Group for Broadcasting
- Editing Member Information
- Deleting a Member or Group
- Exporting the Address Book
- Importing to the Address Book
- Setting Up a Cover Page
- Sending a File as a PC-FAX Using the Facsimile Style
- Sending a File as a PC-FAX Using the Simple Style
- 17 Using Automatic E-Mail Printing
- 18 Using the Brother MFC with a New Power Macintosh® G3, G4 or iMac™/iBook
- 19 Important Information
- 20 Troubleshooting and Routine Maintenance
- Glossary
- Specifications
- Index
- Remote Retrieval Access Card

SETUP SEND
6 - 6
Composing Electronic Cover Page
The cover page is generated at the receiving party’s machine. Your cover page
includes the name stored in the One Touch (FAX-2800 Only) or Speed Dial
memory. If you’re dialing manually, the name is left blank.
The cover page indicates your Station ID and the number of pages you’re
sending. If you have Cover page Setup set to ON, the number of pages remains
blank. (Menu/Set, 2, 2, 8) (See
Setting Station ID, page 4-2.)
You can select a comment to include on your cover page.
Instead of using one of the comments above, you can enter up to two customized
messages, each 27 characters long. Use the chart on page 4-2 to help enter
characters. (See Composing Your Own Comments below.)
Most of the SETUP SEND menu selections are temporary settings that allow
you to make adjustments for each document you send. However, so you can set
up your cover page and cover page comments in advance, the Cover Page Setup
and Cover Page Message features will change the default settings.
Composing Your Own Comments
You can set up two custom comments.
1
Press Menu/Set, 2, 2, 9.
2
Press to choose position 5 or 6 for your customized comment, and then
press Menu/Set.
3
Use the dial pad to enter your customized comment, and then press Menu/Set.
(See
Entering Text, page 4-2.)
4
Press 1 if you want to select additional settings. The LCD returns to the SETUP
SEND menu—OR—Press 2 to exit.
1.COMMENT OFF
2.PLEASE CALL
3.URGENT
4.CONFIDENTIAL
5.(USER DEFINED)
6.(USER DEFINED)
9.COVERPAGE MSG
or