
User's Guide
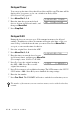
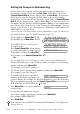
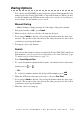

Table Of Contents
- YL4_US.pdf
- Brother Numbers
- Ordering Accessories and Supplies
- Notice – Disclaimer of Warranties (For USA and Canada)
- Compilation and Publication Notice
- BROTHER ONE YEAR LIMITED WARRANTY and EXCHANGE SERVICE (For USA Only)
- BROTHER ONE YEAR LIMITED WARRANTY and EXCHANGE SERVICE (For USA Only)
- BROTHER MULTIFUNCTION CENTER/FACSIMILE MACHINE LIMITED WARRANTY (For Canada Only)
- Quick Reference Guide
- Table of Contents
- 1 Introduction
- 2 Assembly and Connections
- Packing List
- Choosing a Location
- Assembly
- Installing the Drum Unit Assembly (with Toner Cartridge)
- Setting Up the FAX/MFC
- Loading Paper
- Acceptable Paper
- Paper Capacity of Feeder
- Connecting an External Telephone
- Connecting an External Telephone Answering Device (TAD)
- Special Line Considerations
- Multi-Line Connections (PBX)
- Custom Features on a Your Phone Line
- 3 On-Screen Programming
- 4 Initial Setup
- Getting Started
- Setting Paper Size
- Setting Date and Time
- Setting Station ID
- Setting the Ring Volume
- Setting the Beeper Volume
- Setting the Speaker Volume
- Setting the Handset Volume
- Choosing the Handset Volume (For Volume Amplify)
- Setting Volume Amplify
- Memory Storage
- Turning On Automatic Daylight Savings Time
- Toner Save
- Sleep Mode
- Setting Tone/Pulse Dialing Mode (For Canada Only)
- Getting Started
- 5 Setup Receive
- 6 Setup Send
- 7 Auto Dial Numbers and Dialing Options
- 8 Telephone Services
- 9 Remote Fax Options
- 10 Printing Reports
- 11 Making Copies
- 12 Using Brother Machine as a Printer
- 13 Printer Driver Settings (For Windows® Only)
- 14 Using the Windows®-Based Brother MFL-Pro Control Center (For Windows® Only)
- 15 Scanner and Using ScanSoft™ PaperPort® and TextBridge® OCR
- Using ScanSoft™ PaperPort® and TextBridge®
- Viewing Items
- Organizing Your Items in Folders
- Links to Many Other Applications
- Using ScanSoft™ TextBridge® OCR (Converting Image Text to Text You Can Edit)
- Importing Items from Other Applications
- Exporting Items in Other Formats
- Accessing the Scanner
- Scanning a Document into Your PC
- Settings in the Scanner Window
- PreScanning an Image
- Using ScanSoft™ PaperPort® and TextBridge®
- 16 Setting Up and Using PC FAX (For Windows® Only)
- Introduction
- MFC Remote Setup
- PC FAX Sending (For Windows® Only)
- Setting Up Speed Dial
- The Address Book
- Setting Up a Member in the Address Book
- Setting Up a Group for Broadcasting
- Editing Member Information
- Deleting a Member or Group
- Exporting the Address Book
- Importing to the Address Book
- Setting Up a Cover Page
- Sending a File as a PC-FAX Using the Facsimile Style
- Sending a File as a PC-FAX Using the Simple Style
- 17 Using Automatic E-Mail Printing
- 18 Using the Brother MFC with a New Power Macintosh® G3, G4 or iMac™/iBook
- 19 Important Information
- 20 Troubleshooting and Routine Maintenance
- Glossary
- Specifications
- Index
- Remote Retrieval Access Card

SETUP SEND
6 - 8
Using a Printed Cover Page
If you prefer using a printed cover page that you can write on, you can print the
sample page and attach it to your fax.
1
Press Menu/Set, 2, 2, 8.
2
Press to select PRINT SAMPLE?, and then press Menu/Set.
3
Press Fax Start. Your FAX/MFC prints a copy of your cover page.
4
Press Stop/Exit.
Advanced Sending Operations
Overseas Mode
After you send a fax using this feature, the feature turns itself off.
1
Place the original face down in the ADF.
2
Press Menu/Set, 2, 2, 0.
3
Press to select ON (or OFF),
and then press Menu/Set.
4
Press 1 if you want to select additional settings. The LCD returns to the SETUP
SEND menu—OR—Press 2 if you are finished choosing settings.
5
Enter the fax number you’re calling.
6
Press Fax Start.
8.COVERPG SETUP
or
- - -
- - -
- - -
- - -
TO:
FROM:
COMMENT:
FAX:
TEL:
COVER PAGE
PAGE[S] TO FOLLOW
0.OVERSEAS MODE
or