Brother Laser Printer HL-1270N Network built in model Network User’s Guide Please read this manual thoroughly before using the printer. You can print or view this manual from the CD-ROM at any time, please keep the CD-ROM in a convenient place for quick and easy reference at all times.
TABLE OF CONTENTS Chapter 1 How to Configure TCP/IP printing for Unix Systems 1-1 TCP/IP 1-1 TCP/IP UNIX Host Configuration Linux Configuration HP/UX Configuration IBM RS/6000 AIX Configuration Sun Solaris 2.
Chapter 2 How to Configure TCP/IP printing for Windows NT, LAN Server and OS/2 Warp Server 2-1 Windows NT(TCP/IP) Configuration 2-1 Configuring an IP address for the Print Server Changing the IP Address using the BRAdmin32 application Changing the IP Address using the ARP command 2-3 2-3 2-5 Windows NT Print Queue Configuration Windows NT 4.0 Print Queue Configuration (Printer Driver already installed) Windows NT 4.0 Print Queue Configuration (Printer Driver not installed) Windows NT 3.
Chapter 4 How to Configure Peer-to-Peer (NetBIOS) printing for Windows 95/98/NT, LAN Server and OS/2 Warp Server 4-1 Introduction 4-1 Print Server Configuration Changing the workgroup/domain name using TELNET or BRCONFIG or a web browser 4-2 4-3 NetBIOS Port Monitor for Windows 95/98, NT4.
Chapter 6 How to Configure Novell Netware printing using IPX/SPX 6-1 General Information 6-1 Creating a Print Queue Using BRAdmin32 Configuring the Brother Print Server (Queue Server Mode in Bindery emulation mode) using BRAdmin32 Configuring the Brother Print Server (Queue Server Mode in NDS mode) using BRAdmin32 Configuring the Brother Print Server (Queue Server Mode in NDS mode) using Novell NWADMIN and BRAdmin32 Configuring the Brother Print Server (Remote Server Mode in NDS mode) using Novell NWAdm
Chapter 8 How to Configure DLC/LLC printing for Windows NT 8-1 Configuring DLC on Windows NT Windows NT 4.0 Printer Setup Windows NT 3.
Chapter 10 TROUBLESHOOTING 10-1 Overview 10-1 Installation problems 10-1 Intermittent Problems 10-3 TCP/IP Troubleshooting 10-4 UNIX Troubleshooting 10-5 Windows NT/LAN Server (TCP/IP) Troubleshooting 10-6 Windows 95/98 Peer to Peer Print (LPR) Troubleshooting 10-6 Windows 95/98 (or later) Peer-to-Peer (HP JetAdmin compatible method) Troubleshooting 10-7 Windows 95/98/NT 4.
APPENDIX Command Summary General Commands NetWare Commands AppleTalk Commands NetBIOS Commands DLC commands Internet Print Commands A-1 A-1 A-6 A-7 A-7 A-7 A-8 Using Services A-9 Reloading the Print Server Firmware General A-12 A-12 Reloading from BRAdmin32 on the Windows 95/98/NT4.
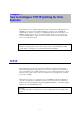
Chapter 1 How to Configure TCP/IP printing for Unix Systems Brother print servers are supplied with the Transmission Control Protocol/Internet Protocol (TCP/IP) protocol suite. Since virtually all UNIX host computers support TCP/IP, this capability allows a printer to be shared on a UNIX Ethernet network.
TCP/IP UNIX Host Configuration The configuration process for most UNIX systems is described in the following steps. Unfortunately, this process can vary, so refer to your system documentation (or man pages) for additional information. 1. Configure the /etc/hosts file on each UNIX host that needs to communicate with the print server or provide similar information to a nameserver on the network.
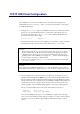
3. ✒ Note This step applies to the majority of UNIX systems, including Sun OS (but not Solaris 2.xx), Silicon Graphics (lpr/lpd option required), DEC ULTRIX, DEC OSF/1, and Digital UNIX. SCO UNIX users should follow these steps, but should also refer to the SCO UNIX Configuration section. Users of RS/6000 AIX, HP/UX, Sun Solaris 2.xx, and other systems that do not use the printcap file.
3-a. ✒ Note Skip this section if you have completed Step 3, unless you have an SCO UNIX system. If you have an HP/UX system, IBM RS/6000 AIX computer, or Sun Solaris 2.xx, there is no printcap file. This is also true for some other AT&T-based UNIX systems, as well as many VMS-based TCP/IP software packages (for example, UCX, TGV Multinet, etc.).
HP/UX Configuration In the case of HP/UX, the sam program is used to set up the remote printer. The steps are as follows: - Enter sam and select "Peripheral Devices" and then "Add Remote Printer" (not "Networked printer") Enter the following remote printer settings (the other settings do not matter): Line printer name (user-selectable) Remote system name (the print server name; must match what is in hosts file or use print server IP address) Remote printer queue (Printserver binary or text service name, e.
Sun Solaris 2.x Configuration Sun Solaris 2.x uses the lpsystem and lpadmin programs for remote printer configuration: lpsystem -t bsd queue lpadmin -p queue -sprnservername!prnserverservice accept queue enable queue • Where queue is the name of the local print queue. • prnservername is the name of the print server (must match the entry in the /etc/hosts file). • prnserverservice is the print server Binary or Text service.
Other Non-Standard Configurations DEC TCP/IP Servers for VMS(UCX) You need to run the sys$system:ucx:$lprsetup command, specify a printer name, and then enter the print server IP address as the remote system name. Specify one of the print server services (see beginning of this section for options) as the remote system printer name (accept the defaults for other questions).
Other Systems Other systems use similar programs to set up Print servers. These programs will generally ask for the following information: Requested information: remote printer remote host computer name remote host IP address You should use: Binary or Text service name Any name (must match the name in the printcap file, if any) or in some cases, you may enter the print server IP address here IP address of print server.
IP Address Configuration The final step before printing is to program the IP address information into the print server. This can be done in any of the following ways: a) BRAdmin32 (for Windows 95/98/NT 4.0 using the IPX/SPX or TCP/IP protocol) b) DHCP, Reverse Arp (rarp), BOOTP c) The UNIX arp command. The following step (e, f, g) is effective way, when you change IP address. But a valid IP address must already be programmed into the print server.
The BRAdmin32 utility can use the IPX/SPX or TCP/IP protocols to communicate with the Brother print server. As the default IP address of Brother print servers is 192.0.0.192, this means that the print server will probably be incompatible with the IP address numbering scheme on your network. If you are not using DHCP, BOOTP or RARP, you will probably want to change the IP address. There are two ways that you can do this from within BRAdmin32.
3. Select the “Device” menu and choose the “Setup Unconfigured Device”. 4. Select the MAC address of your print server and click the Configure button. ✒ Note You can find the node name and MAC address by printing out the printer configuration page. Refer to the Quick Setup Guide for information on how to print the configuration page on your print server. 5. Input the IP address, Subnet mask and Gateway (If needed) of your print server. 6. Click OK then select Close.
Using arp to Configure the Print Server IP Address Arp is the simplest method of configuring the print server IP address. To use, arp, enter the following command at the UNIX system prompt: arp -s ipaddress ethernetaddress where ethernetaddress is the Ethernet address (MAC address) of the print server and ipaddress is the IP address of the print server. For example: arp -s 192.189.207.
Using RARP to Configure the IP Address Brother print server IP address can be configured using the Reverse ARP (rarp) facility on your host computer. This is done by editing the /etc/ethers file (if this file does not exist, you can create it) with an entry similar to the following: 00:80:77:31:01:07 BRN_310107 where the first entry is the Ethernet address of the print server and the second entry is the name of the print server (the name must be the same as the one you put in the /etc/hosts file).
Using BOOTP to Configure the IP Address BOOTP is an alternative to rarp that has the advantage of allowing configuration of the subnet mask and gateway. In order to use BOOTP to configure the IP address make sure that BOOTP is installed and running on your host computer (it should appear in the /etc/services file on your host as a real service; type man bootpd or refer to your system documentation for information). BOOTP is usually started up via the /etc/inetd.
Changing the IP Address settings with the Remote Console a If you are using the remote console, such as TELNET, you will be expected to enter the password of the print server. Press RETURN and enter the default password of “access” in response to the "#" prompt (it will not echo). b You will be prompted for a user name. Enter anything in response to this prompt. c You will then get the Local> prompt.
Before attempting to print It is very important to verify the connection between the host and the print server by using the ping command with the IP address you have set. For example: ping 192.189.207.3 You should get a reply back from the print server. If you get an error message, or no response, then there is no connection. You will not be able to print if you cannot ping the print server.
IP Security Brother print servers provide a means of allowing only host computers with authorized IP addresses to access the print server. This is very useful for applications where general access to the printer is not allowed. The console command SET IP ACCESS ENABLED ipaddress enters a host computer IP address into the access table of the print server (where ipaddress is the IP address of the host computer; refer to Appendix A for information on using the print server console).
Chapter 2 How to Configure TCP/IP printing for Windows NT, LAN Server and OS/2 Warp Server Users of Windows NT can print directly to a network ready Brother using the TCP/IP protocol. Microsoft Windows NT 3.5x and NT 4.0 users must install Microsoft's "TCP/IP printing" protocol. Brother’s Print Server also support transparent printing from IBM LAN Server and OS/2 Warp Server file servers, as well as from OS/2 Warp Connect workstations using the TCP/IP protocol.
NT 4.0 systems: a Running the Network applet, click on the Protocols tab. b Select Add, and double click on TCP/IP protocol. c Insert the requested disk(s), or CD-ROM, to copy the required files. d Click on the Services tab, click on Add and double click on Microsoft TCP/IP Printing. e Again insert the requested disk (s) or CD-ROM. f Click on the Protocols tab when then copying is finished.
Configuring an IP address for the Print Server You must now set an IP address into the Brother Print Server. There are several ways of doing this: If your printer has an LCD panel you can use the front panel buttons to change the IP address, subnet mask and gateway addresses. Refer to Quick Setup Guide for instructions on how to do this. You can also use the BRadmin32 Windows utility to change the IP address.
If your PC has Netware Client Software, do the following: 1. Select IPX/SPX filter in the left frame of the main window. 2. Check the print server name (the default node name will be BRN_xxxxxx, where “xxxxxx” is the last six digits of the Ethernet address (MAC address)). If you cannot find your print server , select the “Device” menu and choose “Search Active Devices” (you can also press the F4 key) and try again.
✒ Note You can find the MAC address by printing out the printer configuration page. Refer to the Quick Setup Guide for information on how to print the configuration page on your print server. 5. Input the IP address, Subnet mask and Gateway (If needed) of your print server. 6. Click OK then select Close. With the correctly programmed IP address, you will see the Brother print server in the device list.
✒ Note • You must be on the same Ethernet segment (that is, there cannot be a router between the print server and the Windows NT system) to use the arp -s command. • If there is a router, you may use BOOTP or other methods described in How to configure TCP/IP printing for UNIX system to enter the IP address.
Windows NT Print Queue Configuration Windows NT 4.0 Print Queue Configuration (Printer Driver already installed) ✒ Note If you have Windows NT 3.5 or 3.51, skip to the Windows NT 3.5x section. If you have already installed the appropriate Brother printer driver do the following: 1. Click on Start then select Settings/Printers to display the currently installed printer drivers. 2. Double click the printer driver you wish to configure and select Printer menu and then choose Properties. 3.
Windows NT 4.0 Print Queue Configuration (Printer Driver not installed) ✒ Note If you have Windows NT 3.5 or 3.51, skip to the next section. 1. Go to the Start button, choose Settings, and then select Printers. Double click the Add Printer icon to get the Add Printer Wizard. Click. Select My Computer (Not Network Printer) and click on Next. 2.
8. If desired, change the name of the printer then click on Next. 9. If desired, make the printer shared (so other users can access it), and select the operating system(s) that these other computers will be running. Click on Next. 10. Select Yes when you are asked "Would you like to print a test page?" Click on Finish to complete the installation. You may now print to the printer as if it were a local printer. Windows NT 3.5x Print Queue Configuration If you have Windows NT 3.5 or 3.
LAN Server, OS/2 Warp Server Configuration Brother Print Servers will work with IBM LAN Server, OS/2 Warp Server networks that have IBM TCP/IP V2.0 or later installed on the file server (TCP/IP is supplied as standard with LAN Server V4.0 and later as well as Warp Server).
If you get the message "The arp entry addition failed:", try pinging a known device on the network using the command “ping ipaddress”, where “ipaddress” is the IP address of that device. ✒ Note • You must be on the same Ethernet segment (that is, there cannot be a router between the print server and the Windows NT system) to use the arp -s command. • If there is a router, you may use BOOTP or other methods described in How to configure TCP/IP printing for UNIX system to enter the IP address.
✒ Note Early versions of Warp Server have a bug in which the named pipes do not appear (the problem does not affect Warp Connect or LAN Server). This problem is fixed via a patch available from IBM. You will get the Settings window. Enter the following: LPD server LPD printer Host name User The Brother Print Server name (from the HOSTS file)or its IP address. For most applications, use the Brother Print Server 'binary' service BINARY_P1.
Where servername is the name of the file server and alias is the alias name that you specified during this configuration process. This should print the CONFIG.SYS file on the printer. Note that if you selected a binary service as the LPD printer name, the lines will be staggered; don't worry about this because normal DOS, Windows, and OS/2 applications will print OK. 5. The Brother Print Server will appear as a standard OS/2 printer to application programs.
Chapter 3 How to Configure Peer-to-Peer Printing for Windows 95/98 Microsoft's Windows 95/98 operating system features built-in networking capabilities. These capabilities allow a Windows 95/98 PC to be configured as a client workstation in a NetWare and Windows NT, environment. For smaller networks, Windows 95/98 also allows the PC to operate in a peer-to-peer mode. In this mode, the PC can share resources with other PCs on the network without the need for a central file server.
Changing the IP Address using the BRAdmin32 application Start the BRAdmin32 utility (from Windows 95/98) The BRAdmin32 utility can use the IPX/SPX or TCP/IP protocols to communicate with the Brother Network printer. As the default IP address of Brother print servers is 192.0.0.192, this means that the print server will probably be incompatible with the IP address numbering scheme on your network. If you are not using DHCP, BOOTP or RARP, you will probably want to change the IP address of the print server.
If your PC is using the TCP/IP protocol, do the following: 1. Select TCP/IP filter in the left frame of the main window. 2. Select the “Device” menu and choose the “Search Active Devices”. ✒ Note If the print server is set to its factory default settings, it will not appear in the BRAdmin32 screen, however, when you select the “Search Active Devices” option, it will be found as a unconfigured device. 3.
Setup from the CD-ROM 1. Start the CD-ROM installation menu program according to the Quick Setup Guide. 2. Select the proper Model and Software Installation menu. Then select the Network Print Software menu to start the Brother Print Software installation program. Common 1. Push the Next button in response to the Welcome message. 2. Select the Brother Peer to Peer Print (LPR) button 3. Select the desired directory to install the Brother Network Direct Print files and push Next.
Associating to the printer 1. You must now create a printer on your Windows 95/98 system using the standard Windows 95/98 printer setup procedure. To do this, go the Start button, select Setting and then Printers. 2. Select Add Printer to begin the printer installation. 3. Click Next when you get the add Printer Wizard window. 4. Select Local Printer when you are asked how the printers is connected to your computer, and then push Next. 5. Select the correct driver. Click Next when you are done. 6.
HP’s JetAdmin compatible method (TCP/IP or IPX/SPX) To use a peer-to-peer print queue from a Windows 95/98 workstation, first make sure that the following items are configured in the Network Control Panel: • • TCP/IP Protocol or the IPX/SPX compatible protocol. HP JetAdmin (the latest version can be downloaded from the HP Web site). 1. Go to the Start button and choose Settings then select Printers. 2. Click on the Add Printer icon. 3. Click on Next. 4.
Chapter 4 How to Configure Peer-to-Peer (NetBIOS) printing for Windows 95/98/NT, LAN Server and OS/2 Warp Server Introduction Brother’s Print Server range supports SMB (Server Message Block) over the TCP/IP protocol via the NetBIOS interface. This allows direct printing on Microsoft-compatible networks. Because Brother print servers support the SMB protocol over TCP/IP, Brother print server will appear in your network neighborhood.
Print Server Configuration The key to getting this function to work is to ensure that the Brother print server is configured for your network domain name or workgroup name. When you install Windows 95/98 you are asked which workgroup you belong to, the default workgroup name for Windows 95/98 is "WORKGROUP", however you could change this to anything you want. With Windows NT, Microsoft introduce the concept of "Domains".
Changing the workgroup/domain name using TELNET or BRCONFIG or a web browser If you are unable to use a BRAdmin32 utility or a web browser, you can use TELNET or the BRCONFIG Remote console program (BRCONFIG requires the IPX/SPX protocol to be installed on your PC). When you are connected to the print server, enter the default password “access” in response to the "#" prompt. Type in anything in response to the "Enter Username>" prompt, you will then be at the "Local>" prompt.
NetBIOS Port Monitor for Windows 95/98, NT4.0 This software requires the TCP/IP transport protocols to be installed on your Windows 95/98, NT4.0 computer. To install those protocols refer to your Windows 95/98, NT4.0 documentation. If you are using the TCP/IP protocol, the proper IP address should be defined on both the Brother print server and your client PC. Installing the Brother NetBIOS Port Monitor Setup from the floppy disk 1.
7. You must now enter the server name and port name for actual print server. You can use the Browse button for searching the print server, select the domain/workgroup name, then the server is listed. If the print server does not automatically appear in your browse list, then you must ensure that the domain name is configured correctly. Otherwise you must enter the name manually. The name should be compliant with UNC (Universal Name Convention). For example “\\NodeName\ServiceName”.
Associating to the printer 1. You must now create a printer on your Windows 95/98 and NT4.0 system using the standard Windows printer setup procedure. To do this, go the Start button, select Setting and then Printers. (Windows 95/98) 2. Select Add Printer to begin the printer installation. 3. Click Next when you get the add Printer Wizard window. 4. Select Local Printer when you are asked how the printers is connected to your computer, and then push Next. 5. Select the correct driver.
(Windows NT4.0) 2. Select Add Printer to begin the printer installation. 3. Click Next when you get the add Printer Wizard window. 4. Select My Computer when you are asked how the printers is connected to your computer, and then push Next. 5. Select the Brother NetBIOS Port (Port name you assigned in step 6 of the Installing the Brother Peer-to-Peer Print (NetBIOS) section ) and press Next. 6. Select the correct driver. Click Next when you are done. 7.
Adding a Second Network Direct Print Port 1. You do not need to re-run the installation program to add a new NetBIOS port. Instead, press the Start button, select Settings, and open the Printers windows. Click on the icon of the printer that you wish to configure, select File from the Menu bar, and then choose Properties. (Windows 95/98) 2. Click on the Details tab and push the Add Port button. In the Add Port dialog, select the Other radio button and then highlight “Brother NetBIOS port”.
LAN Server/OS/2 Warp Server Configuration As Brother print servers support the SMB protocol over TCP/IP via a NetBIOS interface, you can easily configure your printer to work with an IBM LAN Server and OS/2 Warp Server networks that have IBM TCP/IP V2.0 or later installed on the fileserver. Use the following procedure to configure the LAN Server, OS/2 Warp Server or OS/2 Warp connect workstation. Server Configuration: 1. Open the Templates folder on the OS/2 desktop. 2.
Chapter 5 How to Configure Brother Internet Print for Windows 95/98/NT BIP Internet Printing Installation Brother’s Brother Internet Print (BIP ) software, for Windows 95/98/NT4.0, allows a PC user at one location, to send a print job to a Brother Printer at a remote location via the Internet. For example, a user on a PC in New York could print a document directly from his Microsoft Excel application program to a printer in Paris.
At the remote site, an E-mail server receives the E-mail message. The remote print server, which has its own E-mail address, uses the POP3 protocol (Post Office Protocol 3) to download the E-mail message from the server. It then decodes the attachment and prints it out on the printer. ✒ Note If an E-mail is received that has not been configured to use the BIP virtual port driver, the printer will print the e-mail out as a text document.
1. Configure the POP3 server on the E-mail server at the remote site with a mail account (Mailbox name) and password for the Brother print server (generally, the mail account name will be the first part of the Email address; for example, if you assign the Email address emailprinter@xyz.com, then the mail account name would be emailprinter). 2. Make sure that the print server is installed and running with TCP/IP enabled and has a valid IP address assigned to it.
7. The print server is configured by default to poll the POP3 server every 30 seconds. You may change this value, if desired. 8. If you have enabled notification, enter the IP address of your SMTP server (consult your network administrator if you do not know this address). 9. Press the OK button and save the changes. Now exit BRAdmin32 utility. You have now configured the print server to receive print jobs. Using a Web Browser to Configure the Print Server 1.
SET SET POP3 POP3 NAME mailboxname PASSWORD emailpassword where mailboxname is the name of the remote print server mailbox and emailpassword is the password associated with this mailbox. Usually the mailbox name is the same as the first part of the E-mail address that you defined previously (for example, usually if the E-mail address is emailprinter@xyz.com, then the mailbox name is emailprinter). 3. The print server is set by default to poll the POP3 server every 30 seconds.
Setup from the CD-ROM 1. Start the CD-ROM installation menu program according to the Quick Setup guide. 2. Select the proper Model and Software Installation menu. Then select the Network Print Software menu to start the Brother Network Print Software installation program. Common (floppy disk and CD-ROM) 3. Push the Next button in response to the Welcome message. 4. Select the Brother Internet Print button. 5. Select the desired directory to install the BIP files and then push Next.
16. Select the desired model of the remote printer (for example, Brother HL-series). If necessary, click Have Disk to load the driver from the printer’s installation diskette. Click Next when you are done. 17. If you have selected a printer driver that is already being used, you have the option of either keeping the existing driver (recommended) or replacing it. Select the desired option and press Next. 18. Select the Brother Internet port (BIP...) and press Next.
Adding a Second Brother Internet Port You should not re-run the install program to add a new Brother Internet Port. Instead, press the Start button, select Settings, and open the Printers windows. Click on the icon of a printer that is using BIP, select File from the menu bar, and then choose Properties. Click on the Details (Ports on Windows NT) tab and push the Add Port button. In the Add Port dialog, select the Other radio button (Windows 95/98 only) and then “Brother Internet Port”.
Chapter 6 How to Configure Novell Netware printing using IPX/SPX Brother Print Servers allow NetWare client PCs to print jobs on the same printer as TCP/IP and AppleTalk users. All NetWare jobs are spooled through the Novell server and delivered to the printer when it is available. General Information In order to use a Brother print server on a NetWare network, one or more file servers must be configured with a print queue that the print server can service.
Creating a Print Queue Using BRAdmin32 Brother’s BRAdmin32 utility are Windows-based applications that provide similar functionality to the Netware PCONSOLE utility (or the NWADMIN utility in Netware 4.1x or later). To use the BRAdmin32 programs to configure a Brother print server under NetWare, make sure that you are logged in as SUPERVISOR (NetWare 2.xx or 3.xx) or ADMIN (NetWare 4.
a If it is not already selected, select Queue Server mode. b Click the Change Bindery Queues button. c Select the Netware server which you wish to configure. d Select the New Queue button and type in the queue name which you wish to create. e Once you have done that highlight the queue name you created an then click on the Add button. f Click on Close and then OK. Now exit the BRAdmin32 application. Configuring the Brother Print Server (Queue Server Mode in NDS mode) using BRAdmin32 1.
a If it is not already selected, select Queue Server mode. b Select the correct NDS tree and NDS context (you can manually enter this information, or by clicking on the down arrow by the side of NDS tree and the Change button by the side of NDS Context, you can let BRAdmin32 display your choices automatically. Once you have specified this information, click on the Change NDS queues button. c In the Netware Print Queues screen select the appropriate TREE and Context and then Click the New Queue button.
Configuring the Brother Print Server (Queue Server Mode in NDS mode) using Novell NWADMIN and BRAdmin32 1. Make sure that you are logged in as ADMIN in NDS mode on the NetWare 4.1x (or later) file server and start the NWADMIN application. 2. Select desired Context that will contain the Printer and then click on Object from the menu bar and then Create. When you get the New Object menu, select Printer and then OK. 3. Enter the name of the printer and select Create. 4.
13. Double click on the name of your print server. Click on Assignments and then Add... 14. If necessary, change the directory context. Select the printer you created in step 3 and click OK and then OK again. 15. Exit NWADMIN. 16. Start the appropriate BRAdmin32 application, and select the correct print server from the list (by default, the node name is BRN_xxxxxx, where “xxxxxx” is the last six digits of the Ethernet address (MAC address)). 17. Double click the appropriate Brother print server.
Configuring the Brother Print Server (Remote Server Mode in NDS mode) using Novell NWAdmin and BRAdmin32 To configure a Brother print server for remote printer mode with NWADMIN (NetWare Administrator utility) and BRAdmin32, you will need to perform the following steps: 1. Make sure that the PSERVER NLM (NetWare Loadable Module) is loaded on your file server and that you are logged in as ADMIN in NDS mode on the NetWare 4.1x file server. 2. Start NWADMIN by double clicking on the icon.
✒ Note You can find the Netware server name and MAC address by printing out the printer configuration page. Refer to the Quick Setup Guide for information on how to print the configuration page on your print server. 14. Double click the appropriate print server. You will be prompted for a password, the default password is “access”. 15. Now select the NetWare tab. 16.
Configuring the Brother Print Server (Queue Server Mode in Bindery emulation mode) using PCONSOLE and BRCONFIG 1. Login as Supervisor (NetWare 3.xx) or ADMIN (NetWare 4.1x or later; be sure to specify the /b option for bindery mode). 2.
12. Press INSERT to create a new queue on the file server, type the new queue name and press ENTER. The name does not have to be related to the name of the print server resources, but should be short and convenient for users to remember. 13. Make sure that the new queue name is highlighted, and then press ENTER to configure the queue. 14. Select Queue Servers (in NetWare 4.1x, this item is called Print Servers) and press ENTER to specify which network print servers can print jobs from this print queue.
Configuring the Brother Print Server (Queue Server Mode in NDS mode) using PCONSOLE and BRCONFIG 1. Make sure that you are logged in as ADMIN in NDS mode on the NetWare 4.1x file server. 2. Run the PCONSOLE utility from PC workstation. 3. Select Print Servers from the Available Options menu. 4.
15. Highlight the Printers option in the Print Server Information menu. 16. Press INSERT and select the name of the printers you entered in Step. 17. Press ESCAPE several times to return to DOS. 18. Execute the BRCONFIG from the Windows menu or insert the Brother Print Server Configuration Utility diskette in Drive A: of your PC and type: A:BRCONFIG. Select the print server from the list of print servers.
Configuring the Brother Print Server (Remote Printer Mode using PCONSOLE and BRCONFIG 1. Make sure that the PSERVER NLM (NetWare Loadable Module) is loaded on your file server. 2. Log into the file server from your PC workstation as ADMIN if you are using NetWare 4.1x (if you want NDS support, do not login under bindery mode). If you are using NetWare 2.xx or 3.xx, login as SUPERVISOR. 3. Run the PCONSOLE utility from your PC workstation. 4.
The following steps apply to configuring a remote printer on NetWare 3.xx systems: 6. a Select Print Server Information from the PCONSOLE main menu and choose the name of the PSERVER NLM. b Select Print Server Configuration and then Printer Configuration. Select any "Not Installed" printer and press Enter. Remember the number of this printer, since it will be used later in the configuration process. c If desired, type in a new name for the printer.
• Where nlm is the name of the PSERVER NLM on your file server • Number is the printer number (must match the printer number you selected during the PCONSOLE configuration in the previous steps) • Service is the name of the service assigned by Netware print server name(where the default services are BRN_xxxxxx_P1 for the Brother printer, where "xxxxxx is the last six digits of the Ethernet address (MAC address)).
Configuring the Workstation (DOS-based NetWare drivers) To configure the PC workstation so that DOS applications can print transparently to the Brother print server (you may use this procedure if you do not have Windows-specific Netware drivers), use the DOS editor to add a command with following format to the AUTOEXEC.BAT file on your PC: capture l=n q=queuename ti=timeout • Where n is the number of the parallel port you wish to redirect.
4. Click Capture and Permanent. 5. Close the window and select Options and then Printer Setup. 6. Choose the desired printer under Installed Printers. If the desired printer does not exist, select Add>> and select the printer from the List of Printers, and click on Install (normally you will need the printer driver diskette). 7. If the desired printer is not on the correct port, click on Connect, select the port, and click OK. 8.
Chapter 7 How to Configure Macintosh printing using Appletalk Brother Print Server’s support the AppleTalk protocol running over Ethernet (also known as EtherTalk). This allows Macintosh users to print at the same time as all other Ethernet network users. AppleTalk Our AppleTalk capabilities allow a Brother Printer to appear as a shareable printer node on an AppleTalk Phase 2 network.
Also you should install the configuration file of HL-1270N for Laserwiter 8 driver before print server configuration. To do that , load the CD-ROM bundled with HL-1270N into the Macintosh , then following folder will be open. Double click the “BR-Script PPD Installer” and follow the instruction.
Operation Once the print server is installed and the printer is powered on, the Brother print server Appletalk service name (default is BRN_xxxxxx_P1_AT, where "xxxxxx" is the last six digits of the Ethernet address (MAC address); for example, BRN_310107_P1_AT) should appear in the Chooser. ✒ Note You can find the service name and MAC address by printing out the printer configuration page. Refer to the Quick Setup Guide for information on how to print the configuration page on your print server.
2. Click on the appropriate print server and close the Chooser program. You should now be able to print from the Macintosh. ✒ Note If you cannot see the print server, first make sure that your cabling is correct and that you have enabled EtherTalk from your Macintosh Network Control Panel. You may also need to force the print server into the correct AppleTalk zone using the SET APPLETALK ZONE command described in Appendix A.
Chapter 8 How to Configure DLC/LLC printing for Windows NT DLC is a simple protocol that is included in Windows NT as standard. It can be used on other operating systems (such as Windows 3.x) with the addition of vendor supplied software that supports the Hewlett-Packard JetDirect card.
Configuring DLC on Windows NT To use DLC on Windows NT, you must first install the DLC protocol. 1. Log into Windows NT with administrative privileges. Go to the NT Control Panel and double click on the Network icon. 2. On Windows NT 3.5x systems, select Add Software. On Windows NT 4.0 systems, click on the Protocol tab, and click Add. 3. Select DLC Protocol and then OK.
Windows NT 4.0 Printer Setup 1. Log into Windows NT with administrative privileges. From the Start menu, select Settings and then Printers. 2. Select Add Printer (If you have already installed a Brother printer driver, double click the printer driver that you wish to configure and then select Printers/Properties, select the Ports tab and continue from Step 4 (ignoring steps 9-13) about installing the correct driver). 3. Select My Computer and then click Next. 4. Select Add a Port. 5.
7. The selected print server address will then appear in the smaller box under Card Address. 8. Type in any desired name for the port (the name must not be the name of an existing port or DOS device, such as LPT1) and click OK then on the Printer Ports screen, click Close. 9. The name you selected in the above step will appear as a checked port in the list of available ports. Click Next. 10. Select the correct driver click Next. 11. Give a name to the printer.
Windows NT 3.5x Printer Setup 1. From the Windows NT Main group, double click on the Print Manager icon. 2. Select Printer from the menu bar and click on Create Printer. 3. Enter any desired name for the printer in the Printer Name box. 4. Select the printer model in the Driver menu. 5. Choose Other (or Network Printer for V3.1 systems) from the Print to menu. 6. Click on Hewlett-Packard Network Port. 7.
The MAC addresses (Ethernet addresses) of available print servers will appear in the Card Address menu. Select the desired address (You can see the Ethernet address on the printer configuration page) ✒ Note You can find the node name and MAC address by printing out the printer configuration page. Refer to the Quick Setup Guide for information on how to print the configuration page on your print server. 9. Click OK. 10. If you want to share the printer, click Share the Printer on the Network. 11.
Configuring DLC on Other Systems To use DLC on other network systems, you will generally need vendor supplied software. Typically such software will support the Brother print servers. Follow the vendor's instructions to install the DLC protocol on your system. Once the protocol is installed, create a network port in the same way that you did for Windows NT in the previous sections. The MAC address (Ethernet address) of the print server should automatically appear during the configuration process.
Chapter 9 How to use the Web based management function Overview A standard World Wide Web Browser (we recommend Netscape Navigator version 3.0 or later/Microsoft Internet Explorer version 3.02a or later) can be used to manage your printer using the HTTP (Hyper Text Transfer Protocol). It is possible to get the following information from the printer using a web browser and to configure Network and printer settings. 1. 2. 3. 4.
Web Function Page Once you are connected to the printer, you will see a screen similar to the one below. • Refresh The refresh button reloads the page. • Automatic Refresh The Automatic Refresh button reloads the page every 15 seconds. • View Configuration The configuration button lets you see printer information such as toner status, current page count, etc...
• Control panel The control panel allows you to see the current printer status and also allows you to interact with the printer as if you were standing at the printer and pressing the buttons on the front panel. • Printer settings This section allows you to change printer settings such as default font, etc. • On Line support Use this section for on-line product support (you must have a Internet connection to use this section). • Administrator settings Special section for Administrators.
Chapter 10 TROUBLESHOOTING Overview This chapter describes procedures for troubleshooting problems you may encounter with a Brother Print Server, it is divided into the following sections: 1. Installation Problems 2. Intermittent Problems 3. Protocol-Specific Troubleshooting For more information go to http://www.brother.com/ Installation problems If you cannot print over the network, check the following: 1. Make sure that the printer is powered on, is on-line and ready to print.
✒ Note If none of the following steps are successful, there is almost certainly a hardware or network problem! a. If you are using TCP/IP: Try pinging the print server from the host operating system prompt with the command ping ipaddress, where ipaddress is the print server IP address (note that in some instances it can take up to two minutes for the print server load its IP address (after setting the IP address).
5. If you have a bridge or router located between the print server and host computer, make sure that the device is set up to allow the print server to send and receive data from the host. For example, a bridge can be set up to only allow certain types of Ethernet addresses to pass through (a process known as filtering); therefore, such a bridge must be configured to allow Brother print server addresses.
TCP/IP Troubleshooting If you are using TCP/IP and cannot print to the print server and you have checked the hardware and network as described in the previous steps, then check the following: ✒ Note It is always a good idea to try following in order to eliminate the possibility of setup errors. • Turning off the printer and then again, • Deleting and recreating the print server and creating a new print queue in order to eliminate the possibility of setup errors. 1.
UNIX Troubleshooting 1. Make sure that the /etc/printcap file (if applicable) is typed in correctly. In particular, look for missing ":" and "\" characters, because a small error anywhere in the file can have major consequences. Also check the /usr/spool directory to make sure that you have created a valid spool directory. 2.
Windows NT/LAN Server (TCP/IP) Troubleshooting If you are having trouble printing with Windows NT or LAN Server, check the following: 1. Make sure that TCP/IP and TCP/IP print service are installed and running on the Windows NT system or the LAN Server file server. 2. If you are using DHCP and you have not created a reservation for the print server, make sure that you enter the NetBIOS name of the print server in the “Name or address of server providing lpd” box.
Windows 95/98 (or later) Peer-to-Peer (HP JetAdmin compatible method) Troubleshooting If you are having trouble printing on a Windows 95/98 (or later) Peer-to-Peer network, check the following (HP JetAdmin compatible method): 1.
Internet Print (TCP/IP) Troubleshooting 1. The first step in troubleshooting is to make sure that you have a valid E-mail connection on both the sending PC and the receiving print server. Try sending an Email message from the PC to a user at the remote site who can receive mail via the POP3 server. If this does not work, there may be an E-mail configuration problem on the PC, on the local E-mail server, or on the remote POP3 server.
1. If you changed the login password, you must change the password in both the Brother print server (using the SET NETWARE PASSWORD command if you are using the BRConfig software) or by using a web browser or the BRAdmin32 utility and in the file server (using the PCONSOLE Print Server Information Change Password command). 2.
DLC/LLC Troubleshooting If you are having trouble printing with DLC/LLC, check the following: 1. 2. Make sure that the DLC/LLC protocol is enabled using either BRAdmin32, a web browser or TELNET. Make sure that the MAC address of the Windows setting is as same as the print configuration page result. Web Browser Troubleshooting (TCP/IP) 1. If you can not connect to the print server using your web browser it may be worth checking the Proxy Settings of your browser.
APPENDIX Appendix A Command Summary General Commands You can change the configuration of your print server using any of the following methods. • • • • Brother BRAdmin32 utility for Windows 95/98 and NT 4.0 HTTP (using a web browser) TELNET (command utility) Brother BRCONFIG NetWare Utility (command utility) BRAdmin32 The Brother BRAdmin32 utility can use the TCP/IP or IPX/SPX protocol. This utility allows you to graphically manage aspects of the network and printer.
BRCONFIG Brother BRCONFIG utility runs on the DOS system prompt and is installed with BRAdmin32. To connect the print server using the Brother BRCONFIG NetWare utility, Choose the BRCONFIG utility from the Brother BRAdmin32 utilities menu or insert the Brother BRAdmin32 utility diskette into Drive A and type: A:BRCONFIG at the DOS system prompt. If you have only one print server, you will be immediately connected to that server.
SET LOAD HOst Sets node name of boot host for (NetWare firmware load) SET LOAD IP aa.bb.cc.
SET SERVIce RECeive [EN|DIS] Set receive only mode on specified service SHow FATal Show fatal error log SHow FREE Shows memory available SHow LOAD Shows firmware update parameters SHow PORt Shows port parameters SHow PORt STA Shows current port status.
TCP/IP Commands SET IP Access [EN|DIS|ALL] aa.bb.cc.dd {Mask ee.ff.gg.hh} Allows or prevents specified IP address from accessing print server SET IP ADdress aa.bb.cc.dd Sets IP address of print server SET IP BOot n Number of BOOTP/RARP tries SET IP [EN|DIS] Enables or Disables IP Processing SET IP RArp nn Sets procedure used by print server when obtaining its IP address.
NetWare Commands CLear NETWare SErver server Removes the specified NetWare file server from Brother print servers access list. SET NETWare ADvertise n Sets advertising frequency of print server SET NETWare [EN|DIS] Enables/Disables Netware protocol on print server SET NETWare FRame [802.2|802.3|ETH|AL|AU|SNA] Sets Netware frame type to 802.2, 802.
AppleTalk Commands SET APpletalk [EN|DIS] Enables or Disables Appletalk Processing SET APpletalk ZOne "" Set Appletalk zone name SET SERVIce APP [EN|DIS] Enables or disables AppleTalk jobs on specified service SET SERVIce RECEIVE [EN|DIS] Enables or Disables bi-directional communications on service.
Internet Print Commands SET POP3 Address aa.bb.cc.dd Purpose: Sets POP3 Server IP address SET POP3 Enable/Disable Enables or disables POP3 protocol SET POP3 Polling nn Sets POP3 server polling frequency in seconds SET POP3 Name Sets POP3 mailbox name for print server SET POP3 Password Sets the POP3 Mailbox password SET SMTP Address aa.bb.cc.
Appendix B Using Services A service is a resource that can be accessed by computers that wish to print to the Brother print server.
No. 0 String (special) 1 2 3 4 5 6 7 8 9 10 11 NULL \1BE \04 \1B%-12345X @PJL Enter Language= PCL\0A Postscript\0A \FF\04\FF\05\FF\06\FF\07 \FF\04\FF\05\FF\06\FF\08 \0C Definition Using this number causes printer not to be automatically reset at the end of each job.
To clear a setup or reset string, set the string number to 1 (the null string): SET SERVICE servicename BOT 1 SET SERVICE servicename EOT 1 You may enable or disable protocols that can access a given service with the following commands: SET SERVICE name IP ENABLED SET SERVICE name NETWARE ENABLED SET SERVICE name APPLE ENABLED SET SERVICE name NetBIOS ENABLED SET SERVICE name DLC ENABLED filter no.
Appendix C Reloading the Print Server Firmware General The firmware on the print server is stored in flash memory. This means that you can upgrade the firmware by downloading the appropriate update file. To get the latest firmware update, access the Brother WWW server on www.brother.com. ✒ Note We recommend that you factory reset the print server if you upgrade to a later version of software.
1. TFTP PUT from this host Use this method if you have TCP/IP already installed on your PC. BRAdmin32 will use the TFTP protocol to send the new firmware data to the print server. 2. TFTP GET from a server If you have a TFTP server installed in your network (many Unix systems provide TFTP support), you may wish to use this option. The new firmware file must be located in the TFTP BOOT directory on your TFTP server.
3. Netware GET from a server You must have a Netware server on your network (running IPX/SPX) and you must store the new firmware file in the SYS/Login directory of the server. In this case, your PC makes the print server read the firmware data from the assigned Netware server, the print server attaches to the Netware server and reads the firmware itself..
Reloading without BRAdmin32 Reloading from a UNIX Host Computer using TFTP To download the print server firmware from a UNIX host using tftp, first copy the load file e.g. Firmname.bin to that host. Make sure that tftp is started by checking the appropriate files on your system (generally speaking, tftp must be enabled in your /etc/services file and possibly in another configuration file, such as /etc/inetd.conf). Refer to your UNIX system documentation or man pages for additional information.
Reloading from a UNIX Host Computer using BOOTP To download the print server firmware from a UNIX host using BOOTP, first copy the load file e.g. Firmname.bin to that host. Make sure that BOOTP and tftp are started by checking the appropriate files on your system (generally speaking, BOOTP must be enabled in the /etc/inetd.conf file, while tftp must be enabled in your /etc/services file and possibly in another configuration file, such as the /etc/inetd.conf file).
When you type a CTRL-D or EXIT to exit the remote console, the file Firmname.bin will then be loaded into the print server. The Data LED on the printer front panel will blink during the load process and will go out when the process is complete. If the Data LED does not stop blinking after about two minutes, or start to blink periodically, check to make sure that you correctly entered all parameters and that your network connections are good.
REGULATIONS IMPORTANT INFORMATION: REGULATIONS Federal Communications Commission Compliance Notice (For U.S.A. only) This equipment has been tested and found to comply with the limits for a Class A digital device, pursuant to Part 15 of the FCC Rules. These limits are designed to provide reasonable protection against harmful interference when the equipment is operated in a commercial environment.
INDEX A ADMIN AppleTalk arp Arp J 6-2 7-1 1-9 1-12, 2-5, 2-6 JetAdmin L LAN Server LaserWriter Linux Linux lpd LPR B Bindery BOOTP BRAdmin32 BRCONFIG 6-1 1-9, 1-14, 2-6, 3-2 1-9, 3-2, 6-1, 7-4 6-1, 6-8 NDS NetBEUI NetBIOS Netscape Navigator NetWare NWADMIN DEC NCP 6-8 DEC OSF/1 1-3 DEC TCP/IP Servers 1-7 DEC ULTRIX 1-3 DHCP 1-9, 2-6, 3-2 Digital UNIX 1-3 DLC 8-1 DOS 2-5, 6-15 Dynamic Host Configuration Protocol (DHCP) 1-11 6-1 8-7 4-1, 8-1 8-1 6-1 6-2, 6-7 M Macintosh Messaging API (MAPI) E 7-1
TCP port TELNET TGV’s Multinet S SCO UNIX SCO UNIX Silicon Graphics SMB SMTP subnet mask Sun OS Sun Solaris 2.x Sun Solaris 2.xx SUPERVISOR 1-6 1-3 1-3 4-1 5-1 1-15 1-3 1-6 1-4 6-2 U UNIX 1-1 W Warp Server Web Browser Windows NT Windows NT 3.5x Windows NT 4.