
Quick Setup Guide
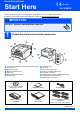
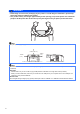
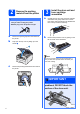
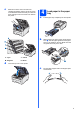
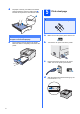
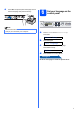

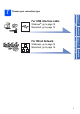
Table Of Contents
- Quick Setup Guide HL-3040CN
- Start Here
- For USB Interface Cable Users (For Windows® users)
- For USB Interface Cable Users (For Mac OS X users)
- For Wired Network Interface Cable Users (For Windows® users)
- For Wired Network Interface Cable Users (For Mac OS X users)
- For Network Users
- Other Information
- Safety precautions
- Regulations
- Federal Communications Commission (FCC) Declaration of Conformity (USA only)
- Important
- Important - about the interface cable
- Radio interference
- Industry Canada Compliance Statement (Canada only)
- EC Declaration of Conformity
- International ENERGY STAR® Compliance Statement
- Disconnect device
- EU Directive 2002/96/EC and EN50419
- IMPORTANT - For Your Safety
- LAN connection
- Wiring information (UK only)
- Warning - This printer must be earthed.
- Shipment of the printer
- Repacking Instructions
- Supplied CD-ROM
- Control panel
- Options and Consumables

4
2
Remove the packing
material from the printer
a Remove the packing tape from the outside of
the printer.
b Fully open the top cover by lifting up on the
handle a.
c Remove the packing material from the inside of
the printer.
3
Install the drum unit and
toner cartridge
assemblies
a Unpack the four drum unit and toner cartridge
assemblies and gently shake each of them
from side to side several times to distribute the
toner evenly inside the assembly.
b Remove the protective cover by pulling on the
tab as shown in the illustration.
IMPORTANT
• Save all packing material and the carton in
case you have to ship your printer.
• DO NOT plug in the AC power cord yet.
Note
Do not touch the surface of the packing film. It
may contain toner powder which can stain your
skin and clothing.
IMPORTANT
To avoid print quality
problems, DO NOT touch the
surface of the drum unit.