
Quick Setup Guide
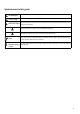
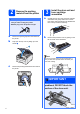
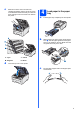
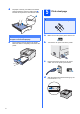

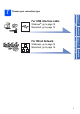
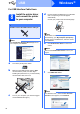
Table Of Contents
- Quick Setup Guide HL-3040CN
- Start Here
- For USB Interface Cable Users (For Windows® users)
- For USB Interface Cable Users (For Mac OS X users)
- For Wired Network Interface Cable Users (For Windows® users)
- For Wired Network Interface Cable Users (For Mac OS X users)
- For Network Users
- Other Information
- Safety precautions
- Regulations
- Federal Communications Commission (FCC) Declaration of Conformity (USA only)
- Important
- Important - about the interface cable
- Radio interference
- Industry Canada Compliance Statement (Canada only)
- EC Declaration of Conformity
- International ENERGY STAR® Compliance Statement
- Disconnect device
- EU Directive 2002/96/EC and EN50419
- IMPORTANT - For Your Safety
- LAN connection
- Wiring information (UK only)
- Warning - This printer must be earthed.
- Shipment of the printer
- Repacking Instructions
- Supplied CD-ROM
- Control panel
- Options and Consumables

6
d Put paper in the tray, and make sure that the
paper is below the maximum paper mark a.
The side to be printed on must be face down.
e Put the paper tray firmly back in the printer.
Make sure that it is completely inserted into the
printer.
5
Print a test page
a Make sure that the printer power switch is off.
b Connect the AC power cord to the printer.
c Plug the AC power cord into an AC power
outlet. Turn on the printer power switch.
d After the printer has finished warming up, the
LCD will show Ready.
IMPORTANT
Make sure the paper guides touch the sides of
the paper so it will feed properly.
IMPORTANT
DO NOT connect the interface cable yet.