Brother Laser Printer USER’S GUIDE HL-4040CN HL-4050CDN HL-4070CDW For visually-impaired users You can read this manual with Screen Reader ‘text-to-speech’ software. You must set up the hardware and install the driver before you can use the printer. Please use the Quick Setup Guide to set up the printer. You can find a printed copy in the box. Please read this User’s Guide thoroughly before you use the printer. Keep the CD-ROM in a convenient place so you can use it quickly if you need to.
Using this guide Symbols used in this guide We use the following icons throughout this User’s Guide: Warnings tell you what to do to prevent possible personal injury. Electrical Hazard icons alert you to a possible electrical shock. Hot Surface icons warn you not to touch machine parts that are hot. Cautions specify procedures you must follow or avoid to prevent possible damage to the printer or other objects. Improper Setup icons alert you to devices and operations that are not compatible with the printer.
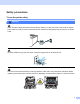
Safety precautions To use the printer safely WARNING There are high voltage electrodes inside the printer. Before you clean the inside of the printer or replace parts, make sure that you have turned off the power switch and unplugged the printer from the AC power outlet. DO NOT handle the plug with wet hands. Doing this might cause an electrical shock. The fuser unit becomes extremely hot during operation. Wait until it has cooled down sufficiently before replacing consumable items.
DO NOT use a vacuum cleaner to clean up scattered toner. Doing this might cause the toner dust to ignite inside the vacuum cleaner, potentially starting a fire. Carefully clean the toner dust with a dry, lint-free cloth and dispose of it according to local regulations. DO NOT use flammable substances or any type of spray to clean the inside or outside of the machine. Doing this may cause a fire or electrical shock.
Trademarks The Brother logo is a registered trademark of Brother Industries, Ltd. Apple, the Apple Logo, Macintosh and TrueType are registered trademarks of Apple Computer, Inc in the United States and other countries. Hewlett Packard is a registered trademark and HP LaserJet 6P, 6L, 5P, 5L, 4, 4L 4P, III, IIIP, II, and IIP are trademarks of Hewlett-Packard Company. Microsoft, MS-DOS, Windows are registered trademarks of Microsoft Corporation in the U.S. and other countries.
Table of Contents 1 About this Printer 1 Carton components ...................................................................................................................................1 Interface cable .....................................................................................................................................2 Front view ............................................................................................................................................3 Back view ...
Software for networks .......................................................................................................................66 About emulation modes.....................................................................................................................67 Automatic emulation selection (HL-4050CDN / HL-4070CDW only).................................................67 Automatic interface selection......................................................................................
Paper handling ......................................................................................................................................146 Paper jams and how to clear them ........................................................................................................147 Jam MP Tray (paper jam in the MP tray).........................................................................................148 Jam Tray 1 / Tray 2 (paper jam inside the paper tray) .................................
Industry Canada Compliance Statement (Canada only) .................................................................198 International ENERGY STAR® Compliance Statement (For HL-4050CDN / HL-4070CDW only) ..198 Laser notices .........................................................................................................................................199 Laser safety (110 to 120 volt model only)........................................................................................
1 About this Printer 1 1 Carton components 1 WARNING This printer is heavy and weights roughly 29.1kg (64.2 lb). To prevent injuries when moving or lifting this printer, make sure to use at least two people. When you unpack the printer, make sure that you have all of the following parts. Printer Quick Setup Guide CD-ROM Toner cartridges (Black, Cyan, Magenta and Yellow) Order No.
About this Printer Interface cable 1 The interface cable is not a standard accessory. Buy the appropriate cable for the interface you are going to use. USB cable Do not use a USB interface cable that is longer than 6 feet (2.0 meters). Do not connect the USB cable to a non-powered hub or a Macintosh® keyboard. Make sure that you connect it to the USB connector of your computer. Third party USB ports are not supported for Macintosh®.
About this Printer Front view 1 1 8 1 2 3 4 5 7 6 9 1 Face-down output tray support flap (support flap) 2 Front cover release button 3 Control panel 1 4 USB direct interface 5 Front cover 6 Paper tray 7 Power switch 8 Face-down output tray 9 Multi-purpose tray (MP tray) 1 You can adjust the angle of the LCD display by tilting it up or down.
About this Printer Back view 1 1 The printer illustration is based on HL-4070CDW.
About this Printer Positioning the printer 1 1 Read the following before you use the printer. Power supply 1 Use the printer within the recommended power range. Power source: USA and Canada: AC 110 to 120 V, 50/60 Hz Europe and Australia: AC 220 to 240 V, 50/60 Hz The power cord, including extensions, should be no longer than 5 meters (16.5 feet). Do not share the same power circuit with other high-powered appliances, such as an air conditioner, copier, shredder and so on.
2 Printing Methods 2 About paper 2 2 Type and size of paper 2 The printer loads paper from the installed paper tray or the multi-purpose tray.
Printing Methods Tray 1 Tray 2 MP Tray (HL-4050CDN/ HL-4070CDW only) Paper size Number of sheets (80 g/m2 / 20 lb) A4, Letter, Legal, B5 (ISO), Executive, A5, A6, B6 (ISO), Folio, Post Card A4, Letter, Legal, B5 (ISO), Executive, A5, B6 (ISO), Folio 250 sheets 500 sheets DX (HL-4050CDN/ HL-4070CDW only) Width: 69.9 to 215.9 mm (2.75 to 8.5 in.) Length: 116 to 406.4 mm (4.57 to 16 in.
Printing Methods Types of envelopes 2 Most envelopes will be suitable for your printer. However, some envelopes may have feed and print quality problems due to the way they have been made. A suitable envelope should have edges with straight, wellcreased folds and the leading edge should not be thicker than two pieces of paper. The envelope should lie flat and not be of baggy or flimsy construction.
Printing Methods Unprintable area 2 The area of the paper that cannot be printed on is shown in the table below: Portrait 2 Landscape 1 1 2 2 4 4 3 3 Windows® Printer Driver Macintosh® printer driver BRScript Driver for Windows® and Macintosh® (HL-4050CDN/HL-4070CDW only) 1 4.23 mm (0.16 in.) 4.32 mm (0.17 in.) 2 4.23 mm (0.16 in.) 4.32 mm (0.17 in.) 3 4.23 mm (0.16 in.) 4.32 mm (0.17 in.) 4 4.23 mm (0.16 in.) 4.32 mm (0.17 in.
Printing Methods Printing methods 2 Printing on plain paper 2 2 Printing on plain paper from Tray 1, 2 2 (For the recommended paper to use, see About paper on page 6.) a Choose the following from the printer driver: Paper Size ............................ (1) Media Type ........................... (2) Paper Source ....................... (3) and any other settings.
Printing Methods BR-Script printer driver for Windows® (HL-4050CDN / HL-4070CDW only) Paper Size ........................ (1) Media Type ...................... (2) Paper Source ................... (3) 2 1 3 2 Note To use the BR-Script printer driver you must install the driver using the Custom Install from the CD-ROM.
Printing Methods b Pull the paper tray completely out of the printer. 2 c While pressing the green paper-guide release lever, slide the paper guides to fit the paper size. Make sure that the guides are firmly in the slots. d Put paper in the tray, and make sure that the paper is below the maximum paper mark (b). The side to be printed on must be face down.
Printing Methods e f Put the paper tray firmly back in the printer. Make sure that it is completely inserted into the printer. Lift up the support flap to prevent paper from sliding off the face-down output tray, or remove each page as soon as it comes out of the printer. 2 g Send the print data to the printer.
Printing Methods Printing on plain paper or bond paper from the MP tray 2 (For the recommended paper to use, see About paper on page 6.) a Choose the following from the printer driver: Paper Size ............................ (1) Media Type ........................... (2) Paper Source ....................... (3) and any other settings.
Printing Methods Macintosh® printer driver Paper Size ........................ (1) Media Type ...................... (2) Paper Source ................... (3) 1 b Open the MP tray and lower it gently. c Pull out the MP tray support and unfold the flap (1).
Printing Methods d Lift up the support flap to prevent paper from sliding off the face-down output tray, or remove each page as soon as it comes out of the printer. 2 e Put paper in the MP tray. Make sure that the paper stays under the maximum paper mark (1). The side to be printed on must be face up with the leading edge (top of the paper) in first. 1 f While pressing the paper-guide release lever, slide the paper guide to fit the paper size. g Send the print data to the printer.
Printing Methods Printing on thick paper, labels and envelopes 2 (For the recommended paper to use, see About paper on page 6 and Types of envelopes on page 8.) a Choose the following from the printer driver: Paper Size ............................ (1) Media Type ........................... (2) Paper Source ....................... (3) and any other settings.
Printing Methods Note • To use the BR-Script printer driver you must install the driver using the Custom Install from the CD-ROM. 2 • When you use Envelope #10, choose Com-10 for the Paper Size. • For other envelopes which are not listed in the printer driver, such as Envelope #9 or Envelope C6, choose User Defined... (For more information on envelope sizes, see Paper size on page 179.) Macintosh® printer driver Paper Size ........................ (1) Media Type ......................
Printing Methods c Pull out the MP tray support and unfold the flap (1). 2 1 d Lift up the support flap to prevent paper from sliding off the face-down output tray, or remove each page as soon as it comes out of the printer. e Put paper in the MP tray. Make sure that the paper stays under the maximum paper mark (1). 1 Note • Do not put more than 3 envelopes in the MP tray. • Envelope joints that are sealed by the manufacturer should be secure. • The side to be printed on must be face up.
Printing Methods f While pressing the paper-guide release lever, slide the paper guide to fit the paper size. 2 g Send the print data to the printer. Note • Remove each sheet or envelope at once after printing. Stacking the sheets or envelopes may cause the paper to jam or curl. • If envelopes get smudged during printing set the Media Type to Thick Paper or Thicker Paper to increase the fixing temperature.
Printing Methods Duplex printing 2 The supplied printer drivers for Windows® 2000/XP/XP Professional x64 Edition, Windows Vista™, Windows Server® 2003/Windows Server® 2003 x64 Edition and Mac OS® X 10.2.4 or greater all enable duplex printing. For more information about how to choose the settings, see the Help text in the printer driver. Guidelines for printing on both sides of the paper 2 2 If the paper is thin, it may wrinkle.
Printing Methods c Remove the printed even-numbered pages from the output tray and put them back in the paper tray with the side to be printed on (blank side) face down. Follow the instructions on the computer screen. 2 d The printer will now automatically print all the odd-numbered pages on the other side of the paper. Note • If you choose the Paper Source to be Auto Select, put the printed even-numbered pages in the MP tray. • When you put paper in the paper tray, first empty the tray.
Printing Methods c Remove the printed even-numbered pages from the output tray and then, in the same order, put them back into the MP tray. Put the paper with the side to be printed on (the blank side) face up. Follow the instructions on the computer screen. 2 d The printer will now automatically print all the odd-numbered pages on the other side of the paper. Paper orientation for manual duplex printing 2 The printer prints the second page first.
Printing Methods Automatic duplex printing (HL-4050CDN/HL-4070CDW only) 2 If you are using the Macintosh® Printer Driver, see Duplex Printing on page 56. a b 2 Put paper in the paper tray or MP tray. For the Windows® printer driver 1 Open the Properties dialog box in the printer driver. 2 From the General tab, click the Printing Preferences icon. 3 From the Advanced tab, click the Duplex icon. 4 Make sure that Use Duplex Unit has been chosen. 5 Click OK.
Printing Methods 4 Click OK. The printer will print on both sides of the paper automatically. 2 Booklet printing (for Windows® printer driver) a b c d Put paper in the paper tray or MP tray. e Click OK. 2 Open the Properties dialog box in the printer driver. From the General tab, choose the Printing Preferences icon. From the Advanced tab, click the Duplex icon, then choose Duplex and Use Duplex Unit (HL-4050CDN / HL-4070CDW only) or Manual Duplex, and then choose Booklet Printing.
Printing Methods Printing photos from a digital camera 2 2 Your Brother printer supports the PictBridge standard, allowing you to connect to and print photos directly from any PictBridge compatible digital camera. Even if your camera is not in PictBridge mode or does not support PictBridge, you can still print photos from a digital camera in Mass storage mode. See Connecting a camera as a storage device on page 28.
Printing Methods Note The names and availability of each setting depends on the specification of your camera. 2 Please refer to the documentation supplied with your camera for more detailed information on changing PictBridge settings. Printing images a 2 Make sure that your camera is turned off. Connect your camera to the USB direct interface (1) on the front of the printer using a suitable USB cable. 1 b Turn on the camera.
Printing Methods Connecting a camera as a storage device 2 Even if your camera is not in PictBridge mode, or does not support PictBridge, you can connect your camera as a normal storage device. This enables you to print photos from your camera. Follow the steps for Printing data directly from the USB flash memory drive on page 30. 2 (If you would like to print photos in PictBridge mode, see Setting your digital camera on page 26.
Printing Methods Printing data from a USB flash memory drive with direct print 2 With the Direct Print feature, you do not need a computer to print data. You can print by just plugging your USB flash memory drive into the printer´s USB direct interface. 2 Note There might be some USB flash memory drives that will not work with the printer. Supported file formats 2 Direct print supports the following file formats: PDF version1.
Printing Methods c Choose the folder you want to save the file to and enter the file name if you are prompted to. If you are prompted for a file name only, you can also specify the folder you want to save the file in by entering the directory name. For example: 2 C:\Temp\FileName.prn If you have a USB flash memory drive connected to your computer, you can save the file directly to the USB flash memory drive.
Printing Methods Note • The file names will be shown after you choose a folder and press OK. If you want to choose a file in another folder, press back to return to the folder name. And then press the + or - button to choose a different folder. 2 Direct Print 1./XXXX.FOLDER1 h Press OK. /XXXX.FOLDER1 3.XXXX.PDF Direct Print 1./XXXX.FOLDER1 g Press Back. /XXXX.folder1 3.XXXX.PDF • If you want to print an index of the files, choose Index Print.
Printing Methods Note You can change the default settings for Direct Print by using the control panel when the printer is not in the Direct Print mode.
3 Driver and Software 3 Printer driver 3 A printer driver is software that translates data from the format used by a computer to the format that a particular printer needs. Typically, this format is page description language (PDL). 3 The printer drivers for the supported versions of Windows® and Macintosh® are on the CD-ROM we have supplied or on the Brother Solutions Center at http://solutions.brother.com. Install the drivers by following the Quick Setup Guide.
Driver and Software Windows® printer driver BR-Script printer driver Macintosh® Printer Driver LPR / CUPS printer driver 1 (HL-4050CDN/ HL-4070CDW only) Windows® 2000 Professional p p Windows® XP Home Edition p p Windows® XP Professional p p Windows Vista™ p p Windows Server® 2003 p p Windows® XP Professional x64 Edition p p Windows Server® 2003 x64 Edition p p Mac OS® X 10.2.
Driver and Software You can change the following printer settings when you print from your computer.
Driver and Software Features in the printer driver (for Windows®) 3 (For more information, see the Help text in the printer driver.) Note • The screens in this section are from Windows® XP. The screens on your computer will vary depending on your operating system. Windows® 3 ® • If you are using 2000, XP, Windows Vista™ or Windows Server 2003, you can access the Printing Preferences dialog box by clicking Printing Preferences... in the General tab of the Printer Properties dialog box.
Driver and Software Paper Size 3 From the drop-down box choose the Paper Size you are using. Multiple Page 3 The Multiple Page selection can reduce the image size of a page allowing multiple pages to be printed on one sheet of paper or enlarging the image size for printing one page on multiple sheets of paper. 3 Page Order 3 When N in 1 option is selected, the page order can be selected from the drop-down list.
Driver and Software Media Type 3 You can use the following types of media in your printer. For the best print quality, select the type of media that you wish to use. Plain Paper Thin Paper Thick Paper Thicker Paper Bond Paper Env. Thick Env. Thin Recycled Paper Postcard Label Envelopes 3 Note • When using ordinary plain paper (19 to 25 lb) choose Plain Paper. When using heavier weight paper, envelopes or rough paper choose Thick Paper or Thicker Paper. For bond paper, choose Bond Paper.
Driver and Software Advanced tab 3 1 2 3 4 5 3 Change the tab settings by clicking one of the following icons: Print Quality (1) Duplex (2) Watermark (3) Page Setting (4) Device Options (5) Print Quality 3 Print Quality You can choose the following print quality settings. • Normal 600×600 dpi. Recommended for ordinary printing. Good print quality with reasonable print speeds. • Fine 2400 dpi class. The finest print mode. Use this mode to print precise images such as photographs.
Driver and Software Color Mode The following options are available in Color Matching mode: • Normal This is the Default color mode. • Vivid 3 The color of all elements are adjusted to become a more vivid color. • Auto The printer driver automatically selects the Color Mode type. • None Improve Gray Color You can improve the image quality of a shaded area. Enhance Black Printing If a black graphic cannot be printed correctly, choose this setting.
Driver and Software Watermark 3 You can put a logo or text into your documents as a watermark. You can choose one of the preset watermarks, or you can use a bitmap file or text file that you have created. When you use a bitmap file as a watermark, you can change the size of the watermark and put it anywhere you like on the page. 3 When you use text as a watermark, you can change the font, color and angle settings.
Driver and Software Job Spooling The printer keeps the print job sent to it in memory. You can reprint a document without sending the data again from your computer (except for secure printing): • Last Job Reprint: Reprints the last job • Secure Print: Secure documents are documents that are password protected when they are sent to the machine. Only the people who know the password will be able to print them.
Driver and Software Administrator Administrators have the authority to limit access to functions such as scaling and watermark. • Password Enter the password into this box. • Set Password 3 Click here to change the password. • Copies Lock Lock the copy pages selection to prevent multiple copy printing. • Multiple Page & Scaling Lock Lock the scaling setting and multiple page setting. • Color/Mono Lock Lock the Color/Mono settings as Mono to prevent color printing.
Driver and Software Accessories tab 3 When you install the optional accessories, you can add and choose their settings in the Accessories tab as follows. 3 1 3 2 4 Available Options (1) You can manually add and remove the options that are installed on the printer. Tray settings will match the installed options. Paper Source Setting (2) This feature recognizes the paper size set from the control panel menu for each paper tray. Serial No.
Driver and Software Support tab 3 1 3 2 3 Brother Solutions Center (1) The Brother Solutions Center (http://solutions.brother.com) is a web site offering information about your Brother product including FAQs (Frequently Asked Questions), User’s Guides, driver updates and tips for using your printer. Printer Settings (2) This will print the pages that show how the internal settings of the printer have been configured. Check Setting... (3) You can check the current driver settings.
Driver and Software Using the custom monochrome printer driver (for Windows®) 3 You can install a windows® printer driver that will restrict printing to monochrome only. If you want to install the Windows® printer driver that will restricted color printing, choose Custom setup from Install Printer Driver selection on the menu screen of the supplied CD-ROM. After accepting the software license and the initial installation screens, follow the steps below when the Select Components screen appears.
Driver and Software Using the BR-Script3 printer driver (PostScript® 3™ language emulation for Windows®) (HL-4050CDN/HL-4070CDW only) 3 (For more information, see the Help text in the printer driver.) Note • To use the BR-Script3 printer driver you must install the driver using the Custom Install from the CD-ROM. • The screens in this section are from Windows® XP. The screens on your computer may vary depending on your operating system. Device Settings tab 3 Choose the options you have installed.
Driver and Software Printing Preferences 3 Note If you are using Windows® 2000, XP, Windows Vista™ or Windows Server® 2003, you can access the Printing Preferences dialog box by clicking Printing Preferences... in the General tab of the Brother HL-4050CDN(HL-4070CDW) BR-Script3 Properties dialog box. 3 Layout tab You can change the layout setting by choosing the settings for Orientation, Print on Both Sides (Duplex), Page Order and Page Per Sheet.
Driver and Software Paper/Quality tab Choose the Paper Source and Color. 3 • Paper Source You can choose Auto Select, Tray1, MP tray or Manual Feed. • Color Choose how to print color graphics either Black and White or Color.
Driver and Software Advanced options 3 1 3 2 a Choose the Paper Size and Copy Count (1). Paper Size From the drop-down box choose the Paper Size you are using. Copy Count The copy selection sets the number of copies that will be printed. b Set the Image Color Management, Scaling and TrueType Font settings (2). Image Color Management Specifies how to print your color graphics. • If you don’t want to enable Image Color Management, click ICM Disabled.
Driver and Software c You can change settings by choosing a setting in the Printer Features list (3): 3 3 Media Type You can use the following types of media in your printer. For the best print quality, select the type of media that you wish to use. Plain Paper Thin Paper Thick Paper Thicker Paper Bond Paper Env. Thick Env. Thin Recycled Paper Postcard Label Envelopes Job Spooling Secure Print allows you to secure documents that are password protected when they are sent to the printer.
Driver and Software Print Quality You can choose the following print quality settings. • Normal 600 dpi class. Recommended for ordinary printing. Good print quality with good print speeds. • Fine 2400 dpi class. The finest print mode. Use this mode to print precise images such as photographs. Since the print data is much larger than in normal mode, processing time, data transfer time and printing time will be longer. Toner Save You can conserve toner using this feature.
Driver and Software Halftone Screen Lock Stops other applications from modifying the Halftone settings. The default setting is On. High Quality Image Printing You can get high quality image printing. If you set High Quality Image Printing to On, the printing speed will be slower. BR-Script Level 3 You can change the BR-script emulation language level. Choose a level from the drop-down list.
Driver and Software Features in the printer driver (for Macintosh®) 3 This printer supports Mac OS® X 10.2.4 or greater. Note The screens in this section are from Mac OS® X 10.4. The screens on your Macintosh® will vary depending on your operating system. Page Setup 3 3 You can set the Paper Size, Orientation and Scale. Copies & Pages 3 You can set the Copies and Pages.
Driver and Software Cover Page (for Mac OS® X 10.4) 3 You can make the following cover page settings: 3 Print Cover Page If you want to add a cover page to your document, use this function. Cover Page Type Choose a template for the cover page. Billing Info If you want to add the billing information to the cover page, enter text in the Billing Info box. Layout 3 Pages per Sheet Choose how many pages will appear on each side of the paper.
Driver and Software Job Spooling 3 3 The printer keeps the last print job sent to it in memory. You can reprint a document without sending the data again from your computer (except for secure printing). Last Job Reprint: Reprint the last job Secure Print: Secure documents are documents that are password protected when they are sent to the printer. Only the people who know the password will be able to print them.
Driver and Software • For Mac OS® X 10.2 Select Duplex. Check the Duplex check box. Choose Use Duplex Unit and then Choose Flip on Long Edge or Flip on Short Edge. 3 Manual duplex (for Mac OS® X 10.3 or greater) Select Paper Handling. Choose Odd numbered pages and print, and then choose Even numbered pages and print.
Driver and Software Print Settings 3 You can change settings by choosing a setting in the Print Settings list: Basic tab 3 Media Type You can change the media type to one of the following: • Plain Paper • Thin Paper • Thick Paper • Thicker Paper • Bond Paper • Recycled Paper • Envelopes • Env. Thick • Env.
Driver and Software Color/Mono You can change the Color/Mono settings as follows: • Color When your document contains color and you want to print it in color, select this mode. • Mono Select this mode if your document has only black and grayscale text and/or objects. Mono mode makes the print processing speed faster than color mode. If your document contains color, selecting Mono mode prints your document in 256 levels of gray. • Auto The printer checks the content of your documents for color.
Driver and Software Advanced tab 3 Print Quality You can change the print quality as follows: • Normal 600 x 600 dpi. Recommended mode for ordinary printouts. Good print quality with reasonable printing speed. • Fine 2400 dpi class. The finest print mode. Use this mode to print precise images such as photographs. Since the print data is much larger than in normal mode, processing time / data transfer time and printing time will be longer.
Driver and Software Using the BR-Script3 printer driver (Post Script® 3™ language emulation for Macintosh®) (HL-4050CDN / HL-4070CDW only) 3 Note • To use the BR-Script3 printer driver on a Network, see the Network User’s Guide on the CD-ROM. 3 • To use the BR-Script3 printer driver, you need to set the Emulation to BR-Script3 by using the control panel before connecting the interface cable. (See Menu table on page 77.
Driver and Software c Open the Printer Setup Utility icon. For Mac OS® X 10.2 x users, open the Print Center icon. 3 d Click Add. For Mac OS® X 10.2.4 to 10.3 users, go to e. For Mac OS® X 10.4 or greater users, go to f. e Choose USB.
Driver and Software f Choose the model name and make sure that Brother in Printer Model (Print Using) and the model name which shows BR-Script in Model Name (Model) are selected, and then click Add. For Mac OS® X 10.2.4 to 10.3 users: 3 For Mac OS® X 10.4 or greater users: g From the Printer Setup Utility menu, choose Quit Printer Setup Utility.
Driver and Software Uninstalling the printer driver 3 You can uninstall the printer driver that you have installed with the following steps. Note • This is not available if you installed the printer driver from the Windows Add a printer function. 3 • After uninstalling, we recommend that you restart your computer to remove files that were in use during the uninstall.
Driver and Software Printer driver for Macintosh® 3 For Mac OS® X 10.2 3 a b c d Disconnect the USB cable between the Macintosh® and your printer. e Drag the CLaser06 folder (from the Macintosh HD (Startup Disk), choose Library, Printers, Brother) into the Trash and then empty the Trash. f Restart the Macintosh®. Restart the Macintosh®. 3 Log on as an ‘Administrator’.
Driver and Software Software 3 Software for networks 3 BRAdmin Light 3 BRAdmin Light is a utility for initial setup of Brother network connected devices. This utility can search for Brother products on your network, view the status and configure basic network settings, such as IP address. The BRAdmin Light utility is available for Windows® 2000/XP and Windows Vista™ and Windows Server® 2003, Mac OS® X 10.2.4 or greater computers.
Driver and Software About emulation modes 3 This printer has the following emulation modes. You can change the setting by using the control panel or Web Based Management (Web browser). HP LaserJet Mode The HP LaserJet mode (or HP mode) is the emulation mode in which this printer supports the PCL5C and PCL6 language of the Hewlett-Packard® LaserJet laser printer. Many applications support this type of laser printer. Using this mode will allow your printer to run at its best with those applications.
4 Control Panel 4 Control panel 4 This printer has one back lit liquid crystal display (LCD), eight buttons and two Light Emitting Diodes (LEDs) on the control panel. The display can show various messages with up to 16 characters in each of the two rows.
Control Panel Buttons 4 You can control the basic printer operations and change various printer settings with eight buttons (Go, Cancel, Reprint, +, -, Back, OK, Direct Print). button Operations Go Clear error messages. Pause and continue printing. Cancel 4 Stop and cancel the printing job in progress. Exit from the control panel menu, Reprint menu or Direct Print menu. Reprint Choose the Reprint menu. + Scroll backward through menus and the available options.
Control Panel Reprint 4 If you want to reprint a document that has just been printed, press Reprint. You can reprint when the printer is in the Ready state. (For details, see Reprinting documents on page 73.) + or - button 4 4 Moving through menus on the LCD 4 Pressing the + or - button when the printer is in the Ready state, takes it offline and the LCD will show the control panel menu. Press to scroll through the menus and options. Press the button until you see the setting you want.
Control Panel LEDs 4 The LEDs are lights which show the printer status. Data LED (Yellow) LED indication Meaning On Data is in the printer memory. Blinking Receiving or processing data. Off No remaining data in the memory. 4 Direct Print LED (Blue) LED indication Meaning On USB flash memory or PictBridge digital camera is inserted into the USB direct interface. Off USB flash memory or PictBridge digital camera is not inserted into the USB direct interface.
Control Panel LCD messages 4 The message on the LCD shows the current printer status during normal operation. Ready o o n o The four o marks (also n, n=blinking o) indicate the Black (K), Yellow (Y), Magenta (M), Cyan (C) toner cartridges from left to right. The o marks indicate the status of the toner in the toner cartridges. When the o mark blinks (n), the indicated toner is nearly empty. When toner becomes empty, the o indicator disappears completely.
Control Panel Reprinting documents 4 Reprinting the last job 4 You can reprint the data from the last print job without sending it from the computer again. Note • If the Reprint setting is set to Off on the control panel and you press Reprint, the LCD shows No Data Stored for a short time. 4 • If you want to cancel reprinting, press Cancel. • If the printer does not have enough memory to spool the print job data, it will not print the document.
Control Panel Note • Pressing the + or - key makes the number of reprint copies increase or decrease. You can choose between 1 and 999 Copies. • If you wait 30 seconds to continue the control panel operation, the LCD leaves the Reprint setting automatically. Printing Secure data 4 Secure data 4 Secure documents are protected by a password and only those people who know the password will be able to print the document. The printer will not print the document when you send it for printing.
Control Panel Note If you wait 30 seconds to continue the control panel operation, the LCD leaves the Reprint setting automatically. f Press the + or - button to choose Print. Press OK. XXXXXX.doc Print g Press the + or - button to enter the number of copies you want. Press OK or Go. 4 XXXXXX.doc Copies =1 h Printing When there is no last job data or secure data in memory 4 If the printer does not have reprint data in the memory and you press Reprint, the LCD will show No Data Stored.
Control Panel Using the control panel LCD menu 4 When you use the Menu keys (+, -, OK or Back), remember the following basic steps: If no control panel operations are performed for 30 seconds, the LCD automatically returns to Ready. When you press OK to choose a setting, Accepted appears on the second line of the LCD. After that, the LCD returns to the previous menu level. When you press Go to choose a setting, Accepted appears on the second line of the LCD.
Control Panel Menu table 4 There are nine menus. For more information about the selections available in each menu, see the tables below. Note The control panel LCD names for the paper trays are as follows. • Standard paper tray: Tray1 • Multi-purpose tray: MP 4 • Optional lower tray: Tray2 Machine Info. Submenu Menu Selections Descriptions Print Settings Prints the Printer Settings page. Test Print Prints the test page. Demo Print Prints the demonstration sheet.
Control Panel Machine Info. (continued) Submenu Menu Selections Descriptions Parts Life Drum Life Shows the remaining life for the drum unit. Belt Life Shows the remaining life for the belt unit. PF KitMP Life Shows the pages left to print with the PF kit MP. PF Kit1 Life Shows the pages left to print with the PF kit 1. PF Kit2 Life (HL-4050CDN/HL-4070CDW only) Shows the pages left to print with the PF kit 2. Fuser Life Shows the pages left to print with the fuser unit.
Control Panel Paper Tray (continued) Submenu Options Descriptions Priority When Tray Use is chosen as Auto: Chooses the order in which the printer uses the paper trays that contain paper of the same size. MP>T1*/T1>MP (For no Tray2 installed) MP>T1*/T1>MP (For Tray2 installed) MP>T1>T2*/MP>T2>T1>/T1>T2 >MP/T2>T1>MP/T1>T2/T2>T1 /T1>MP>T2/T2>MP>T1 4 MP First Off*/On Chooses whether to feed paper from the MP tray as a priority.
Control Panel General Setup (continued) Submenu Options Descriptions Setting Lock Off*/On Turns the lock panel settings On or Off using the password. Reprint On*/Off Turns the reprint settings On or Off. Choose the interface you use. Interface Menu Selections Select Auto*/USB/Network 4 Auto*/Parallel/USB/ Network Auto IF Time 1/2/3/4/5*.../99 (sec) You need to set the time-out period for the auto interface selection.
Control Panel Print Menu (continued) Submenu Menu Selections Options Descriptions Print Position X Offset -500/-499.../0*.../499/ 500Dots Moves the print start position (at the top-left corner of pages) horizontally up to -500 (left) to +500 (right) dots in 300 dpi. Y Offset -50/-49.../0*.../499/ 500Dots Moves the print start position (at the top-left corner of pages) vertically up to -50 (up) to +500 (down) dots in 300 dpi. Auto FF HP LaserJet Off*/On Font No. I000.../I059*...
Control Panel Print Menu (continued) Submenu Menu Selections Options BR-Script Error Print On*/Off (HL-4050CDN/ HL-4070CDW only) CAPT Off*/On Descriptions The default settings are shown in Bold with an asterisk. LAN for HL-4040CN/HL-4050CDN users 4 Submenu Menu Selections Options TCP/IP BOOT Method Auto*/Static/RARP/BOOTP Choose the IP method that best suits /DHCP your needs. IP Address ###.###.###.### (000.000.000.000)* 1 Enter the IP address. Subnet Mask ###.###.###.### (000.000.
Control Panel LAN for HL-4070CDW users Submenu 1 Submenu 2 Menu Selections Options Descriptions Wired TCP/IP BOOT Method Auto*/Static/RARP/BOOTP /DHCP Choose the IP method that best suits your needs. IP Address ###.###.###.### (000.000.000.000)* 1 Enter the IP address. Subnet Mask ###.###.###.### (000.000.000.000)* 1 Enter the Subnet mask. Gateway ###.###.###.### (000.000.000.000)* Enter the Gateway address.
Control Panel LAN for HL-4070CDW users (continued) Submenu 1 Submenu 2 Menu Selections WLAN Status Status Set to Default Descriptions Signal SSID (Shows SSID [uses a maximum of 32 digits and characters 0-9, a-z and A-Z in ASCII values]) Comm. Mode AD-HOC*/Infrastructure Shows the current Communication Mode. 4 Restores wired network settings of the internal print server to default. WLAN Enable Factory Reset Options Chooses Ethernet link mode.
Control Panel Color Correction (continued) Submenu Menu Selections Manual Regist. Print Chart Options Descriptions Prints the chart to manually check the registration of the colors. Set Registration 1 2 3 4 5 6 7 8 9 Magenta Left Cyan Left Yellow Left Magenta Center Cyan Center Yellow Center Magenta Right Cyan Right Yellow Right Enter the correction value on the chart you printed from the Print Chart. 4 The default settings are shown in Bold with an asterisk.
Control Panel PictBridge Submenu Menu Selections Options Descriptions Paper Size Letter*/A4/B5/A5/B6/A6 Sets the size of paper for PictBridge. Orientation This printer can print pages in portrait or landscape orientation for PictBridge. Portrait*/Landscape Portrait/Landscape* Date&Time Off*/On Prints the date and time. File Name Off*/On Prints the file name. Print Quality Normal*/Fine 4 The default settings are shown in Bold with an asterisk.
Control Panel Example of changing a menu setting 4 Setting IP address a Press the + or - button to choose LAN (and to display each setting shown below). Select ab or OK Machine Info. h Select ab or OK LAN b 4 Press OK. LAN TCP / IP c Press OK. TCP / IP BOOT Method d Press the - button. TCP / IP IP Address e Press OK. The last digit in the first part of the number is blinking. IP Address 192.0.0.192 f Press the + or - button to increase or decrease the number.
Control Panel Default settings 4 The printer settings have been set at the factory before shipment. They are called default settings (see Menu table on page 77). Although you can run the printer with these default settings unchanged, you can tailor the printer with user settings. Note Changing the user settings does not affect the default settings. You cannot modify the preset default settings. 4 The changed user settings can be restored to the default settings with the Reset Menu.
Control Panel Calibration 4 The output density for each color may vary depending on the environment the machine is in such as temperature and humidity. Calibration helps you to improve the color density. a Press the + or - key to choose Color Correction. Press OK. Select ab or OK Machine Info. h 4 Select ab or OK Color Correction b Press OK. Color Correction ColorCalibration c Press OK. ColorCalibration Calibrate d Press OK again.
Control Panel Auto Registration Registration 4 4 You can adjust the print position of each color automatically. a Press the + or - key to choose Color Correction. Press OK. Select ab or OK Machine Info. h 4 Select ab or OK Color Correction b Press the + or - key to choose Auto Regist.. Press OK. Color Correction Auto Regist. c Press OK. Auto Regist. Registration d Press OK again. Registration OK? Frequency 4 You can set how often the auto registration occurs.
Control Panel Manual Registration Print Chart 4 4 You can print the color registration chart to manually check the registration of the colors. a Press the + or - key to choose Color Correction. Press OK. Select ab or OK Machine Info. h 4 Select ab or OK Color Correction b Press the + or - key to choose Manual Regist.. Press OK. Color Correction Manual Regist. c Press OK. Manual Regist. Print Chart Set Registration 4 You can correct the color registration manually.
5 Options 5 This printer has the following optional accessories. You can increase the capabilities of the printer with these items. Lower tray (HL-4050CDN/HL-4070CDW only) SO-DIMM memory LT-100CL 5 See Lower tray (LT-100CL) (HL-4050CDN / HL-4070CDW only) on this page. See SO-DIMM on page 93. Lower tray (LT-100CL) (HL-4050CDN / HL-4070CDW only) 5 One optional lower tray (Tray 2) can be installed, and the lower tray can hold up to 500 sheets of 80 g/m2 (20 lb) paper.
Options SO-DIMM 5 The printer has 64 MB of standard memory and one slot for optional memory expansion. You can expand the memory up to 576 MB by installing a Dual In-line Memory Module (SO-DIMM).
Options Installing extra memory 5 Note Always turn off the printer power switch before installing or removing the SO-DIMM. a Turn off the printer power switch, and then unplug the printer. Disconnect the interface cable from the printer. b Remove the two SO-DIMM covers (both the plastic one (1) and the metal one (2)). 2 5 1 c Unpack the SO-DIMM and hold it by its edges. CAUTION To prevent damage to the printer from static electricity, DO NOT touch the memory chips or the board surface.
Options e Put the two SO-DIMM covers back on (both the plastic one (1) and the metal one (2)). 2 1 5 f Reconnect the interface cable to your printer. Plug the printer back in, and then turn on the power switch. Note To make sure that you have installed the SO-DIMM properly, you can print the printer settings page that shows the current memory size. (See Menu table on page 77.
6 Routine Maintenance 6 Replacing the consumable items 6 When you need to replace the consumable items, the following messages will appear on the LCD. LCD messages Consumable item Approximate life to replace How to replace Order No.
Routine Maintenance The following are maintenance messages that appear alternately with the Ready message on the upper row of the LCD when the printer is in the Ready state. These messages advise you that you will need to replace each of the consumable items as soon as possible, since the consumable item’s end of life has been reached. The printer will continue printing when any of these messages appear on the LCD. LCD messages Consumable part to replace Approximate life How to replace Order No.
Routine Maintenance Toner cartridges 6 Note • The amount of toner used varies according to what is printed on the page and the print density setting. • Wait to unpack the toner cartridge until immediately before you put it into the printer. Toner nearly empty message 6 Check printed pages, page counter, and display messages regularly. If the o indicator starts blinking, the printer has nearly run out of toner or the toner is not evenly distributed inside the cartridge.
Routine Maintenance CAUTION Wait to unpack the toner cartridge until immediately before you put it in the printer. If toner cartridges are left unpacked for a long time the toner life will be shortened. If an unpacked drum unit is put in direct sunlight or room light, the unit may be damaged. Put the toner cartridge in the drum unit immediately after you have removed the protective cover. To prevent any degradation to the print quality, DO NOT touch the shaded parts shown in the illustrations.
Routine Maintenance a Turn off the printer power switch. Press the front cover release button and then open the front cover. b Hold the green handle of the drum unit. Lift the drum unit up and then pull it out until it stops. c Hold the handle of the toner cartridge and pull it out of the drum unit. Repeat this for all the toner cartridges.
Routine Maintenance CAUTION We recommend that you place the toner cartridges on a clean, flat surface with a piece of disposable paper underneath them in case you accidentally spill or scatter toner. DO NOT put a toner cartridge into a fire. It could explode, resulting in injuries. Handle the toner cartridge carefully. If toner scatters on your hands or clothes, wipe or wash it off with cold water at once. To avoid print quality problems, DO NOT touch the shaded parts shown in the illustrations.
Routine Maintenance d Clean the corona wire as follows: 1 Push to release the latches of the white corona wire cover (1), and then open the cover. 2 1 2 6 1 1 2 1 1 2 1 2 Clean the corona wire inside the drum unit by gently sliding the green tab from left to right and right to left several times. 1 2 1 2 1 1 2 1 1 2 CAUTION Be sure to return the tab to the home position a (1). If you do not, printed pages may have a vertical stripe.
Routine Maintenance 3 Close the corona wire cover. 2 1 2 6 1 1 2 1 1 2 4 Repeat steps 1 to 3 to clean each of three remaining corona wires. e Unpack the new toner cartridge. Hold the cartridge with both hands and gently rock it five or six times to spread the toner evenly inside the cartridge. f Remove the protective cover.
Routine Maintenance g Hold the handle of the toner cartridge and slide the toner cartridge into the drum unit. Make sure that you match the toner cartridge color to the same color label on the drum unit, and make sure that you fold down the toner cartridge handle (1) once the toner cartridge is in place. Repeat this for all the toner cartridges. (1) (1) 1 2 3 4 1.C - Cyan 2.M - Magenta 3.Y - Yellow 4.K - Black 6 h Put the drum unit back in the printer. i Close the front cover of the printer.
Routine Maintenance Drum unit 6 Order No. DR-110CL A new drum unit can print approximately 17,000 A4 or Letter size single-sided pages. Note • There are many factors that determine the actual drum life, such as the temperature, humidity, type of paper, type of toner used and so on. Under ideal conditions, the average drum life is estimated at approximately 17,000 pages. The actual number of pages that your drum will print may be significantly less than this estimate.
Routine Maintenance b Hold the green handle of the drum unit. Lift the drum unit up and then pull it out until it stops. c Release the gray lock lever (1) that is on the left side of the printer. Pull the drum unit completely out of the printer using the green handles on the drum unit. 1 CAUTION Hold the green handles of the drum unit when you carry it. DO NOT hold the sides of the drum unit.
Routine Maintenance d Hold the handle of the toner cartridge and pull it out of the drum unit. Repeat this for all the toner cartridges. 6 CAUTION To prevent damage to the printer from static electricity, DO NOT touch the electrodes shown in the illustration. To avoid print quality problems, DO NOT touch the shaded parts shown in the illustrations.
Routine Maintenance e Unpack the new drum unit and remove the protective cover. 2 1 CAUTION Wait to unpack a drum unit until immediately before you put it in the printer. Exposure to direct sunlight or room light may damage the drum unit. f Hold the handle of the toner cartridge and slide the toner cartridge into the drum unit.
Routine Maintenance g Put the drum unit back in the printer as follows. 1 Make sure that the gray lock lever (1) is in the up position and put the drum unit in the printer. Push down the gray lock lever (1). 1 1 Note When you put the drum unit in the printer, match the green guides (1) of the drum unit handle to the green arrows (2) on both sides of the machine. 2 2 1 1 2 h Push the drum unit in until it stops. Close the front cover.
Routine Maintenance When you replace the drum unit with a new one, you need to reset the drum counter by completing the following steps: a b c Turn the printer power switch back on. d e Press OK, and then press the + key to choose Drum Unit. Press the + or - key to choose Machine Info.. Press OK to proceed to the next menu level, and then press the + or - key to choose Reset Parts Life. Press OK two times.
Routine Maintenance Belt unit 6 Order No. BU-100CL Change Belt Unit message 6 When the belt unit runs out, the following message appears on the LCD. When you see this message, you must replace the belt unit: Change Belt Unit CAUTION DO NOT touch the surface of the belt unit. If you touch it, it could degrade print quality. 6 Damage caused by incorrect handling of the belt unit may void your warranty. Replacing the belt unit 6 a Turn off the printer power switch.
Routine Maintenance c Release the gray lock lever (1) that is on the left side of the printer. Pull the drum unit completely out of the printer using the green handles on the drum unit. 1 6 CAUTION Hold the green handles of the drum unit when you carry it. DO NOT hold the sides of the drum unit. We recommend that you place the drum unit and belt unit on a clean, flat surface with a piece of disposable paper underneath it in case you accidentally spill or scatter toner.
Routine Maintenance d Hold the green parts of the belt unit with both hands and lift the belt unit up, then pull it out. e Unpack the new belt unit, and remove the protective cover and paper. f Put the new belt unit in the printer. Match the h mark on the belt unit to the g mark on the printer. Push down on the green area of the belt unit to lock it in place.
Routine Maintenance g Put the drum unit back in the printer as follows. 1 Make sure that the gray lock lever (1) is in the up position and put the drum unit in the printer. Push down the gray lock lever (1). 1 1 Note When you put the drum unit in the printer, match the green guides (1) of the drum unit handle to the green arrows (2) on both sides of the machine. 2 2 1 1 2 h Push the drum unit in until it stops. Close the front cover.
Routine Maintenance When you replace the belt unit with a new one, you need to reset the belt unit counter by completing the following steps: a b c Turn the printer power switch back on. d e Press OK, and then press the + button to choose Belt Unit. Press the + or - button to choose Machine Info.. Press OK to proceed to the next menu level, and then press the + or - button to choose Reset Parts Life. Press OK two times.
Routine Maintenance Waste toner box 6 Order No. WT-100CL After you have printed approximately 20,000 pages at 5% coverage for CMYK each, you must change the waste toner box. The actual number of printed pages will vary depending on the print jobs and paper you use. Waste Toner Soon Waste Toner Box Full message 6 When the waste toner box is full, the following message appears on the LCD and the printer will stop printing.
Routine Maintenance b Hold the green handle of the drum unit. Lift the drum unit up and then pull it out until it stops. c Release the gray lock lever (1) that is on the left side of the printer. Pull the drum unit completely out of the printer using the green handles on the drum unit.
Routine Maintenance CAUTION Hold the green handles of the drum unit when you carry it. DO NOT hold the sides of the drum unit. We recommend that you place the drum unit and belt unit on a clean, flat surface with a piece of disposable paper underneath it in case you accidentally spill or scatter toner. If toner scatters on your hands or clothes, wipe or wash it off with cold water at once. To prevent damage to the printer from static electricity, DO NOT touch the electrodes shown in the illustration.
Routine Maintenance e Remove the waste toner box from the printer using the green handle. 6 CAUTION Handle the waste toner cartridges carefully in case you accidentally spill or scatter toner. If toner scatters on your hands or clothes, wipe or wash it off with cold water at once. Note Discard the used waste toner box according to local regulations, keeping it separate from domestic waste. If you have questions, call your local waste disposal office.
Routine Maintenance g Put the belt unit back in the printer. Match the h mark on the belt unit to the g mark on the printer. Push down on the green area of the belt unit to lock it in place. h Put the drum unit back in the printer as follows. 1 Make sure that the gray lock lever (1) is in the up position and put the drum unit in the printer. Push down the gray lock lever (1).
Routine Maintenance 2 i Push the drum unit in until it stops. Close the front cover.
Routine Maintenance Cleaning 6 Clean the outside and inside of the printer regularly with a dry, lint-free cloth. When you replace the toner cartridge or the drum unit, make sure that you clean the inside of the printer. If printed pages are stained with toner, clean the inside of the printer with a dry, lint-free cloth. Cleaning the outside of the printer 6 WARNING Use neutral detergents. Cleaning with volatile liquids such as thinner or benzine will damage the surface of the printer.
Routine Maintenance c Wipe the outside of the printer with a dry, lint-free cloth to remove dust. d e Remove anything that is stuck inside the paper tray. Wipe the inside of the paper tray with a dry, lint-free cloth to remove dust. 6 f g Put the paper tray back in the printer. Plug the printer back in, and then turn on the power switch. Cleaning the inside of the scanner windows a 6 Turn off the printer power switch and then unplug the printer.
Routine Maintenance b Press the front cover release button and then open the front cover. c Hold the green handle of the drum unit. Lift the drum unit up and then pull it out until it stops. d Release the gray lock lever (1) that is on the left side of the printer. Pull the drum unit completely out of the printer using the green handles on the drum unit.
Routine Maintenance CAUTION Hold the green handles of the drum unit when you carry it. DO NOT hold the sides of the drum unit. We recommend that you place the drum unit on a clean, flat surface with a piece of disposable paper underneath it in case you accidentally spill or scatter toner. 6 To prevent damage to the printer from static electricity, DO NOT touch the electrodes shown in the illustration. e Wipe the scanner windows (1) with a dry, lint-free cloth.
Routine Maintenance f Put the drum unit back in the printer as follows. 1 Make sure that the gray lock lever (1) is in the up position and put the drum unit in the printer. Push down the gray lock lever (1). 1 1 Note When you put the drum unit in the printer, match the green guides (1) of the drum unit handle to the green arrows (2) on both sides of the machine. 2 2 1 1 2 g h Push the drum unit in until it stops. Close the front cover.
Routine Maintenance Cleaning the corona wires 6 If you have print quality problems, clean the corona wires as follows: a Turn off the printer power switch. Press the front cover release button and then open the front cover. 6 b Hold the green handle of the drum unit. Lift the drum unit up and then pull it out until it stops.
Routine Maintenance c Hold the handle of the toner cartridge and pull it out of the drum unit. Repeat this for all the toner cartridges. 6 CAUTION We recommend that you place the toner cartridge on a clean, flat surface with a piece of disposable paper underneath it in case you accidentally spill or scatter toner. DO NOT put a toner cartridge into a fire. It could explode, resulting in injuries. Handle the toner cartridge carefully.
Routine Maintenance d Push to release the latches of the white corona wire cover (1), and then open the cover. 2 1 2 6 1 1 2 1 1 2 1 Note We recommend that you clean the corona wire for each of the colors. If you want to clean only the corona wire of the color that caused the print quality problem, see the illustration below to identify the position of each of the corona wires.
Routine Maintenance e Clean the corona wire inside the drum unit by gently sliding the green tab from left to right and right to left several times. 1 2 1 2 1 1 2 6 1 1 2 CAUTION Be sure to return the tab to the home position a (1). If you do not, printed pages may have a vertical stripe. f Close the corona wire cover. g Repeat steps d to f to clean each of the remaining corona wires.
Routine Maintenance h Hold the handle of the toner cartridge and slide the toner cartridge into the drum unit. Make sure that you match the toner cartridge color to the same color label on the drum unit, and make sure that you fold down the toner cartridge handle (1) once the toner cartridge is in place. Repeat this for all the toner cartridges. 1.C - Cyan (1) (1) 1 2 3 4 2.M - Magenta 3.Y - Yellow 4.K - Black 6 i Put the drum unit back in the printer. j Close the front cover of the printer.
Routine Maintenance Cleaning the drum unit 6 If you have print quality problems, clean the drum unit as follows: a Pull the drum unit out from the printer and pull all the toner cartridge out from the drum unit. See steps a to d in Replacing the drum unit on page 105-107. b Turn the drum unit over by holding the green handle. Make sure that the drum unit gears (1) are on the left hand side.
Routine Maintenance d Turn the drum unit gear toward you by hand while looking at the surface of the drum (1). 1 e When you have found the mark on the drum that matches the print sample, wipe the surface of the drum gently with a cotton swab until the dust or paper powder on the surface comes off. 6 CAUTION DO NOT clean the surface of the photosensitive drum with a sharp object. f Turn the drum unit gear toward you by hand to return it to the home position.
Routine Maintenance Shipping the printer 6 WARNING Once your printer has been set up and used, we do not recommend that it be moved or shipped unless absolutely necessary. Color laser printers are complex printing devices. Moving the printer or shipping it without properly removing the installed supplies can result in SEVERE damage to the printer. As a result, your printer may not operate properly afterwards.
Routine Maintenance Repacking the printer 6 WARNING This printer is heavy and weights roughly 29.1 kg (64.2 lb). To prevent injuries when moving or lifting this printer, make sure to use at least two people. Be careful not to pinch your fingers when you put the printer down. a Turn off the power switch, and unplug all the cables from the printer. 6 b Press the front cover release button and then open the front cover. c Hold the green handle of the drum unit.
Routine Maintenance d Release the gray lock lever (1) that is on the left side of the printer. Pull the drum unit completely out using the green handles on the drum unit. 1 6 CAUTION Hold the green handles of the drum unit when you carry it. DO NOT hold the sides of the drum unit. We recommend that you place the drum unit on a clean, flat surface with a piece of disposable paper underneath it in case you accidentally spill or scatter toner.
Routine Maintenance e Hold the handle of the toner cartridge and pull it out of the drum unit. Repeat this for all the toner cartridges. 6 CAUTION To avoid print quality problems, DO NOT touch the shaded parts shown in the illustrations. f Attach the original orange protective cover to each of the toner cartridges. Place each of the toner cartridges into the plastic bag included in the carton. Repeat steps e to f for all the toner cartridges.
Routine Maintenance g Hold the green parts of the belt unit with both hands and lift the belt unit up, then pull it out. Note We recommend that you put the belt unit on a clean, flat surface with a piece of disposable paper underneath it in case you accidentally spill or scatter toner. 6 h Remove the waste toner box from the printer using the green handle and place it into the plastic bag included in the carton. i Put the belt unit back in the printer.
Routine Maintenance j Insert the original orange packing material for locking the belt unit as shown in the illustration 6 k Put a piece of paper (letter or A4) on the belt unit to prevent damage to the belt unit. l Make sure that the gray lock lever (1) is in the up position and put the drum unit in the printer. Push down the gray lock lever (1).
Routine Maintenance m Push the drum unit in until it stops. n Insert the original orange packing material for the drum unit as shown in the illustration, and then close the front cover. o Two people should place the printer into the plastic bag and put the printer and the Styrofoam pieces into the carton. Match the front side of the printer to the “FRONT” mark (1) on the Styrofoam pieces. Put the Styrofoam piece for the toner cartridges (2) on top of the printer.
Routine Maintenance p Put the toner cartridges into the Styrofoam piece. q Put the two carton trays (1) (2) on the top and put the waste toner box in the tray placed towards on the front side of the printer (1). 1 r 6 2 Close the carton and tape it shut.
7 Troubleshooting 7 You can correct most problems by yourself. If you need additional help, the Brother Solutions Center offers the latest FAQs and troubleshooting tips. Visit us at http://solutions.brother.com. Identifying your problem First, check the following: 7 7 The AC power cord is connected properly and the printer is turned on. All of the protective parts have been removed. The toner cartridges and drum unit are installed properly. The front and back covers are fully closed.
Troubleshooting LCD messages 7 If any problems occur, the printer automatically stops printing, diagnoses the problem, and displays the resulting message on the LCD to alert you. Take the appropriate action, referring to the following tables. If you cannot clear the problem, call the dealer you bought the printer from or Brother Customer Service. Note The LCD names for the paper trays are as follows.
Troubleshooting Error messages (continued) Error message Action Size Mismatch Put the same size paper in the paper tray or MP tray that is selected in the printer driver, and then press Go, or select the size of paper you set in the Tray Size setting from the control panel. Toner Life End It is time to replace the toner cartridge. (See Replacing a toner cartridge on page 98.) Tray2 Error Take out Tray2 and push it back in firmly.
Troubleshooting Maintenance messages (continued) Error message Meaning Action Waste Toner Soon The waste toner box is almost full. Be ready to replace the waste toner box. (See Replacing the waste toner box on page 116.) Call service messages Call service message Action Print Unable ## Turn off the printer. Wait a few seconds, then turn it on again. If this does not clear the problem, call your dealer or a Brother Customer Service.
Troubleshooting Paper handling 7 First, make sure that you are using paper that meets Brother recommended paper specifications. (See About paper on page 6.) Problem The printer does not feed paper. Recommendation If there is paper in the paper tray, make sure it is straight. If the paper is curled, straighten it before printing. Sometimes it is helpful to remove the paper. Turn the stack over and put it back in the paper tray. Reduce the amount of paper in the paper tray, and then try again.
Troubleshooting Paper jams and how to clear them 7 If paper jams inside the printer, the printer will stop. One of the following LCD messages will appear to tell you where to find the jammed paper. 6 1 5 4 2 3 Jam MP Tray (1) Paper jam in the MP tray. (See page 148.) 7 Jam Tray 1 (2) Paper jam in the standard paper tray (Tray 1). (See page 148.) Jam Tray 2 (3) Paper jam in the lower tray (Tray 2). (See page 148.
Troubleshooting Jam MP Tray (paper jam in the MP tray) 7 Jam MP Tray If a paper jam occurs inside the MP tray, follow these steps: a b c Remove the paper from the MP tray. d When loading paper in the MP tray, make sure that the paper stays under the maximum paper height guides on both sides of the tray. e Remove any jammed paper from in and around the MP Tray. Fan the paper stack, and then put it back in the MP tray. 7 If the printer does not automatically start printing, press Go.
Troubleshooting a Pull the paper tray completely out of the printer. b Use both hands to slowly pull out the jammed paper. c Put paper below the maximum paper mark. While pressing the green paper-guide release lever, slide the paper guides to fit the paper size. Make sure that the guides are firmly in the slots. d e Put the paper tray firmly back in the printer. 7 Open the front cover and close it to resume printing.
Troubleshooting Jam Duplex (paper jam underneath the standard paper tray (tray 1) or in the fuser unit) (HL-4050CDN / HL-4070CDW only) 7 Jam Duplex If a paper jam occurs inside the duplex unit, follow these steps: a Pull the paper tray completely out of the printer and check inside the printer. 7 b If paper is not caught inside the printer, check underneath the paper tray. Note Do not put the paper tray back in at this point.
Troubleshooting c If the paper is not caught in the paper tray, open the back cover. d Push the gray lever on the left hand side (1) to the right. 1 7 HOT SURFACE After you have just used the printer, some internal parts of the printer will be extremely hot. Wait for the printer to cool down before you touch the internal parts of the printer.
Troubleshooting e Pull out the jammed paper slowly. f Reset the gray lever on the left hand side (1) back to the original position. 1 7 g h Fully close the back cover. Put the paper tray back in the printer.
Troubleshooting Jam Rear (paper jam behind the back cover) 7 Jam Rear HOT SURFACE After you have just used the printer, some internal parts of the printer will be extremely hot. When you open the front cover or back cover of the printer, DO NOT touch the shaded parts shown in the illustrations. 7 If a paper jam occurs behind the face-up output tray, follow these steps: a Open the back cover.
Troubleshooting b Pull the tabs at the left and right hand sides toward you and fold down the fuser cover (1). 1 c Using both hands, gently pull the jammed paper out of the fuser unit. 7 HOT SURFACE After you have just used the printer, some internal parts of the printer will be extremely hot. Wait for the printer to cool down before you touch the internal parts of the printer.
Troubleshooting d Close the fuser cover (1) and lift the tabs at the left and right hand sides. 1 e Fully close the back covers.
Troubleshooting Jam Inside (paper jam inside the printer) 7 Jam Inside HOT SURFACE After you have just used the printer, some internal parts of the printer will be extremely hot. When you open the front cover or back cover of the printer, DO NOT touch the shaded parts shown in the illustrations. 7 If a paper jam occurs inside the printer, follow these steps: a Turn off the printer power switch. Press the front cover release button and then open the front cover.
Troubleshooting b Hold the green handle of the drum unit. Lift the drum unit up and then pull it out until it stops. Note If you cannot pull the drum unit out, make sure that the front cover is fully open as shown below. 7 c Release the gray lock lever (1) that is on the left side of the printer. Pull the drum unit completely out using the green handles on the drum unit.
Troubleshooting CAUTION Hold the green handles of the drum unit when you carry it. DO NOT hold the sides of the drum unit. We recommend that you place the drum unit on a clean, flat surface with a piece of disposable paper underneath it in case you accidentally spill or scatter toner. To prevent damage to the printer from static electricity, DO NOT touch the electrodes shown in the illustration. d 7 Pull out the jammed paper slowly.
Troubleshooting e Put the drum unit back in the printer as follows. 1 Make sure that the gray lock lever (1) is in the up position and put the drum unit in the printer. Push down the gray lock lever (1). 1 1 Note When you put the drum unit in the printer, match the green guides (1) of the drum unit handle to the green arrows (2) on both sides of the machine. 2 2 1 1 2 f Push the drum unit in until it stops. Close the front cover.
Troubleshooting Improving the print quality 7 If you have a print quality problem, print a test page first (see Menu table on page 77). If the printout looks good, the problem is probably not the printer. Check the interface cable or try the printer on another computer. This section gives information on the following topics. Note You can resolve a print quality problem by replacing a toner cartridge with a new one when the toner indicators start blinking or the LCD shows the Toner Life End message.
Troubleshooting Examples of poor print quality Colored streaks or bands down the page Recommendation Replace the toner cartridge that matches the color of the streak or band. (See Replacing a toner cartridge on page 98.) Clean all four corona wires (one for each color) inside the drum unit by sliding the green tab. (See Cleaning the corona wires on page 127.) ABCDEFGHIJKLMNOPQRSTUVWXYZ. 0123456789. abcdefghijklmnopqrstuvwxyz. ABCDEFGHIJKLMNOPQRSTUVWXYZ. 0123456789. abcdefghijklmnopqrstuvwxyz.
Troubleshooting Examples of poor print quality Colored spots at 75mm ABCDEFGHIJKLMNOPQRSTUVWXYZ. 0123456789. abcdefghijklmnopqrstuvwxyz. ABCDEFGHIJKLMNOPQRSTUVWXYZ. 0123456789. abcdefghijklmnopqrstuvwxyz. ABCDEFGHIJKLMNOPQRSTUVWXYZ. 0123456789. abcdefghijklmnopqrstuvwxyz. ABCDEFGHIJKLMNOPQRSTUVWXYZ. 0123456789. abcdefghijklmnopqrstuvwxyz. Recommendation If the problem is not solved after printing a few pages, the drum unit may have glue from a label stuck on the drum surface. Clean the drum unit.
Troubleshooting Examples of poor print quality Color misregistration Recommendation Make sure that the drum unit is installed properly. Make sure that the belt unit is installed properly. ABCDEFGHIJKLMNOPQRSTUVWXYZ. 0123456789. abcdefghijklmnopqrstuvwxyz. ABCDEFGHIJKLMNOPQRSTUVWXYZ. 0123456789. abcdefghijklmnopqrstuvwxyz. ABCDEFGHIJKLMNOPQRSTUVWXYZ. 0123456789. abcdefghijklmnopqrstuvwxyz. ABCDEFGHIJKLMNOPQRSTUVWXYZ. 0123456789. abcdefghijklmnopqrstuvwxyz.
Troubleshooting Examples of poor print quality Recommendation Change to the recommended type of paper. Wrinkle Make sure that the back cover is closed properly. ABCDEFGHIJKLMNOPQRSTUVWXYZ. 0123456789. abcdefghijklmnopqrstuvwxyz. ABCDEFGHIJKLMNOPQRSTUVWXYZ. 0123456789. abcdefghijklmnopqrstuvwxyz. ABCDEFGHIJKLMNOPQRSTUVWXYZ. 0123456789. abcdefghijklmnopqrstuvwxyz. ABCDEFGHIJKLMNOPQRSTUVWXYZ. 0123456789. abcdefghijklmnopqrstuvwxyz. Make sure that the drum unit is installed properly.
Troubleshooting Examples of poor print quality Curled or wavy Recommendation Check the paper type and quality. High temperatures and high humidity will cause paper to curl. (See About paper on page 6.) If you do not use the printer often, the paper may have been in the paper tray too long. Turn over the stack of paper in the paper tray. Also, fan the paper stack and then rotate the paper 180° in the paper tray. Follow these steps: a b Open the back cover.
Troubleshooting Examples of poor print quality Recommendation 7 a b EFGHIJKLMN ABCDEFG Envelope creases Open the back cover. Pull down the two gray levers, one on the left-hand side and one on the right-hand side, to the envelope position as shown in the illustration below. 7 c Close the back cover and re-send the print job. Note When you have finished printing, open the back cover and reset the two gray levers back to the original position.
Troubleshooting Examples of poor print quality Recommendation Toner scatter or toner stain on the edge of duplex pages CAUTION ABCDEFGHIJKLMNOPQRSTUVWXYZ. 0123456789. abcdefghijklmnopqrstuvwxyz. ABCDEFGHIJKLMNOPQRSTUVWXYZ. 0123456789. abcdefghijklmnopqrstuvwxyz. ABCDEFGHIJKLMNOPQRSTUVWXYZ. 0123456789. abcdefghijklmnopqrstuvwxyz. ABCDEFGHIJKLMNOPQRSTUVWXYZ. 0123456789. abcdefghijklmnopqrstuvwxyz.
Troubleshooting Examples of poor print quality White lines or ribbing down the page on duplex print Recommendation Choose Thin Paper mode in the printer driver and re-send the print job. If the problem is not solved after printing a few pages, follow these steps: ABCDEFGHIJKLMNOPQRSTUVWXYZ. 0123456789. abcdefghijklmnopqrstuvwxyz. ABCDEFGHIJKLMNOPQRSTUVWXYZ. 0123456789. abcdefghijklmnopqrstuvwxyz. ABCDEFGHIJKLMNOPQRSTUVWXYZ. 0123456789. abcdefghijklmnopqrstuvwxyz. ABCDEFGHIJKLMNOPQRSTUVWXYZ. 0123456789.
Troubleshooting Solving print problems Problem The printer prints unexpectedly or it prints garbage data. 7 Recommendation Make sure that the printer cable is not too long. We recommend that you use a parallel or USB cable that is no longer than 2 meters (6.5 feet). Make sure that the printer cable is not damaged or broken. If you are using an interface-switching device, remove it. Connect your computer directly to your printer, and then try again.
Troubleshooting For Macintosh® with USB Problem 7 Recommendation The printer does not appear in Print Center (Mac OS® X 10.2) or Print Setup Utility (Mac OS® X 10.3 or greater). Make sure that the printer is turned on. Unable to print from the application. Make sure that the supplied Macintosh® printer driver is installed in the Hard Disk and that it is chosen with Print Center (Mac OS® X 10.2) or Print Setup Utility (Mac OS® X 10.3 or greater).
A Appendix A Printer specifications A Engine A Model HL-4040CN Technology HL-4050CDN HL-4070CDW Electrophotographic 12 Print speed (A4 size/ Letter size) Standard (A4/Letter) Monochrome Up to 20 ppm (A4 size) 3,Up to 21 ppm (Letter size) 3 Full Color Up to 20 ppm (A4 size) 3,Up to 21 ppm (Letter size) 3 Auto Duplex Monochrome N/A (A4/Letter) (HL-4050CDN Full Color N/A /HL-4070CDW only) Up to 7 sides per minute (3.5 sheets per minute) Up to 7 sides per minute (3.
Appendix Controller A Model HL-4040CN Processor 300MHz Memory HL-4050CDN Standard 64 MB Option 1 DIMM slot; expandable up to 576 MB Interface Standard Hi-Speed USB 2.0, Hi-Speed USB 2.0, IEEE 10BASE-T/100BASE-TX 1284 Parallel, 10BASEEthernet T/100BASE-TX Ethernet Network Connectivity Protocols TCP/IP (Standard 10/100BASE-TX Ethernet) 1 Management tool BRAdmin Light HL-4070CDW Hi-Speed USB 2.0, IEEE 1284 Parallel, 10BASET/100BASE-TX Ethernet, Wireless LAN IEEE 802.
Appendix Software A Model Printer driver HL-4040CN Windows® HL-4050CDN Host-Based Driver for Windows® 2000/XP/XP Professional x64 Edition, Windows Vista™, Windows Server® 2003/Windows Server® 2003 x64 Edition BR-Script 3 (PPD file) for Windows® 2000/XP/XP Professional x64 Edition, Windows Vista™, Windows Server® 2003/Windows Server® 2003 x64 Edition. N/A Macintosh® Macintosh Printer Driver for Mac OS® × 10.2.4 or greater N/A Linux HL-4070CDW BR-Script 3 (PPD file) for Mac OS® X 10.2.
Appendix Paper handling Model Paper Input 1 1 A HL-4040CN Multi-purpose tray HL-4050CDN HL-4070CDW 50 sheets Paper tray (Standard) 250 sheets Lower tray (Option) N/A Paper Output 1 Face-down 150 sheets Duplex Manual Duplex Yes Automatic Duplex N/A 500 sheets Yes Calculated with 80 g/m2 (20 lb) paper Media specifications Model Media types Media weights Media sizes 1 A HL-4040CN HL-4050CDN HL-4070CDW Multi-purpose tray Plain paper, Bond paper, Recycled paper, Envelopes, Label,
Appendix Supplies A Model Toner Cartridge HL-4040CN Black HL-4050CDN HL-4070CDW Order No. Standard cartridge Approx. 2,500 pages A4/Letter pages @ 5% coverage TN-110BK High yield cartridge Approx. 5,000 pages A4/Letter pages @ 5% coverage TN-115BK Cyan, Standard cartridge Magenta, Yellow High yield cartridge Approx. 1,500 pages A4/Letter pages @ 5% coverage TN-110C, TN-110M, TN-110Y Approx. 4,000 pages A4/Letter pages @ 5% coverage TN-115C, TN-115M, TN-115Y Drum Unit Approx.
Appendix Computer requirements A Computer Platform & Operating System Version Processor Minimum Speed Minimum RAM Recomm ended RAM Available Hard Disk Space Windows® Operating System Intel® Pentium® or equivalent 64 MB 128 MB 50 MB 128 MB 256 MB 50 MB Windows® XP Professional x64 Edition AMD Opteron™ AMD Athlon™ 64 256 MB ® ® ® Intel Xeon with Intel EM64T Intel® Pentium® 4 with Intel® EM64T or equivalent 384 MB 50 MB Windows Vista™ Intel® Pentium® 4 or equivalent 64-bit supported CPU 5
Appendix Important information for choosing your paper A This section gives information to help you choose paper to use with this printer. Note If you use paper that is not recommended, a paper jam or misfeed may occur in the printer. (See Recommended paper on page 7.) Before you buy a large quantity of paper A Make sure that the paper is suitable for the printer. Paper for plain paper copies A Paper is divided by usage, such as paper for printing and paper for copying.
Appendix Print surface A The characteristics of the face side and reverse side of a sheet of paper may vary a little. Usually, the opening side of the paper ream package is the print side. Follow the indications on the paper package. Typically, the print side is indicated by an arrow. Moisture content A Moisture content is the amount of water left in the paper after manufacture. It is one of the important characteristics of the paper.
Appendix Paper size Paper size A mm in. Letter 8.5 × 11 in. Legal 8.5 × 14 in. Executive 7.25 × 10.5 in. A4 210 × 297 mm A5 148 × 210 mm A6 105 × 148 mm Envelope Monarch 3.875 × 7.5 in. Envelope Com-10 4.12 × 9.5 in. Envelope DL 110 × 220 mm Envelope C5 162 × 229 mm B5 (JIS) 182 × 257 mm B5 (ISO) 176 × 250 mm B6 (ISO) 125 × 176 mm 8.5 × 13 in. Folio Post Card 100 × 148 mm A4 Long 210 × 405 mm Envelope DL-L 220 × 110 mm 3×5 3 × 5 in. Organizer J 2.75 × 5 in.
Appendix Symbol and character sets A For the HP LaserJet emulation modes, you can choose the symbol and character sets using a Web Based Management (Web browser) or the control panel buttons. How to use the Web Based Management (web browser) A To use the Web Based Management (Web browser), follow the steps below. a Enter [http://printer’s IP address/] into your browser. For example: [http://192.168.1.2/] (if the printer’s IP address is 192.168.1.2) b c Click Printer Settings. d e Click OK.
Appendix HP LaserJet mode ISO69 French (1F) ISO84 Portuguese (5S) ISO85 Spanish (6S) ISO8859 / 7 Latin / Greek (12N) ISO8859 / 15 Latin (9N) ISO8859 / 15 Latin / Cyrillic (10N) Legal (1U) Math-8 (8M) MC Text (12J) MS Publishing (6J) PC8 (10U) PC8 Bulgarian (13R) PC8 D/N (11U) PC8 Greek Alternate (437G) (14G) PC8 Latin / Greek (12G) PC8 PC Nova (27Q) PC8 Turkish (9T) PC775 (26U) PC850 Multilingual (12U) PC851 Greece (10G) PC852 East Europe (17U) PC853 Latin3 (Turkish) (18U) PC855 Cyril
Appendix Quick reference for bar code control commands A The printer can print bar codes in the HP LaserJet emulation modes. Print bar codes or expanded characters Code ESC i Dec 27 105 Hex 1B 69 A Format: ESC i n ... n \ Creates bar codes or expanded characters according to the segment of parameters ‘n ... n’. For more information about parameters, see the following Definition of Parameters. This command must end with the ‘ \ ’ code (5CH).
Appendix This parameter selects the bar code mode as shown above. When n is ‘t5’ or ‘T5’ the bar code mode (EAN 8, EAN 13, or UPC A) varies according to the number of characters in the data. Bar code, expanded character, line block drawing and box drawing n = ‘s0’ or ‘S0’ 3: 1 (default) n = ‘s1’ or ‘S1’ 2: 1 n = ‘s3’ or ‘S3’ 2.5: 1 A This parameter chooses the bar code style as above.
Appendix Bar code human readable line ON or OFF n = ‘r0’ or ‘R0 Human readable line OFF n = ‘r1’ or ‘R1 Human readable line ON Preset: A Human readable line ON (1) ‘T5’ or ‘t5’ (2) ‘T6’ or ‘t6’ (3) ‘T130’ or ‘t130’ (4) ‘T131’ or ‘t131’ Preset: Human readable line OFF All others This parameter shows whether the printer prints the human readable line below the bar code.
Appendix Bar code & expanded character offset in Y-axis A n = ‘ynnn’ or ‘Ynnn’ This parameter shows the downward offset from the current print position in the ‘u’- or ‘U’-specified unit. Bar code, expanded character, line block drawing and box drawing height A n = ‘hnnn’, ‘Hnnn’, ‘dnnn’, or ‘Dnnn’ 1 EAN13, EAN8, UPC-A, ISBN (EAN13, EAN8, UPC-A), ISBN (UPC-E): 22 mm 2 UPC-E: 18 mm 3 Others: 12 mm Expanded characters i 2.
Appendix When Interleaved 2 of 5 is selected with the parameter ‘t1’ or ‘T1’: Ten numerical characters ‘0’ to ‘9’ can be accepted as bar code data. Other characters cause a data error. The number of characters for bar codes is not limited. This mode of bar codes needs even characters. If the bar code data has odd characters, ‘0’ is automatically added to the end of the bar code data.
Appendix When ISBN (UPC-E) is selected with the parameter ‘t131’ or ‘T131’: The same rules apply as for ‘t6’ or ‘T6’. When EAN 128 set A, set B or set C is selected with the parameter ‘t132’ or ‘T132’, ‘t133’ or ‘T133’ or ‘t134’ or ‘T134’ The same rules apply as for ‘t12’ or ‘T12’, ‘t13’ or ‘T13’, or ‘t14’ or ‘T14’. Box drawing A ESC i ... E (or e) ‘E’ or ‘e’ is a terminator. Line block drawing A ESC i ... V (or v) ‘V’ or ‘v’ is a terminator.
Appendix 'Codabar LPRINT CHR$(27);"it9r1s0o0x00y100bA123456A\"; 'Code 128 set A LPRINT CHR$(27);"it12r1o0x00y120bCODE128A12345?\"; 'Code 128 set B LPRINT CHR$(27);"it13r1o0x00y140bCODE128B12345?\"; 'Code 128 set C LPRINT CHR$(27);"it14r1o0x00y160b";CHR$(1);CHR$(2);"?\"; 'ISBN(EAN) LPRINTCHR$(27);"it130r1o0x00y180b123456789012?+12345\"; 'EAN 128 set A LPRINT CHR$(27);"it132r1o0x00y210b1234567890?\"; LPRINT CHR$(12) END A 188
B Appendix (for Europe and Other Countries) B Brother numbers B IMPORTANT For technical and operational help, you must call the country where you bought the printer. Calls must be made from within that country. Register your product B By registering your Brother product, you will be recorded as the original owner of the product.
Appendix (for Europe and Other Countries) Important information: regulations B Radio interference (220 to 240 volt model only) B This printer follows EN55022 (CISPR Publication 22)/Class B. Before you use this product, make sure that you use one of the following interface cables. 1 A shielded parallel interface cable with twisted-pair conductors and that it is marked IEEE 1284 compliant (HL-4050CDN / HL-4070CDW only). 2 A USB cable. The cable must not be more than 2 meters long.
Appendix (for Europe and Other Countries) For Finland and Sweden B LUOKAN 1 LASERLAITE KLASS 1 LASER APPARAT Varoitus! B Laitteen käyttäminen muulla kuin tässä käyttöohjeessa mainitulla tavalla saattaa altistaa käyttäjän turvallisuusluokan 1 ylittävälle näkymättömälle lasersäteilylle. Varning B Om apparaten används på annat sätt än i denna Bruksanvisning specificerats, kan användaren utsättas för osynlig laserstrålning, som överskrider gränsen för laserklass 1.
Appendix (for Europe and Other Countries) IMPORTANT - for your safety B To ensure safe operation, the supplied three-pin plug must be inserted only into a standard three-pin power outlet that is properly grounded through the standard electrical wiring. Extension cords used with this printer must be three-pin plug type and correctly wired to provide grounding. Incorrectly wired extension cords may cause personal injury and equipment damage.
Appendix (for Europe and Other Countries) EC Declaration of Conformity B B 193
C Appendix (for USA and Canada) C Brother numbers C IMPORTANT For technical and operational help, you must call the country where you bought the printer. Calls must be made from within that country. Register your product C By registering your product with Brother International Corporation, you will be recorded as the original owner of the product.
Appendix (for USA and Canada) Customer Service In USA: C 1-877-284-3238 If you have comments or suggestions, please write us at: In USA: Printer Customer Support Brother International Corporation 26250 Enterprise Ct. # 250 Lake Forest, CA 92630 In Canada: Brother International Corporation (Canada), Ltd. - Marketing Dept. 1, rue Hotel de Ville Dollard-des-Ormeaux, PQ, Canada H9B 3H6 Service center locator (USA only) C For the location of a Brother authorized service center, call 1-800-284-4357.
Appendix (for USA and Canada) Ordering supplies C For best quality results use only genuine Brother supplies, which are available at most Brother retailers. If you cannot find the supplies you need and you have a Visa, MasterCard, Discover, or American Express credit card, you can order supplies directly from Brother. (You can visit us online for a complete selection of the Brother accessories and supplies that are available for purchase.) In USA: 1-877-552-MALL (6255) 1-800-947-1445 (fax) http://www.
Appendix (for USA and Canada) Important information: regulations C Federal Communications Commission (FCC) Declaration of Conformity (USA only) Responsible Party: C Brother International Corporation 100 Somerset Corporate Boulevard P.O. Box 6911 Bridgewater, NJ 08807-0911 USA Telephone: (908) 704-1700 declares, that the products Product name: Laser Printer HL-4040CN, HL-4050CDN and HL-4070CDW Model number: HL-40C Product option: Lower Tray Unit LT-100CL complies with Part 15 of the FCC Rules.
Appendix (for USA and Canada) Industry Canada Compliance Statement (Canada only) C This Class B digital apparatus complies with Canadian ICES-003. Cet appareil numérique de la classe B est conforme à la norme NMB-003 du Canada. International ENERGY STAR® Compliance Statement (For HL-4050CDN / HL-4070CDW only) C The purpose of the International ENERGY STAR® Program is to promote the development and popularization of energy-efficient office equipment. As an ENERGY STAR® Partner, Brother Industries, Ltd.
Appendix (for USA and Canada) Laser notices C Laser safety (110 to 120 volt model only) C This printer is certified as a Class 1 laser product under the U.S. Department of Health and Human Services (DHHS) Radiation Performance Standard according to the Radiation Control for Health and Safety Act of 1968. This means that the printer does not produce hazardous laser radiation.
Appendix (for USA and Canada) IMPORTANT - for your safety C To ensure safe operation, the supplied three-pin plug must be inserted only into a standard three-pin power outlet that is properly grounded through the standard electrical wiring. Extension cords used with this printer must be three-pin plug type and correctly wired to provide proper grounding. Incorrectly wired extension cords may cause personal injury and equipment damage.
D Index Symbols Duplex printing .......................................................... 21 + or - buttons ............................................................. 70 E A Emulation ................................................................ 172 Emulation modes ...................................................... 67 Envelopes .............................................................8, 17 Error message ........................................................ 143 Accessories tab .....
Index Multi-purpose tray ...............................................14, 22 Utilities .................................................................... 173 N W Network ..................................................................... 66 Network connectivity ............................................... 172 NETWORK menu ................................................82, 83 Waste toner pack .................................................... 116 Watermark ..................................