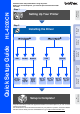
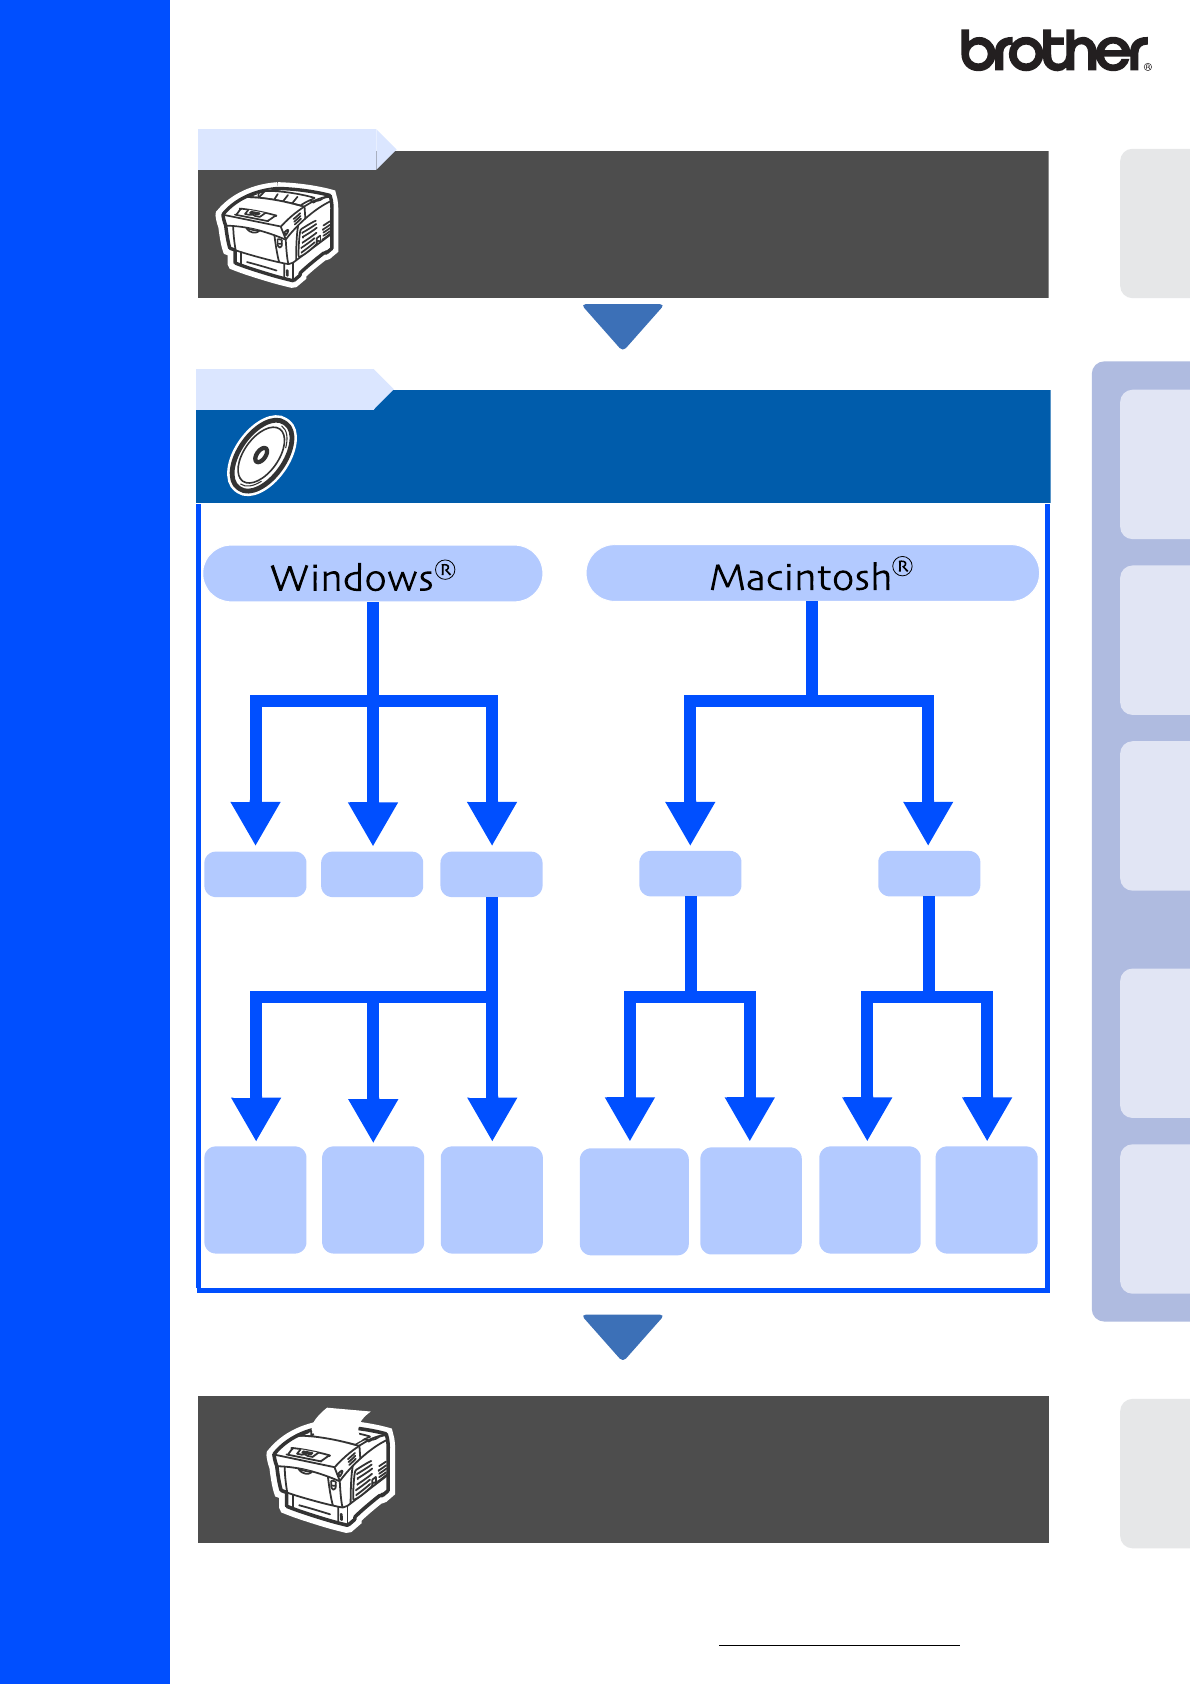
Read this Quick Setup Guide before using the printer. Before you can use the printer, you must set up the hardware and install the driver. Setting Up Your Printer Setting Up Your Printer Windows® USB Step 2 Installing the Driver Parallel Network Peer-toPeer (LPR) page 21 Peer-toPeer (NetBIOS) page 23 Network Shared Printer page 25 USB Network Mac OS® X 10.1 / 10.2 page 30 Mac OS® 8.6 – 9.2 page 32 Mac OS® X 10.1 / 10.
Table of Contents ■ Safety Precautions To Use the Printer Safely ......................................................................................................................... 2 Regulations ............................................................................................................................................... 7 ■ Getting Started Carton Components ................................................................................................................................
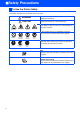
■ Safety Precautions To Use the Printer Safely To ensure the safe operation of your printer, make sure that you read this section thoroughly before use. This section describes the conventions used in the guide. WARNING Indicates warnings that must be observed to prevent possible personal injury. CAUTION Indicates cautions that must be observed to prevent possible personal injury or material damage. This symbol alerts you to procedures that require close attention.
Installing and Relocating your Printer CAUTION Do not place the printer in a hot, humid, dusty, or poorly ventilated environment. Prolonged exposure to such adverse conditions can cause fire or electric shocks. Do not place the printer near heaters or volatile, flammable, or combustible materials, such as curtains. Place the printer on a level, sturdy surface that can withstand the printer's weight. Failure to do so could cause the printer to fall, resulting in injuries.
■Safety Precautions Operating Environment ■ Use the printer in a place that meets the following requirements: Ambient temperature range of 10 to 32 °C (50.0 to 89.6 °F), relative humidity of 15 to 85% (no condensation) When using the printer at an ambient temperature of 32 °C (89.6 °F), the relative humidity should not exceed 65%. When the relative humidity reaches 85%, the ambient temperature should not exceed 28 °C (82.4 °F).
Be sure to turn off and unplug the printer before accessing the interior of the printer for cleaning, maintenance, or troubleshooting. Accessing the interior of a live printer can result in electric shock. Once a month, turn off the printer and check the AC power cord for the following: ■ The AC power cord is plugged firmly into the AC power outlet. ■ The plug is not excessively heated, rusted, or bent. ■ The plug and outlet are dust free. ■ The cord is not cracked or frayed.
■Safety Precautions CAUTION Never touch an area indicated by a high-temperature warning label (on or near the fuser unit). Touching these areas may result in burns. If a sheet of paper is wrapped around the fuser or rollers, do not use excessive force to remove it so as to avoid injuries or burns. Turn off the printer immediately and call your dealer or Brother Customer Service. Do not place any heavy objects on the printer.
Regulations Federal Communications Commission (FCC) Declaration of Conformity (For USA) Responsible Party: Brother International Corporation 100 Somerset Corporate Boulevard P.O. Box 6911 Bridgewater, NJ 08807-0911 USA Telephone: (908) 704-1700 declares, that the products Product name: Model number: Product options: Laser Printer HL-4200CN All complies with Part 15 of the FCC Rules.
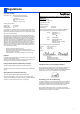
■ Safety Precautions FDA Regulations (110 to 120 volt Model Only) U.S. Food and Drug Administration (FDA) has implemented regulations for laser products manufactured on and after August 2, 1976. Compliance is mandatory for products marketed in the United States. One of the following labels on the back of the printer indicates compliance with the FDA regulations and must be attached to laser products marketed in the United States.
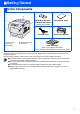
■ Getting Started Carton Components \ Printer 2 CD-ROM for Windows 3 Quick Setup Guide 1 CD-ROM for Macintosh (including User’s Guide) 4 AC Power Cord Print Head Cartridge 5 1 Control Panel 2 Top cover 3 Front cover 4 Multi-purpose Tray 5 Paper Tray Toner Cartridges (Black, Cyan, Magenta and Yellow) ∗ Toner cartridges have already been installed in the printer. Carton components may differ from one country to another.
■ Getting Started Control Panel Display Buttons LED Indicators User’s Guide Chapter 3. LED Indicators Ready (Green) Lights when the printer is ready to print. Blinks when the printer is receiving data. Lights when the printer has a problem that the user can rectify. User’s Guide Chapter 6 to clear the problem. Alarm (Red) Blinks when the printer has a problem that the user cannot rectify.
■ Getting Started Supplied CD-ROM You can find a variety of information on the CD-ROM. Mac OS® X 10.1 / 10.2 Users 1 Mac OS® 8.6 to 9.2 Users: Go to next page. 2 3 4 5 3 1 6 2 3 4 5 6 This screen is not supported by Mac OS® 8.6 to 9.2. 1 Brother Solutions Center The Brother Solutions Center http://solutions.brother.com is your one-stop resource for all your printer needs.
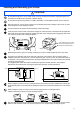
Step 1 Setting Up Your Printer 1 Remove the Packing Tapes and Toner Seal Do NOT connect the interface cable. You will be prompted to connect the interface cable during the driver installation. Remove all the packing tape. 2 Remove the top cover. Top Cover Remove the protective sheet. Protective Sheet 12 Pull each the of the toner seals straight up to remove them. Toner Seal 5 1 3 4 Put the top cover back on.
1 Push up button to open the front cover. 5 Setting Up Your Printer 2 Install the Print Head Cartridge Remove the protective packing. Protective Packing 2 Push the button to open the paper outlet cover. 6 Align the rollers of the print head cartridge with the slots, and then gently lower it into the printer. Windows® Parallel Paper Outlet Cover Windows® USB Front Cover ■ Lowering the cartridge into the printer without correctly aligning the rollers with the slots can damage the cartridge.
Step 1 Setting Up Your Printer 3 Load Paper in the Paper Tray 1 Pull the paper tray out until it stops. Lift up the front of the paper tray slightly and then remove it completely from the printer. Paper Tray 2 Remove the protective packing. Protective Packing 3 Slide the side paper guides out. Lift the end paper guide and insert it into the slot of the paper size you want to load. End Paper Guide Paper Guide 4 Load paper in the paper tray. Make sure that all the paper is under the tabs.
Setting Your Language on the Control Panel Setting Up Your Printer 5 Connect the AC power cord to the printer, and then plug it into the AC power outlet/ socket. 1 Press . Windows® USB 1 Print a Printer Settings Page Menu 1:System Turn on the printer power switch. 2 Press . Windows® Parallel 2 1:System Power Save Time 1:System Panel Language After the printer warms up, the Ready to Print message will appear. 3 Control Panel Press Press .
For Network Interface Cable Users ■ Brother Peer-to-Peer Network Printer Users (LPR) .................................. Go to page 21 ■ Brother Peer-to-Peer Network Printer Users (NetBIOS) ................................. Go to page 23 ■ Network Shared Printer Users..................................................................... Go to page 25 For USB Interface Cable Users ■ Mac OS® 8.6 to 9.2 Users ............................................................................
Step 2 Installing the Driver For USB Interface Cable Users 1. Installing the Driver and Connecting the Printer to Your PC 1 Make sure the USB interface cable is NOT connected to the printer, and then begin installing the driver. If you have already connected the cable, remove it. 4 Depending on the paper size you plan on using, select Standard Driver - default A4 (Recommended) or Standard Driver default Letter (Recommended).
Setting Up Your Printer When this screen appears, make sure the printer power switch is on. Connect the USB interface cable to your PC, and then connect it to the printer. Click the Next button. 2. Setting Your Printer as the Default Printer (For Windows® 2000/XP Users Only) 1 Click Start and Printers and Faxes. 2 Select the Brother HL-4200CN series icon. 3 From the File menu, select Set as Default printer. Installing the Driver Windows® USB 8 9 Click the Finish button.
Step 2 Installing the Driver For Parallel Interface Cable Users Connecting the Printer to Your PC and Installing the Driver 1 Turn off the printer power switch. 2 Connect the parallel interface cable to your PC, and then connect it to your printer. 3 4 Insert the CD-ROM for Windows into your CD-ROM drive. The opening screen will appear automatically. Follow the instructions on the screen. 5 Click Install Software on the Menu screen.
9 Select Local Printer, and then click the Next button. 0 Select the port where your printer is connected, and then click the Next button. A Click the Finish button. Setting Up Your Printer Select Standard Installation, and then click the Next button. The Setup is now complete. 20 For Administrators When you register your product on-line, check “On-Line Registration”.
Step 2 Installing the Driver For Network Interface Cable Users For Brother Peer-to-Peer Network Printer Users (LPR) If you are going to connect the printer to your network, we recommended that you contact your system administrator prior to installation. Connecting the Cable and Installing the Driver 1 Turn off the printer power switch. 5 Click Install Software on the Menu screen. 2 Connect the network interface cable to the printer, and then connect it to a free port on your hub.
Select Brother Peer-to-Peer Network Printer, and then click the Next button. Select Search the network for devices and choose from a list of discovered devices (Recommended). Or enter your printer's IP address or its node name. Click the Next button. B Click the Finish button. When you register your product on-line, check “On-Line Registration”. For Windows NT® 4.0 and Windows® 2000/XP users: The Setup is now complete.
Step 2 Installing the Driver For Network Interface Cable Users For Brother Peer-to-Peer Network Printer Users (NetBIOS) If you are going to connect the printer to your network, we recommended that you contact your system administrator prior to installation. Connecting the Cable and Installing the Driver 1 Turn off the printer power switch. 5 Click Install Software on the Menu screen. 2 Connect the network interface cable to the printer, and then connect it to a free port on your hub.
9 Select Standard Installation, and then click the Next button. Select Brother Peer-to-Peer Network Printer, and then click the Next button. B Setting Up Your Printer 8 Click the Finish button. When you register your product on-line, check “On-Line Registration”. Select Search the network for devices and choose from a list of discovered devices (Recommended). Click the Next button. A Select your printer and NetBIOS, and then click the Next button.
Step 2 Installing the Driver For Network Interface Cable Users For Network Shared Printer Users If you are going to connect the printer to your network, we recommended that you contact your system administrator prior to installation. Connecting the Cable, Installing the Driver and Selecting the Appropriate Printer Queue or ‘Share name’ 1 Turn off the printer power switch. 5 Click Install Software on the Menu screen.
Select Standard Installation, and then click the Next button. 9 Select Network Shared Printer, and then click the Next button. A Setting Up Your Printer 8 Click the Finish button. When you register your product on-line, check “On-Line Registration”. Select your printer’s queue, and then click the OK button. Windows® Network 0 Installing the Driver The setup is now complete. For Administrators Contact your Administrator about the printer’s queue.
Step 2 Installing the Driver For USB Interface Cable Users For Mac OS® 8.6 to 9.2 Users 1. Set the Adobe Protocol 1 Press 2. Connecting the Printer to Your Macintosh & Installing the PPD File and Adobe PS Driver 1 Make sure the printer power switch is on. 2 Connect the USB interface cable to your Macintosh®, and then connect it to the printer. . MENU Do not connect the USB cable to the keyboard USB Port or a non-powered USB Hub. 1:System 2 Press 3 Press . Press . 5 times.
Double-click the AdobePS Installer icon to install the PS driver. Follow the instructions on the screen. 7 Open the Macintosh HD icon. 8 Open the AdobePS Components folder. 9 Open the Desktop Printer Utility icon. A Click the Change... button in PostScriptTM Printer Description (PPD) file. Select Brother HL-4200CN, and then click the Select button. B Click the Change... button in USB Printer Selection. Select HL-4200CN, and then click the OK button.
Step 2 Installing the Driver For USB Interface Cable Users For Mac OS® 8.6 to 9.2 Users C Click the Create... button. D Enter your printer name (HL-4200CN), and then click the Save button. E Select Quit from the File menu. F Click the HL-4200CN icon on the Desktop. G Select Set Default Printer from the Printing menu. The setup is now complete.
Setting Up Your Printer For USB Interface Cable Users For Mac OS® X 10.1 / 10.2 Users 1 Make sure the printer power switch is on. 4 Click Install Software on the Menu screen. Follow the instructions on the screen. 2 Connect the USB interface cable to your Macintosh, and then connect it to the printer. 5 Select Applications from the Go menu. 6 Open the Utilities folder. 7 Open the Print Center icon. Do not connect the USB cable to the keyboard USB Port or a non-powered USB Hub.
Step 2 Installing the Driver For USB Interface Cable Users For Mac OS® X 10.1 / 10.2 Users 8 Click the Add Printer... button. 9 Select USB. 0 Select HL-4200CN series, and then click the Add button. A Select Quit Print Center from the Print Center menu. The setup is now complete.
Setting Up Your Printer For Network Interface Cable Users For Mac OS® 8.6 to 9.2 Users Connecting the Printer to Your Network & Installing the PPD File and Adobe PS Driver 1 Turn off the printer power switch. 2 Connect the network interface cable to the printer, and then connect it to a free port on your hub. 6 Double-click the AdobePS Installer icon to install the PS driver. Follow the instructions on the screen. 7 Open the Chooser from the Apple Menu.
Step 2 Installing the Driver For Network Interface Cable Users For Mac OS® X 10.1 / 10.2 Users Connecting the Printer to Your Network & Installing the Adobe PostScript 3 PPD File 1 Turn off the printer power switch. 5 Click Install Software on the Menu screen. Follow the instructions on the screen. 2 Connect the network interface cable to the printer, and then connect it to a free port on your hub. 6 Select Applications from the Go menu. 7 Open the Utilities folder.
Click the Add Printer... button. 0 Select AppleTalk. B Setting Up Your Printer 9 Select Quit Print Center from the Print Center menu. A Select BRN_xxxxxx_P1_AT*1, and then click the Add button. Installing the Driver The setup is now complete. For Administrators Macintosh® Network *1 xxxxxx are the last six digits of the Ethernet address. Network User’s Guide Chapter 7.
■ For Administrators Setting your IP Address, Subnet Mask and Gateway (Using the Control panel) Your printer is configured to receive an IP address, Subnet mask and Gateway address from a DHCP server. If you do not use a DHCP server follow the steps below. Setting the IP Address Acquisition Method to Control Panel. 1 Press . Setting Your Printer IP Address. Continued from the previous step. TCP/IP Setup IP Address MENU 1:System 2 Press 4 times. Menu Press .
Setting Your Subnet Mask. Setting Your Gateway address. Continued from the previous step. Continued from the previous step. TCP/IP IP Address Setting Up Your Printer Setting your IP Address, Subnet Mask and Gateway (Using the Control panel) TCP/IP Subnet Mask K . TCP/IP Subnet Mask TCP/IP Gateway Address Press L . Subnet Mask 000.000.000.000 Press . Gateway Address 000.000.000.000 M Set your subnet mask in the same way as the IP address.
■ For Administrators Installing the BRAdmin Professional utility (Windows® Users Only) The BRAdmin Professional utility is designed to manage your Brother network connected devices. The BRAdmin Professional utility can also be used to manage devices from other manufacturers whose products support SNMP (Simple Network Management Protocol). For more information on BRAdmin Professional go to http://solutions.brother.com 1 Insert the CD-ROM for Windows® into your CD-ROM drive.
■ Other Information Shipment of the Printer If for any reason you must ship your Printer, carefully package the Printer to avoid any damage during transit. It is recommended that you save and use the original packaging. The Printer should also be adequately insured with the carrier. When shipping the Printer, Do not remove the TONER CARTRIDGES, leave them locked in place. BUT the PRINT HEAD CARTRIDGE must be removed from the Printer and placed in the plastic bag.
Options The printer has the following optional accessories. You can increase the capabilities of the printer with these items. User’s Guide Appendixes. 1 Tray Module 2 Tray Module Hard Disk LT-41CL LT-42CL HD-41CL You can install an up to 500 sheet tray unit. You can install an up to 1000 (2x500) sheet tray unit. Reduce the time taken to print multiple copies of a document. Analyze printer usage by user.
LM0384001 ©2003 Brother Industries, Ltd.