
User's Manual

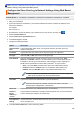


Table Of Contents
- Online User's Guide HL-L5000D/HL-L5100DN/HL-L5200DW/HL-L5200DWT/HL-L6200DW/HL-L6200DWT/HL-L6300DW
- Table of Contents
- Before You Use Your Brother Machine
- Introduction to Your Brother Machine
- Paper Handling
- Print
- Print from Your Computer (Windows®)
- Print a Document (Windows®)
- Print More Than One Page on a Single Sheet of Paper (N in 1) (Windows®)
- Print as a Poster (Windows®)
- Print on Both Sides of the Paper (Windows®)
- Print as a Booklet (Windows®)
- Secure Print (Windows®)
- Use a Macro from Your Computer (Windows®)
- Use a Preset Print Profile (Windows®)
- Change the Default Print Settings (Windows®)
- Print a Document Using the BR-Script3 Printer Driver (PostScript® 3™ Language Emulation) (Windows®)
- Monitor the Status of the Machine from Your Computer (Windows®)
- Print Settings (Windows®)
- Print from Your Computer (Macintosh)
- Print a Document (Macintosh)
- Print on Both Sides of the Paper (Macintosh)
- Print More Than One Page on a Single Sheet of Paper (N in 1) (Macintosh)
- Secure Print (Macintosh)
- Print a Document Using the BR-Script3 Printer Driver (PostScript® 3™ language emulation) (Macintosh)
- Monitor the Status of the Machine from Your Computer (Macintosh)
- Print Options (Macintosh)
- Print One Page Duplicates on Different Types of Paper
- Cancel a Print Job
- Test Print
- Print from Your Computer (Windows®)
- Network
- Get Started
- Network Management Software and Utilities
- Additional Methods of Configuring Your Brother Machine for a Wireless Network
- Before Configuring Your Brother Machine for a Wireless Network
- Configure Your Machine for a Wireless Network
- Configure Your Machine for a Wireless Network Using the One Push Method of Wi-Fi Protected Setup™ (WPS)
- Configure Your Machine for a Wireless Network Using the PIN Method of Wi-Fi Protected Setup™ (WPS)
- Configure Your Machine for a Wireless Network in Ad-Hoc Mode (For IEEE 802.11b/g/n)
- Configure Your Machine for a Wireless Network Using the Machine's Control Panel Setup Wizard
- Configure Your Machine for a Wireless Network When the SSID Is Not Broadcast
- Configure Your Machine for an Enterprise Wireless Network
- Use Wi-Fi Direct®
- Print from Your Mobile Device Using Wi-Fi Direct
- Configure Your Wi-Fi Direct Network
- Wi-Fi Direct Network Configuration Overview
- Configure Your Wi-Fi Direct Network Using the One-Push Method
- Configure Your Wi-Fi Direct Network Using the One-Push Method and Wi-Fi Protected Setup™ (WPS)
- Configure Your Wi-Fi Direct Network Using the PIN Method
- Configure Your Wi-Fi Direct Network Using the PIN Method of Wi-Fi Protected Setup™ (WPS)
- Configure Your Wi-Fi Direct Network Manually
- Advanced Network Features
- Technical Information for Advanced Users
- Security
- Lock the Machine Settings
- Network Security Features
- Before Using Network Security Features
- Secure Function Lock 3.0
- Use Active Directory® Authentication
- Use LDAP Authentication
- Manage Your Network Machine Securely Using SSL/TLS
- Introduction to SSL/TLS
- Certificates and Web Based Management
- Supported Security Certificate Features
- Create and Install a Certificate
- Manage Multiple Certificates
- Manage Your Network Machine Securely Using Web Based Management
- Manage Your Network Machine Securely Using BRAdmin Professional 3 (Windows®)
- Print Documents Securely Using SSL/TLS
- Manage Your Network Machine Securely Using IPsec
- Send an Email Securely
- Use IEEE 802.1x Authentication for a Wired or a Wireless Network
- Store Print Log to Network
- Mobile/Web Connect
- Troubleshooting
- Routine Maintenance
- Machine Settings
- Appendix
- Glossary

Home > Security > Network Security Features > Store Print Log to Network > Configure the Store Print Log
to Network Settings Using Web Based Management
Configure the Store Print Log to Network Settings Using Web Based
Management
Related Models: HL-L5100DN/HL-L5200DW/HL-L5200DWT/HL-L6200DW/HL-L6200DWT/HL-L6300DW
1. Start your web browser.
2. Type "http://machine's IP address" in your browser's address bar (where "machine's IP address" is the
machine's IP address).
For example:
http://192.168.1.2
3. No password is required by default. Type a password if you have set one, and then click
.
4. Click the Administrator tab.
5. Click the Store Print Log to Network menu.
6. In the Print Log field, click On.
7. Configure the following settings:
Option Description
Network Folder
Path
Type the destination folder where your log will be stored on the CIFS server (for
example: brother\abc).
File Name Type the file name you want to use for the print log (up to 32 characters).
File Type Select the TXT or CSV option for the Print Log file type.
Auth. Method Select the authentication method required for access to the CIFS server: Auto,
Kerberos, or NTLMv2. Kerberos is an authentication protocol which allows devices or
individuals to securely prove their identity to network servers using a single sign-on.
NTLMv2 is the authentication method used by Windows
®
to log into servers.
• Auto: If you select Auto, NTLMv2 will be used to the authentication method.
• Kerberos: Select the Kerberos option to use Kerberos authentication only.
• NTLMv2: Select the NTLMv2 option to use NTLMv2 authentication only.
• For the Kerberos and NTLMv2 authentication, you must also configure the
SNTP protocol (network time server) and DNS server.
Username Type the user name for the authentication (up to 96 characters).
If the user name is part of a domain, enter the user name in one of the
following styles: user@domain or domain\user.
Password Type the password for the authentication (up to 32 characters).
Kerberos
Server
Address (if
needed)
Type the KDC host address (for example: kerberos.example.com; up to 64 characters)
or the IP address (for example: 192.168.56.189).
Error Detection
Setting
Choose what action should be taken when the Print Log cannot be stored to the server
due to a network error.
8. In the Connection Status field, confirm the last log status.
230