
Quick Start Guide

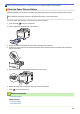


Table Of Contents
- Online User's Guide HL-L9430CDN/HL-L9470CDN
- Table of Contents
- Before You Use Your Machine
- Introduction to Your Machine
- Paper Handling
- Print
- Print from Your Computer (Windows)
- Print from Your Computer (Mac)
- Secure Print Using a USB Flash Drive
- Print Data Directly from a USB Flash Drive
- Print Duplicate Copies
- Cancel a Print Job
- Test Print
- Network
- Supported Basic Network Features
- Configure Network Settings
- Wireless Network Settings
- Use the Wireless Network
- Before Configuring Your Machine for a Wireless Network
- Configure Your Machine for a Wireless Network Using the Setup Wizard from Your Computer
- Configure Your Machine for a Wireless Network Using the Machine's Control Panel Setup Wizard
- Configure Your Machine for a Wireless Network Using the One Push Method of Wi-Fi Protected Setup™ (WPS)
- Configure Your Machine for a Wireless Network Using the PIN Method of Wi-Fi Protected Setup™ (WPS)
- Configure Your Machine for a Wireless Network When the SSID Is Not Broadcast
- Configure Your Machine for an Enterprise Wireless Network
- Use Wi-Fi Direct®
- Enable/Disable Wireless LAN
- Print the WLAN Report
- Use the Wireless Network
- Network Features
- Security
- Before Using Network Security Features
- Configure Certificates for Device Security
- Supported Security Certificate Features
- Step by Step Guide for Creating and Installing a Certificate
- Create a Self-signed Certificate
- Create CSR and Install a Certificate from a Certificate Authority (CA)
- Import and Export the Certificate and Private Key
- Import and Export a CA Certificate
- Manage Multiple Certificates
- Use SSL/TLS
- Use SNMPv3
- Use IPsec
- Use IEEE 802.1x Authentication for a Wired or a Wireless Network
- Use Active Directory Authentication
- Use LDAP Authentication
- Use Secure Function Lock 3.0
- Send an Email Securely
- Store Print Log to Network
- Lock the Machine Settings from the Control Panel
- Administrator
- Mobile/Web Connect
- Brother iPrint&Scan
- Troubleshooting
- Error and Maintenance Messages
- Error Messages When Using the Brother Web Connect Feature
- Paper Jams
- Printing Problems
- Improve the Print Quality
- Network Problems
- AirPrint Problems
- Other Problems
- Check the Machine Information
- Reset Functions
- Routine Maintenance
- Machine Settings
- Appendix

Home > Routine Maintenance > Correct the Colour Printing
Correct the Colour Printing
If the colour print quality is poor, calibrate the output density of each colour and then perform the colour
alignment.
To perform the calibrations of each colour's output density and colour alignment in sequence, set the Auto
Correction function to On.
1. Press [Toner] > [Colour Correction] > [Correction Start].
2. Press [Yes].
The colour correction starts automatically and will take a few minutes.
3. Press .
Related Information
• Routine Maintenance
• Set the Auto Correction Function
• Reset the Machine's Colour Correction Settings
Related Topics:
• Improve the Print Quality
288