
All in One Printer User Manual


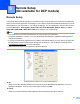

Table Of Contents
- SOFTWARE USER’S GUIDE
- Table of Contents
- Section I: Windows®
- 1 Printing
- Using the Brother printer driver
- Printing a document
- Duplex (two-sided) printing
- Simultaneous scanning, printing and faxing
- Printer operation key
- Status Monitor
- Printer driver settings (For Windows®)
- How to access the printer driver settings (For Windows®)
- Features in the Windows® printer driver
- Features in BR-Script3 (Post Script® 3™ language emulation) Printer compatible driver
- 2 Scanning
- Scanning a document using the TWAIN driver
- Scanning a document using the WIA driver (For Windows® XP/Windows Vista®)
- Using the Scan key (For USB or Parallel cable users)
- Using ScanSoft® PaperPort® SE with OCR
- 3 ControlCenter2
- 4 Network Scanning (For models with built-in network support)
- 5 Remote Setup (Not available for DCP models)
- 6 Brother PC-FAX Software (Not available for DCP models)
- PC-FAX sending
- Speed Dial setup
- Brother Address Book
- Setting up a member in the Address Book
- Setting up a group for broadcasting
- Editing member information
- Deleting a member or group
- Exporting the Address Book
- Importing to the Address Book
- Sending a file as a PC-FAX using the Facsimile style user interface
- Sending a file as a PC-FAX using the Simple style user interface
- PC-FAX receiving
- 7 Firewall settings (For Network users)
- 1 Printing
- Section II: Apple® Macintosh®
- 8 Printing and Faxing
- Setting up your USB-equipped Apple® Macintosh®
- Printer operation key
- Status Monitor
- Using the Brother Laser driver for Macintosh® (Mac OS® X)
- Using the Brother Laser driver for Macintosh® (Mac OS® 9.1 to 9.2)
- Using the BR-Script3 (Post Script® 3™ language emulation printer driver)
- Sending a fax (Not available for DCP models)
- 9 Scanning
- 10 ControlCenter2 (For Mac OS® 10.2.4. or greater)
- 11 Network Scanning (Not available for DCP-8060)
- 12 Remote Setup (Not available for DCP models)
- 8 Printing and Faxing
- Index
- brother USA/CAN

4. Network Scanning (For models with built-in network support)
90
i Choose one of the options below.
Press a or b to choose color 150 dpi, color 300 dpi or color 600 dpi.
Press OK and go to Step j.
Press a or b to choose B/W 200 dpi or B/W 200x100 dpi.
Press OK and go to Step k.
j Press a or b to choose PDF or JPEG.
Press OK.
k Press a or b to choose PDF or TIFF.
Press OK.
l Use the dial pad to enter the username.
Press OK.
m Use the dial pad to enter the password.
Press OK.
n The LCD shows Connecting. When the connection to the FTP server is successful the machine will
start the scanning process.
Note
If a timeout or any other error occurs, start the Scan to FTP process again from the beginning a. If the
username is entered incorrectly then the LCD will show Authenticate Err, please start the process
again from the beginning a.