
User Manual
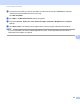

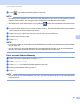


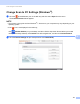
Table Of Contents
- User’s Guide ADS-2000e/ADS-2500We
- Brother Numbers
- User’s Guides and where do I find them?
- Getting Started
- Table of Contents
- 1 General Information
- Using the Documentation
- About This Machine
- Control Panel Overview (ADS-2000e)
- Control Panel Overview (ADS-2500We)
- General Setup (ADS-2000e)
- General Setup (ADS-2500We)
- Set the Backlight Brightness
- Set the Dim Timer for the Backlight
- Set the Home Screen
- Select Your Language
- Memory Storage
- Beep Volume
- Automatic Daylight Saving Time
- Sleep Mode
- Power Down Mode
- Multifeed Detection
- Reduced Noise Mode
- Setting Lock
- Set the Password
- Change the Password
- Turn Setting Lock On/Off
- User Restriction Functions
- 2 Document Specifications
- 3 Scan Preparation
- 4 Prepare Your Network
- 5 Scan Using Your Computer
- Change the ControlCenter4 User Interface (Windows®)
- Scan Using ControlCenter4 in Home Mode (Windows®)
- Scan Using ControlCenter4 in Advanced Mode (Windows®)
- Create a Custom Tab (ControlCenter4 Advanced Mode) (Windows®)
- Change Scan Settings (ControlCenter4) (Windows®)
- Scan Using ControlCenter2 (Macintosh)
- Register Your Favorite Scan Settings Using ControlCenter2 (Macintosh)
- Change Scan Settings (ControlCenter2) (Macintosh)
- Scan Using Nuance™ PaperPort™ 12SE or Other Windows® Applications
- Use Nuance PDF Converter Professional 8 (Windows®)
- Use NewSoft Presto! BizCard 6 (Windows®)
- Scan Using Presto! PageManager or TWAIN Applications (Macintosh)
- Scan Using Apple Image Capture (ICA Driver)
- Use NewSoft Presto! BizCard 6 (Macintosh)
- Scan Using Captiva® QuickScan™ Pro or ISIS® Applications (Windows®)
- 6 Scan Using the Control Panel
- Save Scanned Documents on Your Computer
- Save Scanned Documents on a USB Flash Drive
- Scan Documents to an FTP Server (ADS-2500We only)
- Scan Documents to a Shared Folder / Network Location (Windows®) (ADS-2500We only)
- Scan Using Web Services (Windows Vista® SP2 or Later, Windows® 7, Windows® 8 and Windows® 8.1) (ADS-2500We)
- Send Scanned Documents Directly to an Email Address (ADS-2500We only)
- Set Up the Address Book (ADS-2500We only)
- Upload Scanned Documents to the Web (ADS-2500We only)
- Change Scan to PC Settings (Windows®)
- Change Scan to PC Settings (Macintosh)
- Scanner Shortcuts (ADS-2500We only)
- 7 Managing the Machine from Your Computer
- 8 Routine Maintenance
- 9 Troubleshooting
- A Specifications
- B Appendix
- C Index

Scan Using the Control Panel
143
6
9 Do one of the following:
If you want to change the name, go to step 0.
If you want to change the email address, go to step B.
0 Press Name. The software keyboard appears on the LCD.
A Enter a new name and then press OK. Go to step D.
B Press Address. The software keyboard appears on the LCD.
C Enter a new email address and then press OK.
D Press OK.
NOTE
The LCD displays a list of shortcuts using the email address you changed. The shortcut settings will
automatically change.
Delete an email Address 6
1 Swipe left or right, or press d or c to display Scan 2.
2 Press to E-mail Server.
3 Press Address Book.
4 Press Edit.
5 Press Delete.
6 Press a or b until you find the email address you want to delete.
7 Press the email address.
Press OK.
8 Press Yes.
NOTE
You cannot delete an email address used in a shortcut. Delete the shortcut first (see Edit, Rename or
Delete a Shortcut on page 161).