
User Manual
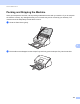


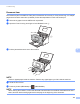
Table Of Contents
- User’s Guide ADS-2000e/ADS-2500We
- Brother Numbers
- User’s Guides and where do I find them?
- Getting Started
- Table of Contents
- 1 General Information
- Using the Documentation
- About This Machine
- Control Panel Overview (ADS-2000e)
- Control Panel Overview (ADS-2500We)
- General Setup (ADS-2000e)
- General Setup (ADS-2500We)
- Set the Backlight Brightness
- Set the Dim Timer for the Backlight
- Set the Home Screen
- Select Your Language
- Memory Storage
- Beep Volume
- Automatic Daylight Saving Time
- Sleep Mode
- Power Down Mode
- Multifeed Detection
- Reduced Noise Mode
- Setting Lock
- Set the Password
- Change the Password
- Turn Setting Lock On/Off
- User Restriction Functions
- 2 Document Specifications
- 3 Scan Preparation
- 4 Prepare Your Network
- 5 Scan Using Your Computer
- Change the ControlCenter4 User Interface (Windows®)
- Scan Using ControlCenter4 in Home Mode (Windows®)
- Scan Using ControlCenter4 in Advanced Mode (Windows®)
- Create a Custom Tab (ControlCenter4 Advanced Mode) (Windows®)
- Change Scan Settings (ControlCenter4) (Windows®)
- Scan Using ControlCenter2 (Macintosh)
- Register Your Favorite Scan Settings Using ControlCenter2 (Macintosh)
- Change Scan Settings (ControlCenter2) (Macintosh)
- Scan Using Nuance™ PaperPort™ 12SE or Other Windows® Applications
- Use Nuance PDF Converter Professional 8 (Windows®)
- Use NewSoft Presto! BizCard 6 (Windows®)
- Scan Using Presto! PageManager or TWAIN Applications (Macintosh)
- Scan Using Apple Image Capture (ICA Driver)
- Use NewSoft Presto! BizCard 6 (Macintosh)
- Scan Using Captiva® QuickScan™ Pro or ISIS® Applications (Windows®)
- 6 Scan Using the Control Panel
- Save Scanned Documents on Your Computer
- Save Scanned Documents on a USB Flash Drive
- Scan Documents to an FTP Server (ADS-2500We only)
- Scan Documents to a Shared Folder / Network Location (Windows®) (ADS-2500We only)
- Scan Using Web Services (Windows Vista® SP2 or Later, Windows® 7, Windows® 8 and Windows® 8.1) (ADS-2500We)
- Send Scanned Documents Directly to an Email Address (ADS-2500We only)
- Set Up the Address Book (ADS-2500We only)
- Upload Scanned Documents to the Web (ADS-2500We only)
- Change Scan to PC Settings (Windows®)
- Change Scan to PC Settings (Macintosh)
- Scanner Shortcuts (ADS-2500We only)
- 7 Managing the Machine from Your Computer
- 8 Routine Maintenance
- 9 Troubleshooting
- A Specifications
- B Appendix
- C Index
Routine Maintenance
190
8
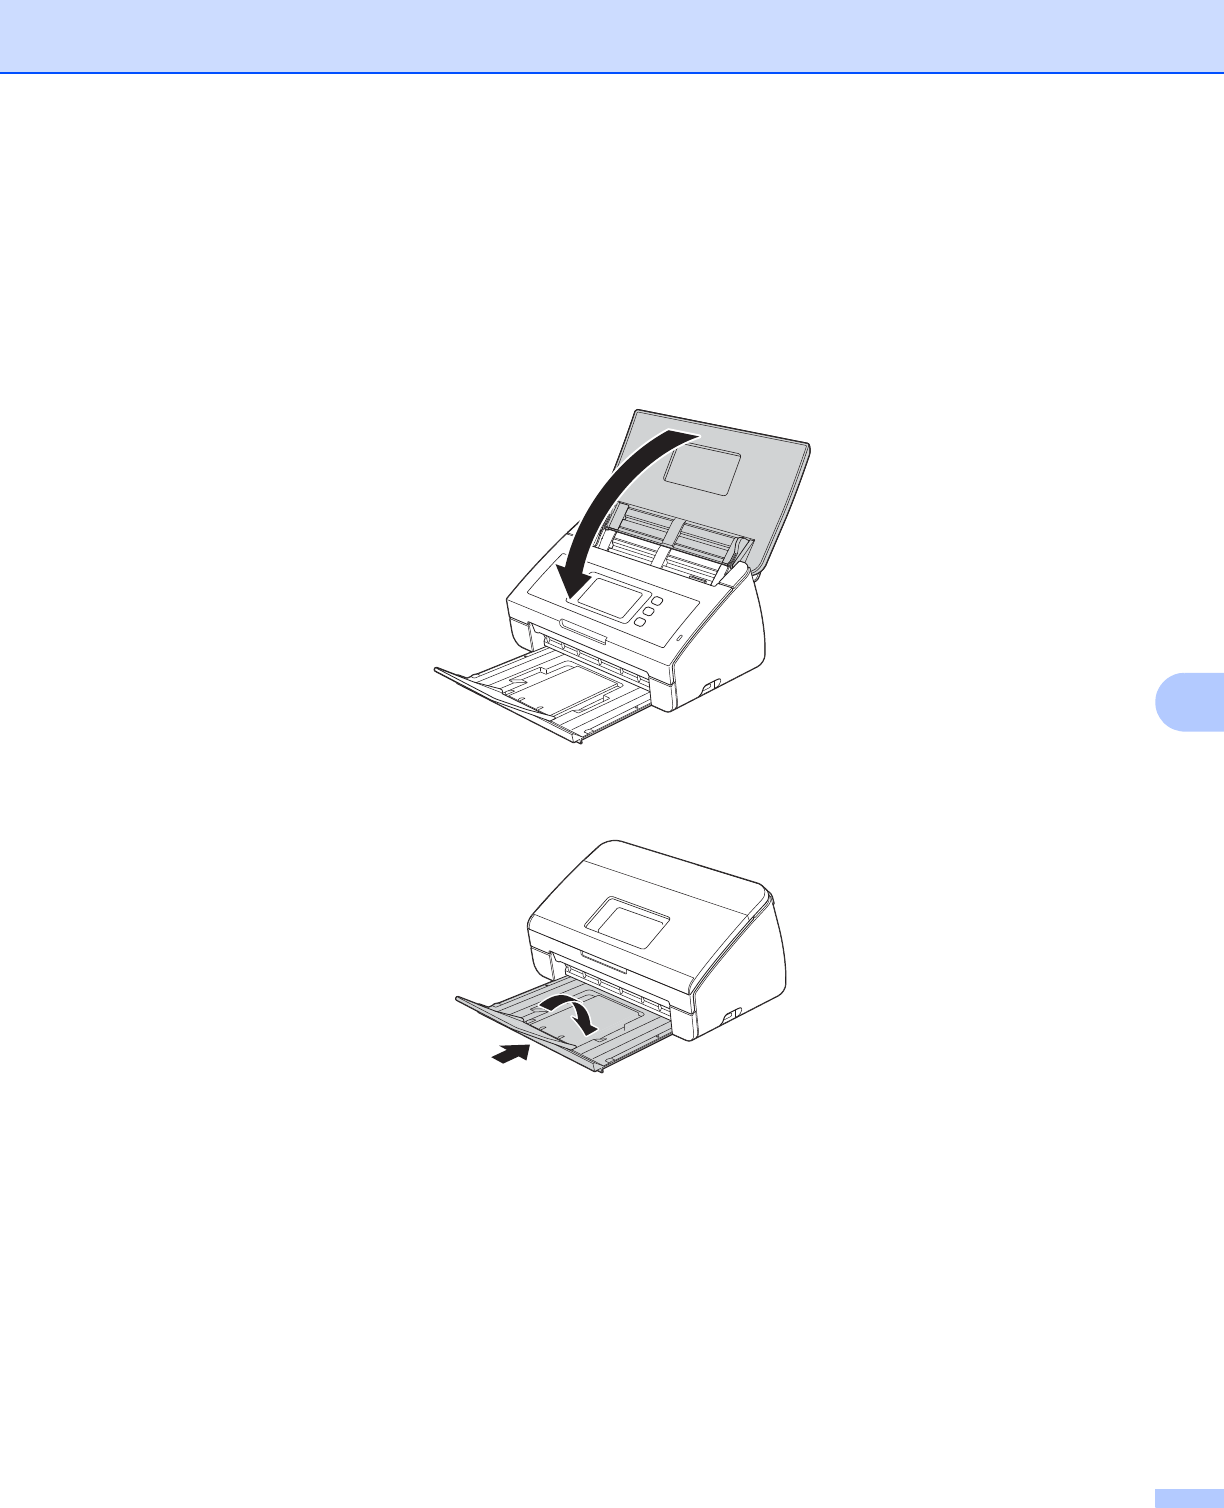
Packing and Shipping the Machine 8
When you transport the machine, use the packing materials that came with your machine. If you do not pack
the machine correctly, any damage that may occur in transit may not be covered by your warranty. The
machine should be adequately insured with the carrier.
1 Close the Panel Cover gently.
2 Fold the Document Stopper into the Output Tray and firmly push the Output Tray into the machine.