Introduction Customizing Labels TD-series Creating Labels Software User's Guide The contents of this guide and the specifications of this product are subject to change without notice. Brother reserves the right to make changes without notice in the specifications and materials contained herein and shall not be responsible for any damages (including consequential) caused by reliance on the materials presented, including but not limited to typographical and other errors relating to the publications.
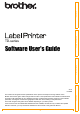
Introduction . . . . . . . . . . . . . . . . . . . . . . . . . . . . . . . . . . . . . . . . . . . . . . . . . . . . . . . . . . . . . . . . . . . . . . . . . . . . . . . .4 Trademarks ................................................................................................................... 4 About this Guide ............................................................................................................ 4 Manual Structure ................................................................
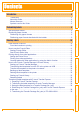
Introduction Printing the list of label templates ................................................................................... 41 Printing labels using P-touch templates .......................................................................... 42 P-touch Template function ........................................................................................... 42 Preparation ..................................................................................................................
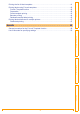
Trademarks The Brother logo is a registered trademark of Brother Industries, Ltd. Brother is a registered trademark of Brother Industries, Ltd. © 2010 Brother Industries, Ltd. All rights reserved. Microsoft, Windows Vista, Windows Server and Windows are registered trademarks of Microsoft Corporation, in the United States and/or other countries. The names of other software or products used in this document are trademarks or registered trademarks of the respective companies that developed them.
P-touch Template manual The latest command tool can be downloaded from the following website. http://solutions.brother.com [Select your region/country] - [Choose your product] - [Downloads] Symbols used in this Guide Introduction This guide describes how to use the functions of the P-touch Template. The symbols used throughout this guide are as follows: This symbol shows information or directions that should be followed. Ignoring them may result in injury, damage, or failed operations.
Add new paper format Introduction Customizing Labels In order to use labels with a size not listed in the [Paper Size] list of the printer driver, the label format must be added to the printer driver. 1 • For Windows® XP From [Control Panel], open [Printer and other hardware], open [Printer and Faxes]. From [Control Panel], go to [Hardware and Sound] and open [Printers]. • For Windows® 7 Click the , go to [Devices and Printers]. For details, see Windows® Help.
1 2 3 4 5 1 New Registers new paper formats. 2 Edit Edits the settings for the selected paper format. To save the selected paper format with the new settings, click [Overwrite]. To add a paper format with the new settings, change the name in the [Paper Size Name] box, and then click [Add]. Preset RD paper formats (paper formats available when the software was installed) cannot be edited. 3 Delete Deletes the selected paper format. A deleted paper format cannot be restored.
4 Click [New]. If continuous length label is being used, select [Continuous length tape] check box. For details on the [Continuous length tape] setting, see "Setting the Printer Driver" on page 17. 5 Creating Labels Click [Advanced Printing Adjustments] to specify the following settings for each paper size. Under [Printing Reference Point Adjustment], the printing position can be adjusted. Under [Energy Rank], the print energy (density) can be adjusted.
The paper formats exported from the [Form Registered Now] list can be distributed to other computers. Distributing only paper formats If the printer driver has been installed on the recipient's computer, only the paper formats need to be distributed. 1 Introduction Distributing paper formats At the sender's computer, specify the paper format settings, and then click [Export Paper Size List...]. 2 Save bst40ed.txt or bst41ned.txt at any location on the recipient's computer.
Introduction Creating Labels Label creation overview This section describes the general procedure for creating labels using the machine. For details on step-by-step instructions, see Help files. From label creation to printing 1 Decide the type of label you want to create. Here are some label design examples to show what is possible. Creating Labels Customizing Labels Label examples Prepare the appropriate RD Roll for the label you want to create.
This section explains the procedure for starting P-touch Editor. With P-touch Editor, you can create various kinds of labels. See the P-touch Editor Help for samples of various kinds of labels and details on creating, printing, and saving the labels. The following is the example for Windows Vista®. Read the printer name in each image as your purchased machine model name. To download the latest driver and software, please visit the Brother Solutions Center at: http://solutions.brother.
Layout window Express Mode Introduction This mode provides easy label creation with texts and images. The layout window consists of the following sections: 1 2 3 4 Customizing Labels 5 6 7 2 Command bar The command bar contains the New/Open, Paper, Text, Frame, Image, etc. 3 Draw/Edit toolbar Provides tools for choosing an object, entering text, drawing graphics, etc. 4 Property bar You can easily insert and format text, image, etc.
Professional Mode Introduction This mode provides all label design features for creating label templates. The layout window consists of the following sections: 1 2 3 4 5 Customizing Labels 8 6 7 2 Standard toolbar A group of frequently used commands (New Layout, Open, Save, Print, etc.) are provided in this toolbar. 3 Property pallet The property pallet contains the Print, Paper, Text and Layout property boxes. Click on the left side of each pallet to show/hide the property box.
Snap Mode 1 When you click [Snap] of the mode switch, Snap mode description dialog box appears. Click . Introduction With this mode, you can capture a portion or the entire screen, print it as an image and save it for future use. • If you put a checkmark in [Do Not Display This Dialog Again], you can go to Snap mode directly the next time without displaying the dialog box. • You can also start Snap mode from [Start] [All Programs (Programs)] - [Brother Ptouch] - [P-touch Editor 5.0 (Snap mode)].
This section explains how to start P-touch Editor Help for Windows®. The following is the example for Windows Vista®. Start from Start button To start P-touch Editor Help, click the Start button on the task bar, point to [All Programs (or Programs)]. Click [Brother P-touch] and [P-touch Editor 5.0 Help]. Introduction Start P-touch Editor Help Start from New/Open dialog Customizing Labels When you start the P-touch Editor 5.0 and the New/Open dialog box appears, click HelpHow To.
The information given in P-touch Editor Help can be printed. Use your normal printer to print the P-touch Editor Help information. 1 In the [Contents] tab, choose any topic you want to print. 2 Click Specify the [Printer] and click . Choose a normal printer that supports general paper sizes, such as Letter. Customizing Labels Choose the range of topics to be printed, and click . Creating Labels 4 on the Toolbar.
You can use this machine to print directly from most Windows® applications, by installing the printer driver. Because the paper size for this machine is different from other regular printers, you may not be able to print even after installing the driver and application software, unless the application software allows the correct label size to be set. Introduction Printing directly from other applications Setting the Printer Driver In the following steps, you will see XX-XXXX.
. • [Basic] Tab The paper size can be selected. If the size of paper to be used is not listed in the [Paper Size] list, a new paper size can be added. For details, see "Add new paper format" on page 6. Then, select the paper size from (Paper Size) list. • [Advanced] Tab Settings for [Halftone], [Brightness] and [Contrast] can be specified from this tab. When using a fixed size with continuous length tape, click [Settings] to display a dialog box, and then specify the necessary settings.
We will use Microsoft® Word 2007 as an example. In the following steps, you will see XX-XXXX. Read "XX" as your printer name. The printer names in the following screens may differ from your purchased printer name. The screens may vary depending on the model. 1 Click and Introduction Printing from other applications . The [Print] dialog box appears. 2 Choose "Brother XX-XXXX".
• The Add-In function supports the following applications: Microsoft® Word 2002/2003/2007/2010, Microsoft® Excel® 2002/2003/2007/2010, and Microsoft® Outlook® 2002/2003/2007/2010 • After the Add-In function is installed into Microsoft® Word, Excel®, or Outlook®, the security dialog box may appear when starting these applications, depending on the application's security settings. • For Microsoft® Word 2007 etc.
Creating Labels Customizing Labels Now for each Microsoft® application you must select which version of the label creation software you would like to open when the P-touch Editor button on the tool bar is clicked. • Express Mode : Starts Express Mode. • Professional Mode : Starts Professional mode. • Print Immediately : Prints the label. Introduction Click on the checkboxes for the Microsoft® application where you would like the P-touch Editor add-in function button to be installed.
Microsoft® Word If Microsoft® Outlook® is running and Microsoft® Word is chosen as the standard editor, you won't be able to use the Add-In function in Microsoft® Word. Exit Microsoft® Outlook® and restart Microsoft® Word. Introduction With the Add-In function, you can directly copy the text in Microsoft® Word to a label layout. Creating labels using Microsoft® Word Open a Microsoft® Word document and select the text you want included in the label from your word document.
Microsoft® Excel® With the Add-In function, you can directly copy text in Microsoft® Excel® to a label layout. 2 Open a Microsoft® Excel® worksheet and select the cells of text you want included in the label from your Excel spreadsheet. On the Microsoft® Excel® ribbon/standard toolbar, click . The [Brother P-touch Import Setup] dialog box appears. 3 In [Label Layout], make adjustments to the line feed in the cells and click .
For first time use, the message "Record data in the Label List?" is displayed. If you click Yes, new records are automatically created in the Label List and the text is added to each field shown below from next time you register the text: Each time you add new information into your label list it also records the following information for your reference.
With the Add-In function, you can directly copy the text in Microsoft® Outlook® to a label layout. Items you can import are: Contacts, Calendar items, Deleted Items, Drafts, Inbox, Journal, Notes (text in the Notes dialog box is not available), Outbox, Sent Items and Tasks windows. Creating labels using the Contacts data in Microsoft® Outlook® 1 Introduction Microsoft® Outlook® Open Microsoft® Outlook® Contacts and highlight the contact information you want to include.
For first time use, the message "Record data in the Label List?" is displayed. If you click Yes, new records are automatically created in the Label List and the text is added to each field shown below from next time you register the text: Each time you add new information into your label list it also records the following information for your reference.
P-touch Library: This application allows you to manage P-touch label templates and other data on the computer. You can print a label from within P-touch library. P-touch Transfer Manager: This application can transfer label template data to the printer’s main unit and can make backups of data transferred to the printer’s internal memory. Transfer function is needed to use P-touch Template. For details on P-touch Template, see P-touch Template manual (page 5).
Explanations of the Icons Function Transfer (Only for P-touch Transfer Manager) Transfers the label templates and other data on your PC to the printer (when connecting USB interface cable). Backup (Only for P-touch Transfer Manager) Backs up the data you have transferred to the Brother printer using the P-touch Transfer Manager. Open Edits the selected data. Print (Only for P-touch Library) Prints the selected label template with the printer.
Drag the transfer data from All contents or from Layouts or some other folder under Filter. When transferring multiple sets of data, move all the transfer data to the folder you made. 4 Key Assign numbers are automatically assigned to transfer data within the folder you made in previous step. To change a number, right click the data name in the list view, then select key assign number. • Key Assign is necessary for transfer of data other than message texts.
To transfer the templates to the printer via network, you need BRAdmin Professional or Web BRAdmin. Download it from our website first. The printer names and pictures in the following screens may differ from your purchased printer. The screens may vary depending on the model. Do not turn off the power when transferring templates. Create the template you want to transfer with P-touch Editor 5.0, then choose [File][Transfer Template...] menu to register.
Choose the file in .blf format which you saved in step 2 and load it to the printer. A Choose .blf file and click [OK] button. B Choose .blf file and click [Submit] button. Introduction 5 Backing up label templates This transfers label templates and other data in the printer to the PC. • Valid only when connecting USB cable. • Backed up data cannot be edited on the PC.
Do not turn off the power when deleting templates. 1 Connect the PC and the printer by USB cable and switch On the printer power. The printer model name is displayed in the folder view. 2 Introduction Deleting label templates in the printer Right click the printer, then select [All Delete]. Click [OK]. All data in the printer is erased. Creating Labels To delete a specific label template, select the label template to be deleted, and then click [File] [Delete].
Starting up P-touch Library 1 Click the [Start] button, then choose [All programs (Programs)] - [Brother P-touch] [P-touch Tools] - [P-touch Library 2.1]. The P-touch Library starts up. Introduction You can start up the P-touch Library and edit and print labels. Opening and editing data 1 Choose the data you want to edit, then click . The application associated with the data is opened and you can edit the data. Customizing Labels The application that starts up depends on the data.
Searching labels Click . The [Search] dialog box is displayed. 2 Check the items to be used as search conditions and set the search items. The search items that can be set are as follows. Settings Details Multiple Parameters This sets the method for combining multiple search items. If you choose AND, files are searched for those that satisfy all the conditions. If you choose OR, files are searched for those that satisfy any one of the conditions. Name Inputs the data name to search for.
By using P-touch Transfer Express, one or more label templates and a database can be easily transferred into a TD-4000/4100N printer via a local USB or network (TD-4100N) connection. After a label template has been created by an administrator, it can be distributed together with P-touch Transfer Express to many users and easily transfer a label template into each TD-4000/4100N printer locally.
1 In P-touch Editor, open the label template to be transferred. 2 Click [File] - [Transfer Template]. Introduction 2. Transferring the label template to P-touch Transfer Manager The label template is transferred to P-touch Transfer Manager. P-touch Transfer Manager automatically starts up. Customizing Labels The label template can also be transferred to P-touch Transfer Manager by clicking [Start] - [All programs] - [Brother P-touch] [P-touch Tools] - [P-touch Transfer Manager 2.
2 Select the label template to be distributed. 3 Customizing Labels Introduction Multiple label templates can be selected. Click [File] - [Save Transfer File]. Type in the name, and then click [Save]. The label template is saved as a Transfer Package file (.pdz). Appendix 4 Creating Labels • If [Save Transfer File] was clicked while either [Configurations] or a created folder is selected, all label templates in the folder are saved as the Transfer Package file (.pdz).
If the user already has P-touch Transfer Express downloaded, it is not necessary for the administrator to send Transfer Express folder to the user. In this case, the user can simply move the distributed Transfer Package file to the folder [Transfer Express] and then double-click "PtTrExp.exe". Customizing Labels Distribute all files in the folder [Transfer Express] to the user. Creating Labels 2 Move the Transfer Package file (.pdz) to the folder [Transfer Express]. Appendix 1 Introduction 4.
Do not turn off the power when transferring templates. 1 Turn on the TD-4000/4100N. 2 Using a USB cable, connect the TD-4000/4100N to the computer. 3 Double-click "PtTrExp.exe", which was received from the administrator. 4 • When there is a single Transfer Package file (.pdz) within the folder containing "PtTrExp.exe" Click [Transfer]. Customizing Labels Using P-touch Transfer Express received from the administrator, the user can transfer the Transfer Package file (.pdz) to the TD-4000/4100N.
Introduction Select the Transfer Package file to be transferred, and then click [Open]. Customizing Labels Click [Transfer]. Click [Yes]. Creating Labels Transfer of the Transfer Package file begins. Click [OK]. Transfer of the Transfer Package file is completed. Appendix 5 40 5. Transferring the Transfer Package file (.
Introduction Printing the list of label templates A list of the templates stored on the TD-4000/4100N can be printed. No more than 99 files will be listed. 1 Install a roll of labels with a width of 2"(50.8mm) or more. 2 Hold down the FEED button. The list of label templates is printed.
P-touch Template function With a barcode reader connected to the printer, labels and barcodes can easily be printed by scanning barcodes. • Preset template printing (Î page 43) If frequently used label layouts are stored in the printer, they can be reprinted by simply scanning the barcode for each label layout. • Barcode printing (Î page 44) "Scan a barcode with a barcode reader to print a duplicate or different label design using the data contained in the scanned barcode.
Preset template printing Bill Anderson Mr. Bill Anderson 4555 Cumberland Pkwy Anytown USA 95063 • For details on the barcodes that can be scanned for the various settings, refer to "List of barcodes for specifying settings" on page 50. • Grouped objects will be converted and sent as an image. Using Transfer Manager, transfer (from P-touch Editor 5.0 to the printer) the label layout to be printed. (Refer to page 27 for details of the Transfer Manager.
Scan a barcode with a barcode reader to print a duplicate or different label design using the data contained in the scanned barcode. Also called retagging. • For details on the barcodes that can be scanned for the various settings, refer to "List of barcodes for specifying settings" on page 50. • If the barcode to be scanned with the barcode reader has a different protocol than the barcode in the previously created template, it may not be possible for the barcode to be created and printed.
Scan the barcode whose data is to be used. (CODE128/9-digit) 7 8 Scan the “Begin printing” barcode. Introduction 6 The barcode is printed with the protocol and size specified in the template. A database linked to a label layout in the printer can be searched by a key which is data scanned from a barcode scanner, and the data in the found record will be inserted into the label layout and then printed.
Scan the “Select template” barcode, and then scan the barcodes under “For entering numbers” to specify the “Key Assign” number (three digits) for the barcode template. • The setting is automatically applied when three digits have been specified. Example: Specify numbers by scanning barcodes as follows: 7→[00][7], 15→[0][1][5] • To change the number, scan the “Select template” barcode again, and then scan the barcodes for the new three-digit number. 7 8 Scan the “Delimiter” barcode.
Distributed printing When printing a large number of labels, printing can be distributed among multiple printers. Since printing is performed at the same time, the total printing time can be reduced. Introduction Printing labels distributed to multiple printers • Printing can be distributed to printers connected via a USB connection or network connection (TD-4100N only). • The number of pages to be printed is automatically divided among the selected printers.
Specify the label size to be used for printing. A.If only one printer has been selected. In the dialog box from step 4, select the printer whose setting is to be specified, and then either double-click it or right-click it and click “Settings”. From the “Paper” drop-down list, select the label size. Introduction 5 • Information to be displayed in the dialog box from step 4 can be entered in the “Notes” text box.
General procedure for the P-touch Template function Introduction Appendix 1 Use P-touch Editor 5.0 to create a template, and then transfer it to the printer. 2 Connect the barcode reader to the printer. 3 Scan the “P-touch template command” barcode. This allows the settings to be specified or clears the previous settings. 4 Scan the “Basic settings” barcode. Customizing Labels The general procedure for using the P-touch Template function is described below.
These are the barcodes for specifying settings used with the "Printing labels using P-touch templates" on page 42. • When using the barcodes in this list, set “Trigger for P-touch Template Printing” and “Command Prefix Character” to default in P-touch Template Settings. • It is possible that these sample bar codes may not be read correctly, depending on the quality of your printout.
•2 •3 •4 •5 •6 •7 •8 •9 •0 Customizing Labels •1 Introduction • For entering numbers*1 • 00 • Preset template 2 • Preset template 3 • Preset template 4 Appendix • Preset template 1 Creating Labels • Preset template number 51
• Preset template 6 • Preset template 7 • Preset template 8 • Preset template 9 • Preset template 10 Introduction • Preset template 5 Customizing Labels • Select template • Delimiter Appendix *1These are used when specifying the number of copies printed and when selecting a template number. Scan barcodes to specify a three-digit number, such as [00][7] or [0][1][5]. The setting is automatically applied when three digits have been specified.