
Printer/Fax/Scanner/Copier USER'S GUIDE MFC-5460CN, MFC-5860CN
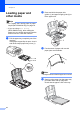

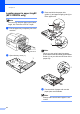
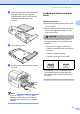
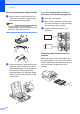
Table Of Contents
- USER’S GUIDE MFC-5460CN MFC-5860CN
- Brother numbers
- Ordering accessories and supplies
- Compilation and Publication Notice
- Table of Contents
- General
- 1 General Information
- 2 Loading documents and paper
- 3 General setup
- 4 Security features
- Fax
- 5 Sending a fax
- Entering Fax mode
- Broadcasting (Black & White only)
- Additional sending operations
- Sending faxes using multiple settings
- Contrast
- Changing Resolution
- Dual access (Black & White only)
- Real time transmission
- Overseas Mode
- Delayed Faxing (Black & White only)
- Delayed Batch Transmission (Black & White only)
- Checking and canceling waiting jobs
- Sending a fax manually
- Sending a fax at the end of a conversation
- Out of Memory message
- 6 Receiving a Fax
- 7 Telephone Services and External devices
- 8 Dialing and storing numbers
- 9 Remote fax options
- 10 Printing Reports
- 11 Polling
- 5 Sending a fax
- Copy
- Walk-up Photo Printing
- Software
- Appendixes
- A Safety and Legal
- Choosing a location
- To use the machine safely
- Important safety instructions
- Standard telephone and FCC Notices (These notices are in effect on models sold and used in the United States only.)
- Federal Communications Commission (FCC) Declaration of Conformity (USA only)
- Industry Canada Compliance Statement (Canada only)
- LAN connection
- Legal limitations for copying
- Trademarks
- B Troubleshooting and Routine Maintenance
- C Menu and Features
- D Specifications
- E Glossary
- F Index
- A Safety and Legal
- brother USA/CAN
Loading documents and paper
17
2
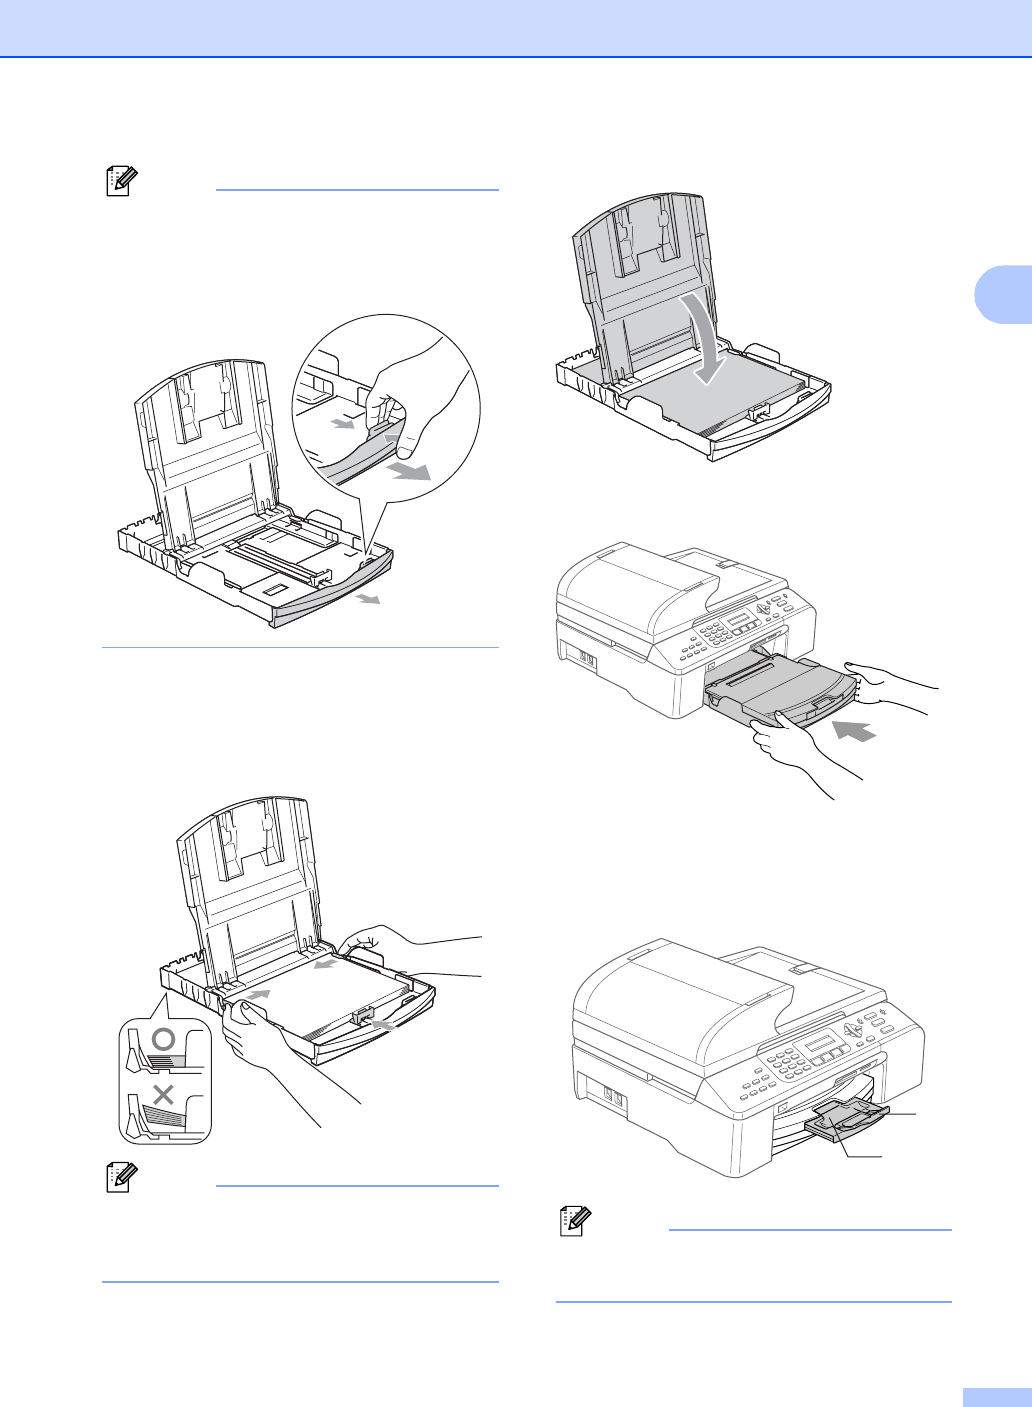
Note
When you use Legal size paper, press
and hold the universal guide release
button as you slide out the front of the
paper tray.
e Gently adjust the paper side guides with
both hands and the paper length guide
to fit the paper.
Make sure the paper side guides touch
the sides of the paper.
Note
Be careful that you do not push the paper
in too far; it may lift at the back of the tray
and cause feed problems.
f Close the output paper tray cover.
g Slowly push the paper tray completely
into the machine.
h While holding the paper tray in place,
pull out the paper support (1) until it
clicks and unfold the paper support
flap (2).
Note
Do not use the paper support flap for
Legal paper.
1
2