
Owner's Manual

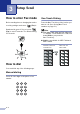
Table Of Contents
- USER’S GUIDE FAX-2820/FAX-2910/FAX-2920/MFC-7220/MFC-7225N
- Brother numbers
- Ordering accessories and supplies
- Safety precautions
- Quick Reference Guide
- Table of Contents
- 1 Introduction
- 2 Getting started
- Initial setup
- General Setup
- Setting the Mode Timer (FAX-2820, FAX-2910 and FAX-2920 only)
- Setting the Mode Timer (MFC-7220 and MFC-7225N only)
- Setting the Paper Type
- Setting the Paper Size
- Setting the Ring Volume
- Setting the Beeper Volume
- Setting the Speaker Volume
- Setting the Handset Volume
- Choosing the Handset Volume (For Volume Amplify)
- Setting Volume Amplify
- Turning on Automatic Daylight Savings Time
- Toner Save
- Sleep Time
- Setting the LCD Contrast
- Security
- TX Lock (FAX-2820, FAX-2910 and MFC-7220 only)
- Memory Security (FAX-2920 and MFC-7225N only)
- Setting Lock
- 3 Setup Send
- 4 Setup Receive
- 5 Quick-Dial numbers and dialing options
- 6 Remote Fax Options
- 7 Printing reports
- 8 Making copies
- 9 Software and Network Features (MFC-7220 and MFC-7225N only)
- 10 Important information
- Standard telephone and FCC Notices These notices are in effect on models sold and used in the United States only.
- Federal Communications Commission (FCC) Declaration of Conformity (USA only)
- Industry Canada Compliance Statement (Canada only)
- Disconnect device
- LAN connection (MFC-7225N only)
- Laser safety
- FDA regulations
- Important safety instructions
- Trademarks
- 11 Troubleshooting and routine maintenance
- Appendix A
- Appendix B
- Glossary
- Specifications
- Product description
- General
- Print media
- Copy
- Fax
- Scanner (MFC-7220 and MFC-7225N only)
- Printer (not available for FAX-2910)
- Interfaces (not available for FAX-2910)
- Download the optional software from the Brother Web Site (FAX-2820 and FAX-2920 users only)
- Computer requirements (not available for FAX-2910)
- Consumable items
- Network (LAN) (MFC-7225N only)
- Index
- Remote Retrieval Access card
- brother USA/CAN

Getting started
2 - 13
2
Changing the Setting Lock password
1 Press Menu/Set, 1, 8, 2.
2
Press
▲
or
▼
to select
Set Password
.
Press Menu/Set.
3
Enter the registered four-digit password.
Press Menu/Set.
4
Enter a four-digit number for the new
password.
Press Menu/Set.
5
If the LCD shows Verify, re-enter the
new password.
Press Menu/Set.
6
Press Stop/Exit.
Turning Setting Lock on
1 Press Menu/Set, 1, 8, 2.
2
Press
▲
or
▼
to select
On
.
Press Menu/Set.
3
Enter the registered four-digit password.
Press Menu/Set.
4
Press Stop/Exit.
Turning Setting Lock off
1
Press Menu/Set, 1, 8, 2.
2
Enter the registered four-digit password.
Press Menu/Set twice.
3
Press Stop/Exit.
Note
If you enter the wrong Password, the LCD
shows
Wrong Password. The machine will
stay in Setting Lock mode until the registered
password is entered.
2.Setting Lock 2.Setting Lock
2.Setting Lock