
Owner's Manual
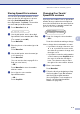


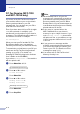

Table Of Contents
- USER’S GUIDE FAX-2820/FAX-2910/FAX-2920/MFC-7220/MFC-7225N
- Brother numbers
- Ordering accessories and supplies
- Safety precautions
- Quick Reference Guide
- Table of Contents
- 1 Introduction
- 2 Getting started
- Initial setup
- General Setup
- Setting the Mode Timer (FAX-2820, FAX-2910 and FAX-2920 only)
- Setting the Mode Timer (MFC-7220 and MFC-7225N only)
- Setting the Paper Type
- Setting the Paper Size
- Setting the Ring Volume
- Setting the Beeper Volume
- Setting the Speaker Volume
- Setting the Handset Volume
- Choosing the Handset Volume (For Volume Amplify)
- Setting Volume Amplify
- Turning on Automatic Daylight Savings Time
- Toner Save
- Sleep Time
- Setting the LCD Contrast
- Security
- TX Lock (FAX-2820, FAX-2910 and MFC-7220 only)
- Memory Security (FAX-2920 and MFC-7225N only)
- Setting Lock
- 3 Setup Send
- 4 Setup Receive
- 5 Quick-Dial numbers and dialing options
- 6 Remote Fax Options
- 7 Printing reports
- 8 Making copies
- 9 Software and Network Features (MFC-7220 and MFC-7225N only)
- 10 Important information
- Standard telephone and FCC Notices These notices are in effect on models sold and used in the United States only.
- Federal Communications Commission (FCC) Declaration of Conformity (USA only)
- Industry Canada Compliance Statement (Canada only)
- Disconnect device
- LAN connection (MFC-7225N only)
- Laser safety
- FDA regulations
- Important safety instructions
- Trademarks
- 11 Troubleshooting and routine maintenance
- Appendix A
- Appendix B
- Glossary
- Specifications
- Product description
- General
- Print media
- Copy
- Fax
- Scanner (MFC-7220 and MFC-7225N only)
- Printer (not available for FAX-2910)
- Interfaces (not available for FAX-2910)
- Download the optional software from the Brother Web Site (FAX-2820 and FAX-2920 users only)
- Computer requirements (not available for FAX-2910)
- Consumable items
- Network (LAN) (MFC-7225N only)
- Index
- Remote Retrieval Access card
- brother USA/CAN

Quick-Dial numbers and dialing options
5 - 2
5
Storing Speed-Dial numbers
You can store Speed-Dial numbers, so that
when you dial you will only have to press a
few keys (Search/Speed Dial, #, the
three-digit number, and Start). The machine
can store 200 Speed-Dial numbers.
1
Press Menu/Set, 2, 3, 2.
2
Use the dial pad to enter a three-digit
Speed-Dial location number (001 - 200).
(For example, press 005.)
Press Menu/Set.
3
Enter the phone or fax number (up to 20
digits).
Press Menu/Set.
4
Use the dial pad to enter the name (up
to 15 characters).
Press Menu/Set.
(You can use the chart on page B-11 to
help you enter letters.)
—OR—
Press Menu/Set to store the number
without a name.
5
Go to Step 2 to store another
Speed-Dial number.
—OR—
Press Stop/Exit.
Changing One-Touch /
Speed-Dial numbers
If you try to store a One-Touch or Speed-Dial
number where a number has already been
stored, the LCD will show the name that has
been stored there (or number) and will ask
you to do one of the following:
1
Press 1 to change the stored number.
—OR—
Press 2 to exit without making a change.
How to change the stored number or name:
• If you want to change a character, use
or to position the cursor under
the character you want to change, and
then type over it.
• If you want to erase the whole number
or whole name, press Stop/Exit when
the cursor is under the first digit or
letter. The characters above and to
the right of the cursor will be deleted.
2
Enter a new number.
Press Menu/Set.
3
Follow the directions beginning at Step
4 in Storing One-Touch Dial numbers
and Storing Speed-Dial numbers.
(See Storing One-Touch numbers on
page 5-1 and Storing Speed-Dial
numbers on page 5-2.)
2.Speed-Dial
#005:MIKE
1.Change 2.Exit
▲
▲