
User Manual
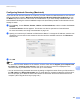
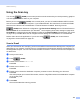
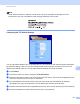
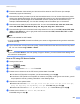

Table Of Contents
- SOFTWARE USER’S GUIDE
- Table of Contents
- Machine operation keys
- 1 Using the control panel
- Using printer keys
- Job Cancel
- Secure Key (For MFC-7460DN and MFC-7860DW)
- Printer Emulation Support (For MFC-7860DW)
- Printing the Internal Font List (For MFC-7860DW)
- Printing the Print Configuration List (For MFC-7860DW)
- Test Print (For MFC-7860DW)
- Duplex Print (For MFC-7860DW)
- Restoring default printer settings (For MFC-7860DW)
- Using the scan keys
- Using printer keys
- 1 Using the control panel
- Windows®
- 2 Printing
- Using the Brother printer driver
- Printing a document
- Duplex printing
- Simultaneous scanning, printing and faxing
- Printer driver settings
- Accessing the printer driver settings
- Features in the Windows® printer driver
- Basic tab
- Advanced tab
- Print Profiles tab
- Editing a print profile
- Support
- Tray Settings
- Status Monitor
- Features in the BR-Script 3 printer driver (For MFC-7860DW) (PostScript® 3™ language emulation)
- Status Monitor
- 3 Scanning
- 4 ControlCenter4
- 5 Remote Setup (MFC models only)
- 6 Brother PC-FAX Software (MFC models only)
- 7 Firewall settings (For Network users)
- 2 Printing
- Apple Macintosh
- 8 Printing and Faxing
- 9 Scanning
- 10 ControlCenter2
- 11 Remote Setup
- Using The Scan key
- Index
- brother TWN-ENG

Network Scanning
195
13
Using the Scan key 13
You can use (SCAN) on the control panel to scan documents into your word processing, graphics
or E-mail applications or a folder on your computer.
Before you can use (SCAN) on the control panel, you have to install the Brother MFL-Pro Suite
and connect the machine to your computer. If you installed the MFL-Pro Suite from the included CD-ROM
then the correct drivers and ControlCenter4 or ControlCenter2 are installed. Scanning from the
(SCAN) button follows the configuration of the Device Scan Settings screen of ControlCenter4 or
Device Button tab of ControlCenter2. (For Windows
®
, see Configuring Scan button settings on page 68 for
Home Mode or Configuring Scan button settings on page 81 for Advanced Mode. For Macintosh, see SCAN
on page 163.) For details about how to configure the scan settings of ControlCenter4 or ControlCenter2
buttons and to launch the application of your choice using (SCAN), see ControlCenter4
on page 58 or ControlCenter2 on page 161.
Scan to E-mail 13
When you choose Scan to E-mail (PC) your document will be scanned and sent directly to the computer you
designated on your network. ControlCenter4 or ControlCenter2 will activate the default E-mail application on
the designated computer. You can scan and send a black and white or color document from the computer as
an attachment.
a Load your document.
b Press (SCAN).
c Press a or b to choose Scan to PC.
Press OK.
d Press a or b to choose E-mail.
Press OK.
e Press a or b to choose the destination computer you want to use for E-mailing your document.
Press OK.
If the LCD prompts you to enter a PIN number, enter the 4-digit PIN number for the destination computer
on the control panel.
Press OK.
f Press Start.
The machine starts the scanning process.