
Network User's Guide


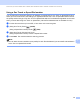
Table Of Contents
- NETWORK USER’S GUIDE
- Table of Contents
- 1 Introduction
- 2 Changing your machine’s network settings
- 3 Configuring your machine for a wireless network (For HL-2280DW, DCP-7055W, DCP-7057W, DCP-7070DW and MFC-7860DW)
- Overview
- Step by step chart for wireless network configuration
- Confirm your network environment
- Confirm your wireless network setup method
- Configuration using the machine’s control panel Setup Wizard to configure your machine for a wireless network (Recommended)
- Configuration using WPS or AOSS™ from the control panel menu to configure your machine for a wireless network (Push Button Configuration) (Infrastructure mode only)
- Configuration using the Brother installer application on the CD-ROM to configure your machine for a wireless network
- Configuration using the PIN Method of Wi-Fi Protected Setup to configure your machine for a wireless network (Infrastructure mode only)
- Configuring your machine for a wireless network (For Infrastructure mode and Ad-hoc mode)
- Using the Setup Wizard from the control panel
- Using WPS or AOSS™ from the control panel menu to configure your machine for a wireless network (Push Button Configuration)
- Configuring your machine when the SSID is not broadcast
- Using the Brother installer application on the CD-ROM to configure your machine for a wireless network
- Using the PIN Method of Wi-Fi Protected Setup
- 4 Wireless configuration using the Brother installer application (For HL-2280DW, DCP-7055W, DCP-7057W, DCP-7070DW and MFC-7860DW)
- 5 Control panel setup
- Network menu
- TCP/IP
- Ethernet (wired network only)
- Status (For DCP-7065DN, MFC-7360N, MFC-7365DN, MFC-7460DN and MFC-7860DN)/Wired Status (For HL-2280DW, DCP-7070DW and MFC-7860DW)
- Setup Wizard (wireless network only)
- WPS or AOSS™ (wireless network only)
- WPS w/PIN Code (wireless network only)
- WLAN Status (wireless network only)
- MAC Address
- Set to Default (For HL-2280DW, DCP-7070DW and MFC-7860DW)
- Wired Enable (For HL-2280DW, DCP-7070DW and MFC-7860DW)
- WLAN Enable (For HL-2280DW, DCP-7055W, DCP-7057W, DCP-7070DW and MFC-7860DW)
- E-mail / IFAX (For MFC-7365DN, MFC-7460DN, MFC-7860DN and MFC-7860DW (if you download IFAX))
- How to set a new default for Scan to E-mail (E-mail server) (MFC-7365DN, MFC-7460DN, MFC-7860DN and MFC-7860DW (if you download IFAX))
- Scan to FTP (For MFC-7365DN, MFC-7460DN, MFC-7860DN and MFC-7860DW)
- Fax to Server (For MFC-7365DN, MFC-7460DN, MFC-7860DN and MFC-7860DW: available as a download)
- Time Zone
- Reset the network settings to the factory default
- Printing the Network Configuration List
- Printing the WLAN report (For HL-2280DW, DCP-7055W, DCP-7057W, DCP-7070DW and MFC-7860DW)
- Function table and default factory settings
- Network menu
- 6 Web Based Management
- 7 Internet fax (For MFC-7365DN, MFC-7460DN, MFC-7860DN and MFC-7860DW: available as a download)
- 8 Security features
- 9 Troubleshooting
- Appendix A
- Index

Internet fax (For MFC-7365DN, MFC-7460DN, MFC-7860DN and MFC-7860DW: available as a download)
61
7
Sending to multiple phone numbers: 7
If you want to have the document relayed to more than one standard fax machine the address can be entered
using the following method:
a Enter the phone number of the first Fax machine UKFAX@brother.co.uk(fax#123).
b Press OK.
c Enter the phone number of the second Fax machine UKFAX@brother.co.uk(fax#456).
d Press Start.
Relay broadcast from a computer 7
1 Internet
You can also send E-mail from your computer and have it relayed to a conventional fax machine. The method
of entering the phone number of the conventional fax machine that will receive the relayed E-mail will vary
depending on the mail application you are using. The following are some examples of different mail
applications:
Some E-mail applications do not support sending to multiple phone numbers. If your E-mail application
cannot support multiple phone numbers you will only be able to relay to one fax machine at a time.
Enter the address of the relay machine and phone number of the fax in the “TO” box using the same method
used when sending from a machine.
UKFAX@brother.co.uk(fax#123456789)
Note
For Microsoft
®
Outlook
®
97 or greater, the address information must be entered into the address book as
follows:
Name: fax#123456789
E-mail address: UKFAX@brother.co.uk
1
UKFAX@brother.co.uk 123456789
UKFAX@brother.co.uk(fax#123456789)