
Quick Setup Guide
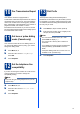
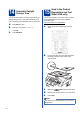
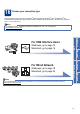
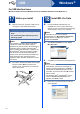
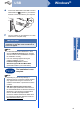


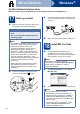
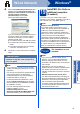
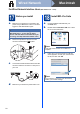
Table Of Contents
- Quick Setup Guide MFC-7360N/MFC-7365DN/MFC-7460DN
- Start Here
- 1 Unpack the machine and check the components
- 2 Remove the packing material from the machine
- 3 Load paper in the paper tray
- 4 Connect the power cord and telephone line
- 5 Choose your language (if needed)
- 6 Choose the correct Receive Mode
- 7 Set the LCD contrast (if needed)
- 8 Set the date and time
- 9 Set your Station ID
- 10 Fax Transmission Report
- 11 Set tone or pulse dialing mode (Canada only)
- 12 Set the telephone line compatibility
- 13 Dial Prefix
- 14 Automatic Daylight Savings Time
- 15 Send in the Product Registration and Test Sheet (USA only)
- 16 Choose your connection type
- For USB Interface Users (Windows® 2000 Professional/XP/XP Professional x64 Edition/Windows Vista®/Windows® 7)
- For USB Interface Users (Mac OS X 10.4.11 - 10.6.x)
- For Wired Network Interface Users (Windows® 2000 Professional/XP/XP Professional x64 Edition/Windows Vista®/Windows® 7)
- For Wired Network Interface Users (Mac OS X 10.4.11 - 10.6.x)
- For Network Users
- Other Information
- Consumables
- brother USA/CAN
- Start Here

14
Windows
®
USB
For USB Interface Users
(Windows
®
2000 Professional/XP/XP Professional x64 Edition/Windows Vista
®
/Windows
®
7)
17
Before you install
a Make sure that your computer is ON and you
are logged on with Administrator rights.
b Turn off the machine and make sure the USB
interface cable is NOT connected to the
machine. If you have already connected the
cable, disconnect it.
18
Install MFL-Pro Suite
a Put the installation CD-ROM into your
CD-ROM drive. If the model name screen
appears, choose your machine. If the language
screen appears, choose your language.
b Click Initial Installation and then Install
MFL-Pro Suite.
c Click Yes if you accept the license agreements.
d Follow the on-screen instructions until this
screen appears.
IMPORTANT
• If there are any programs running, close
them.
• The screens may differ depending on your
operating system.
Note
The installation CD-ROM includes ScanSoft™
PaperPort™ 12SE. This software supports
Windows
®
XP (SP3 or greater), XP Professional
x64 Edition (SP2 or greater), Windows Vista
®
(SP2 or greater) and Windows
®
7. Update to the
latest Windows
®
Service Pack before installing
MFL-Pro Suite. For Windows
®
2000 (SP4 or
greater) users, when the ScanSoft™ PaperPort™
11SE download screen appears during the
installation of MFL-Pro Suite, follow the on-screen
instructions.
Note
If the Brother screen does not appear
automatically, go to My Computer (Computer),
double-click the CD-ROM icon, and then
double-click start.exe.
Note
• If the installation does not continue
automatically, open the top menu again by
ejecting and then reinserting the CD-ROM or
double-click the start.exe program from the
root folder, and continue from step b to install
MFL-Pro Suite.
• For Windows Vista
®
and Windows
®
7 users,
when the User Account Control screen
appears, click Allow or Yes.