
All in One Printer - All-in-One Printer User Manual

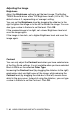


Table Of Contents
- SOFTWARE USER’S GUIDE
- Table of contents
- 1 Using the machine as a printer
- 2 Printer driver settings (Windows® Only)
- 3 How to scan using Windows®
- Scanning a document (For Windows® XP only)
- Scanning a document
- Using the scan key (For USB or Parallel interface cable users)
- Using ScanSoft® PaperPort® 9.0SE and OmniPage® OCR
- 4 Using ControlCenter2.0 (For Windows®)
- 5 Using MFC Remote Setup (For Windows®) (For MFC-8440 and MFC-8840D only)
- 6 Using Brother PC-FAX software (For Windows®) (For MFC-8440 and MFC-8840D only)
- PC-FAX sending
- Speed-Dial setup
- Brother Address Book
- Setting up a Member in the Address Book
- Setting up a Group for Broadcasting
- Editing Member information
- Deleting a Member or Group
- Exporting the Address Book
- Importing to the Address Book
- Setting up a Cover Page
- Entering Cover Page Information
- Sending a file as a PC-FAX using the Facsimile style user interface
- Sending a file as a PC-FAX using the Simple style user interface
- Setting up PC-FAX receiving
- 7 Using your machine with a Macintosh®
- Setting up your USB-equipped Apple® Macintosh®
- Using the Brother printer driver with your Apple® Macintosh® (Mac OS® 8.6 - 9.2)
- Using the Brother Printer Driver with Your Apple® Macintosh® (Mac OS® X)
- Using the PS driver with your Apple® Macintosh®
- Sending a fax from your Macintosh® application (For MFC-8440 and MFC-8840D only)
- Using the Brother TWAIN scanner driver with your Macintosh®
- Using Presto!® PageManager®
- Using ControlCenter2.0 (For Mac OS® X 10.2.1 or greater)
- MFC Remote Setup (Mac OS® X) (For MFC-8440 and MFC-8840D only)
- 8 Network Scanning (Windows® 98/98SE/Me/2000 Professional and XP only)
- 9 Brother Network PC-FAX software (For MFC-8440 and MFC-8840D only)
- Index
- brother UK/IRE/SAF/PAN NORDIC

7 - 32 USING YOUR MACHINE WITH A MACINTOSH
®
SCAN
This section contains four buttons for Scan to Image, Scan to OCR,
Scan to E-mail and Scan to File applications.
■
Image (Default: Apple PreView)
— enables you to scan a page
directly into any graphic viewer/editor application. You can select
the destination application, such as Adobe
®
PhotoShop
®
or any
kind of image editing application you already have installed on
your computer.
■
OCR (Default: Apple Text Edit)
— enables you to scan a page or
document, automatically run the OCR application and insert the
text (not a graphic image) into a word processing application. You
have the option of selecting the target word processing
application, such as MS Word or whichever word processing
application is installed on your computer.
■
E-mail (Default: your default E-mail software) — enables you to
scan a page or document directly into an E-mail application as a
standard attachment. You have the option of selecting the file
type and resolution for the attachment.
■
File — enables you to scan directly to a disk file. You can change
the file type and destination folder, as needed.
ControlCenter2.0 gives you the ability to configure the hardware
Scan key on your machine for each scan feature. Select the Device
Button in the configuration menu for each of the SCAN buttons.
CUSTOM SCAN
You can configure the button name and settings for each of these
buttons to meet your specific requirements by clicking on a button
while holding down the Ctrl key and following the configuration
menus.
For details about how to use the Scan key, see Using the scan
key (For USB or Parallel interface cable users)
on page 3-17.