
Quick Start Manual


5
Setting Up
the machine
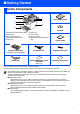
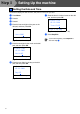
Windows
®
USB
Windows
®
Parallel
Windows NT
®
4.0
Parallel
Macintosh
®
USB
Macintosh
®
Network
Windows
®
Network
Network
Administrators
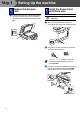
1
Pull the paper tray completely out of the
machine.
2
While pressing the paper guide release
lever (1), slide the adjusters to fit the paper
size. Check that the guides are firmly in the
slots.
3
Fan the stack of paper well to avoid paper
jams and misfeeds.
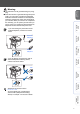
4
Put paper in the paper tray.
Check that the paper is flat in the tray and
below the maximum paper mark (1).
5
Put the paper tray firmly back into the
machine and unfold the output tray support
flap (1) before you use the machine.
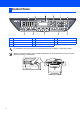
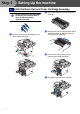
2 Load Paper in the Paper Tray
For Legal size paper, press the lever (1)
located at the back of the tray and pull out the
back of the paper tray. Move the tray lock
button (2) to the lock position.
(1)
(1) (2)
For details on supported paper
specifications, see “Acceptable paper and
other media” in Chapter 2 of the User’s
Guide.
(1)
(1)