
All in One Printer User Manual

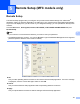
Table Of Contents
- SOFTWARE USER’S GUIDE DCP-8080DN DCP-8085DN MFC-8480DN MFC-8680DN MFC-8690DW MFC-8890DW
- Table of Contents
- Section I: Windows®
- Printing
- Using the Brother printer driver
- Printing a document
- Duplex printing
- Simultaneous scanning, printing and faxing
- Printer operation keys
- Status Monitor
- Printer driver settings
- Features in the Windows® printer driver
- Basic tab
- Advanced tab
- Accessories tab
- Support
- Features in the BR-Script3 (PostScript® 3™ language emulation) printer driver
- Scanning
- Scanning a document using the TWAIN driver
- Scanning a document using the WIA driver (Windows® XP/Windows Vista®)
- Scanning a document using the WIA driver (Windows Photo Gallery and Windows Fax and Scan)
- Using the Scan key (For USB or Parallel cable users)
- Using ScanSoft™ PaperPort™ 11SE with OCR by NUANCE™
- ControlCenter3
- Network Scanning (For models with built-in network)
- Before using Network Scanning
- Using the Scan key
- Scan to E-mail (PC)
- Scan to E-mail (E-mail Server) (MFC-8690DW and MFC-8890DW only)
- Scan to Image
- Scan to OCR
- Scan to File
- Scan to FTP
- Scan to Network
- How to set a new default for the file size (For Scan to E-mail (E-mail server), Scan to FTP and Scan to Network)
- How to set a new default for the Duplex Scan mode (For Scan to E-mail (E-mail server) only)
- Remote Setup (MFC models only)
- Brother PC-FAX Software (MFC models only)
- Firewall settings (For Network users)
- Printing
- Section II Apple Macintosh
- Printing and Faxing
- Printer operation keys
- Status Monitor
- Features in the printer driver (Macintosh)
- Removing the Printer driver for Macintosh
- Using the BR-Script3 Driver (Post Script® 3™ language emulation printer driver)
- Features in the BR-Script3 (PostScript® 3™ language emulation) printer driver
- Sending a fax (MFC models only)
- Scanning
- ControlCenter2
- Network Scanning
- Before using Network Scanning
- Using the Scan key
- Scan to E-mail (PC)
- Scan to E-mail (E-mail server, MFC-8690DW and MFC-8890DW only)
- Scan to Image
- Scan to OCR
- Scan to File
- Scan to FTP
- Scan to Network
- How to set a new default for the file size (For Scan to E-mail (E-mail server), Scan to FTP, Scan to Network)
- How to set a new default for the Duplex Scan mode (For Scan to E-mail (E-mail server) only)
- Remote Setup (MFC models only)
- Printing and Faxing
- Index
- brother USA

Network Scanning (For models with built-in network)
100
4
k Press a or b to choose a file name you want to use and press OK. Press Start.
Note
If you want to change the file name manually, go to step l.
l Press a or b to choose <Manual>. Press OK.
Enter the file name you want to use (up to 32 characters) and press OK.
Press Start.
How to set a new default for the file size
(For Scan to E-mail (E-mail server), Scan to FTP and Scan to Network) 4
You can set your own default setting for the file size. For a higher quality scan, choose the large file size. For
a smaller file size, choose the small file size.
a Press Menu, 1.
b Press a or b to choose Document Scan. Press OK.
c Press a or b to choose File Size. Press OK.
d Press a or b to choose 1.Color or 2.Gray. Press OK.
e Press a or b to choose Small, Middle or L arge. Press OK.
f Press Stop/Exit.
Note
You cannot choose the file size when you scan a document in black and white. Black and white documents
will be stored in the TIFF file format and the data will not be compressed.
How to set a new default for the Duplex Scan mode
(For Scan to E-mail (E-mail server) only) 4
You can set your own default setting for the Duplex Scan mode. You can choose from two types of layout,
long edge or short edge.
a Press Menu, 1.
b Press a or b to choose Document Scan. Press OK.
c Press a or b to choose Duplex Scan. Press OK.
d Press a or b to choose Long edge or Short edge . Press OK.
e Press Stop/Exit.