
All in One Printer User Manual


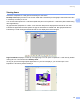


Table Of Contents
- SOFTWARE USER’S GUIDE DCP-8080DN DCP-8085DN MFC-8480DN MFC-8680DN MFC-8690DW MFC-8890DW
- Table of Contents
- Section I: Windows®
- Printing
- Using the Brother printer driver
- Printing a document
- Duplex printing
- Simultaneous scanning, printing and faxing
- Printer operation keys
- Status Monitor
- Printer driver settings
- Features in the Windows® printer driver
- Basic tab
- Advanced tab
- Accessories tab
- Support
- Features in the BR-Script3 (PostScript® 3™ language emulation) printer driver
- Scanning
- Scanning a document using the TWAIN driver
- Scanning a document using the WIA driver (Windows® XP/Windows Vista®)
- Scanning a document using the WIA driver (Windows Photo Gallery and Windows Fax and Scan)
- Using the Scan key (For USB or Parallel cable users)
- Using ScanSoft™ PaperPort™ 11SE with OCR by NUANCE™
- ControlCenter3
- Network Scanning (For models with built-in network)
- Before using Network Scanning
- Using the Scan key
- Scan to E-mail (PC)
- Scan to E-mail (E-mail Server) (MFC-8690DW and MFC-8890DW only)
- Scan to Image
- Scan to OCR
- Scan to File
- Scan to FTP
- Scan to Network
- How to set a new default for the file size (For Scan to E-mail (E-mail server), Scan to FTP and Scan to Network)
- How to set a new default for the Duplex Scan mode (For Scan to E-mail (E-mail server) only)
- Remote Setup (MFC models only)
- Brother PC-FAX Software (MFC models only)
- Firewall settings (For Network users)
- Printing
- Section II Apple Macintosh
- Printing and Faxing
- Printer operation keys
- Status Monitor
- Features in the printer driver (Macintosh)
- Removing the Printer driver for Macintosh
- Using the BR-Script3 Driver (Post Script® 3™ language emulation printer driver)
- Features in the BR-Script3 (PostScript® 3™ language emulation) printer driver
- Sending a fax (MFC models only)
- Scanning
- ControlCenter2
- Network Scanning
- Before using Network Scanning
- Using the Scan key
- Scan to E-mail (PC)
- Scan to E-mail (E-mail server, MFC-8690DW and MFC-8890DW only)
- Scan to Image
- Scan to OCR
- Scan to File
- Scan to FTP
- Scan to Network
- How to set a new default for the file size (For Scan to E-mail (E-mail server), Scan to FTP, Scan to Network)
- How to set a new default for the Duplex Scan mode (For Scan to E-mail (E-mail server) only)
- Remote Setup (MFC models only)
- Printing and Faxing
- Index
- brother USA

Scanning
57
2
Organizing your items in folders 2
PaperPort™ 11SE has an easy-to-use filing system for organizing your items. The filing system consists of
folders and items that you choose to view in Desktop View. An item can be a PaperPort™ 11SE item or a
non-PaperPort™ 11SE item:
Folders are arranged in a ‘tree’ structure in the Folder View. You use this section to choose folders and
view their items in Desktop View.
You can simply drag and drop an item onto a folder. When the folder is highlighted, release the mouse
button and the item is stored in that folder.
Folders can be ‘nested’—that is, stored in other folders.
When you double-click a folder, its contents (both PaperPort™ 11SE MAX files and non PaperPort™
11SE files) appear on the Desktop.
You can also use Windows
®
Explorer to manage the folders and items shown in Desktop View.
Quick links to other applications 2
ScanSoft™ PaperPort™ 11SE automatically recognizes many other applications on your PC and creates a
‘working link’ to them.
The bar at the bottom of the PaperPort™ 11SE desktop shows which programs you can use with PaperPort™
11SE.
To send an item from PaperPort™ 11SE to another program, simply drag and drop the item from the
PaperPort™ 11SE desktop to the program icon on the Send To bar. PaperPort™ 11SE automatically
converts the item to the preferred format.
If PaperPort™ 11SE does not automatically recognize one of the applications on your PC, you can manually
create a link using the New Program Link command.
ScanSoft™ PaperPort™ 11SE with OCR lets you convert image text into text
you can edit 2
ScanSoft™ PaperPort™ 11SE can quickly convert a text document image into text that you can edit with a
word processing application.
PaperPort™ 11SE uses the optical character recognition software (OCR), which comes with PaperPort™
11SE. PaperPort™ 11SE can use your preferred OCR application if it is already on your PC. You can convert
the entire item, or by using the Copy Text command, you can choose only a portion of the text to convert.
Dragging an item onto a word-processing link icon starts PaperPort™ 11SE’s built-in OCR application, or you
can use your own OCR application.