
User Manual
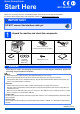
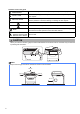
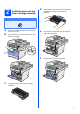
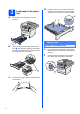
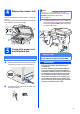
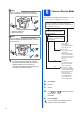
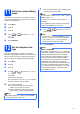
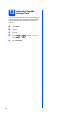
Table Of Contents
- Quick Setup Guide MFC-8890DW
- Start Here
- 1 Unpack the machine and check the components
- 2 Install the drum unit and toner cartridge assembly
- 3 Load paper in the paper tray
- 4 Release the scanner lock
- 5 Connect the power cord and telephone line
- 6 Choose a Receive Mode
- 7 Set the LCD contrast (If needed)
- 8 Set the date and time
- 9 Enter personal information (station ID)
- 10 Fax Transmission Report
- 11 Set tone or pulse dialling mode
- 12 Set the telephone line type
- 13 Automatic Daylight Savings Time
- 14 Choose your connection type
- For USB Interface Users (Windows® 2000 Professional/XP/XP Professional x64 Edition/ Windows Vista®)
- For USB Interface Users (Mac OS® X 10.3.9 or greater)
- For Parallel Interface Users (Windows® 2000 Professional/XP/XP Professional x64 Edition)
- For Wired Network Interface Users (Windows® 2000 Professional/XP/XP Professional x64 Edition/ Windows Vista®)
- For Wired Network Interface Users (Mac OS® X 10.3.9 or greater)
- For Wireless Network Interface Users
- For Network Users
- Options and Consumables
- brother UK/IRE
- Start Here

4
3
Load paper in the paper
tray
a Pull the paper tray completely out of the
machine.
b While pressing the blue paper-guide release
lever a, slide the paper guides to fit the paper
size you are loading in the tray. Make sure that
the guides are firmly in the slots.
c Fan the stack of paper well to avoid paper jams
and misfeeds.
d Put paper in the tray, and make sure that the
paper is below the maximum paper mark a.
The side to be printed on must be face down.
e Put the paper tray firmly back in the machine.
Make sure that it is completely inserted into the
machine.
f Unfold the support flap a to prevent paper
from sliding off the face-down output tray.
1
IMPORTANT
Make sure the paper guides touch the sides of
the paper so it will feed correctly.
1
1